如何为pygame.transform.rotate()设置旋转中心点(旋转中心)?

11
我想围绕不是中心点的某个点旋转一个矩形。我目前的代码如下:
import pygame

pygame.init()
w = 640
h = 480
degree = 45
screen = pygame.display.set_mode((w, h))

surf = pygame.Surface((25, 100))
surf.fill((255, 255, 255))
surf.set_colorkey((255, 0, 0))
bigger = pygame.Rect(0, 0, 25, 100)
pygame.draw.rect(surf, (100, 0, 0), bigger)
rotatedSurf = pygame.transform.rotate(surf, degree)
screen.blit(rotatedSurf, (400, 300))

running = True
while running:
    event = pygame.event.poll()
    if event.type == pygame.QUIT:
        running = False
    pygame.display.flip()

我可以更改度数以获得不同的旋转,但旋转是围绕中心进行的。我想将矩形以外的某个点设置为旋转点。


如何在Pygame中围绕偏心枢轴旋转图像?(相关问题) - Rabbid76
5个回答

21

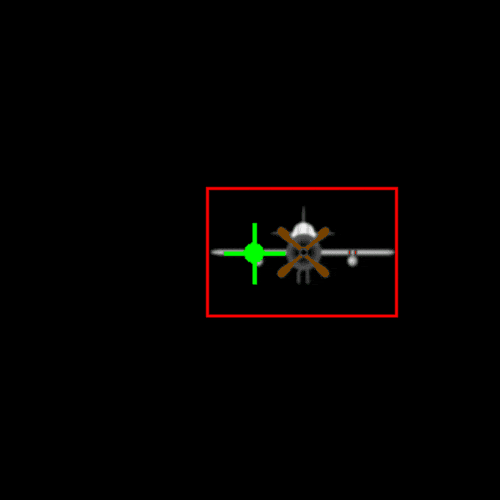
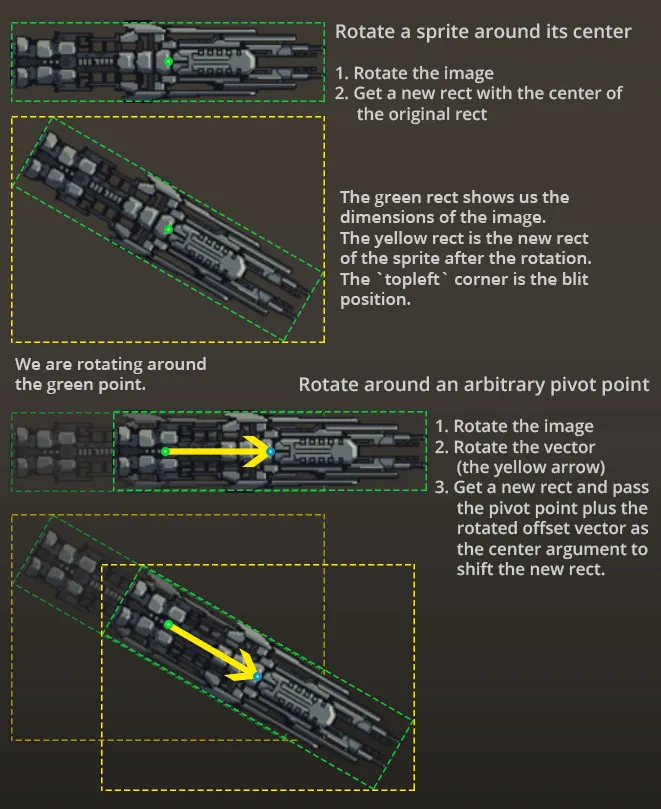
为了使一个表面绕其中心旋转,我们首先旋转图像,然后得到新的矩形,将前一个矩形的center坐标传递给它以保持图像居中。要围绕任意点旋转,我们可以做类似的事情,但我们还必须添加一个偏移向量到中心位置(枢轴点)来移动矩形,这个向量在每次旋转图像时需要旋转。

因此,我们必须将枢轴点(图像或精灵的原始中心)- 存储在元组、列表、向量或矩形中 - 以及偏移向量(我们将矩形移动的量),并将它们传递给rotate函数。然后我们旋转图像和偏移向量,得到一个新的矩形,将枢轴点+偏移作为center参数传递,最后返回旋转后的图像和新矩形。

输入图像描述

import pygame as pg


def rotate(surface, angle, pivot, offset):
    """Rotate the surface around the pivot point.

    Args:
        surface (pygame.Surface): The surface that is to be rotated.
        angle (float): Rotate by this angle.
        pivot (tuple, list, pygame.math.Vector2): The pivot point.
        offset (pygame.math.Vector2): This vector is added to the pivot.
    """
    rotated_image = pg.transform.rotozoom(surface, -angle, 1)  # Rotate the image.
    rotated_offset = offset.rotate(angle)  # Rotate the offset vector.
    # Add the offset vector to the center/pivot point to shift the rect.
    rect = rotated_image.get_rect(center=pivot+rotated_offset)
    return rotated_image, rect  # Return the rotated image and shifted rect.


pg.init()
screen = pg.display.set_mode((640, 480))
clock = pg.time.Clock()
BG_COLOR = pg.Color('gray12')
# The original image will never be modified.
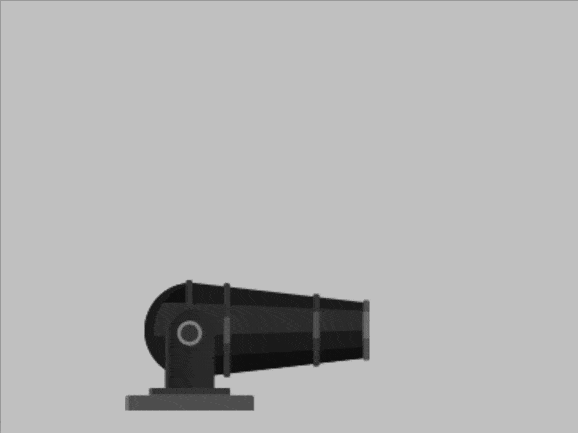
IMAGE = pg.Surface((140, 60), pg.SRCALPHA)
pg.draw.polygon(IMAGE, pg.Color('dodgerblue3'), ((0, 0), (140, 30), (0, 60)))
# Store the original center position of the surface.
pivot = [200, 250]
# This offset vector will be added to the pivot point, so the
# resulting rect will be blitted at `rect.topleft + offset`.
offset = pg.math.Vector2(50, 0)
angle = 0

running = True
while running:
    for event in pg.event.get():
        if event.type == pg.QUIT:
            running = False

    keys = pg.key.get_pressed()
    if keys[pg.K_d] or keys[pg.K_RIGHT]:
        angle += 1
    elif keys[pg.K_a] or keys[pg.K_LEFT]:
        angle -= 1
    if keys[pg.K_f]:
        pivot[0] += 2

    # Rotated version of the image and the shifted rect.
    rotated_image, rect = rotate(IMAGE, angle, pivot, offset)

    # Drawing.
    screen.fill(BG_COLOR)
    screen.blit(rotated_image, rect)  # Blit the rotated image.
    pg.draw.circle(screen, (30, 250, 70), pivot, 3)  # Pivot point.
    pg.draw.rect(screen, (30, 250, 70), rect, 1)  # The rect.
    pg.display.set_caption('Angle: {}'.format(angle))
    pg.display.flip()
    clock.tick(30)

pg.quit()

这是一个带有pygame.sprite.Sprite的版本:

import pygame as pg
from pygame.math import Vector2


class Entity(pg.sprite.Sprite):

    def __init__(self, pos):
        super().__init__()
        self.image = pg.Surface((122, 70), pg.SRCALPHA)
        pg.draw.polygon(self.image, pg.Color('dodgerblue1'),
                        ((1, 0), (120, 35), (1, 70)))
        # A reference to the original image to preserve the quality.
        self.orig_image = self.image
        self.rect = self.image.get_rect(center=pos)
        self.pos = Vector2(pos)  # The original center position/pivot point.
        self.offset = Vector2(50, 0)  # We shift the sprite 50 px to the right.
        self.angle = 0

    def update(self):
        self.angle += 2
        self.rotate()

    def rotate(self):
        """Rotate the image of the sprite around a pivot point."""
        # Rotate the image.
        self.image = pg.transform.rotozoom(self.orig_image, -self.angle, 1)
        # Rotate the offset vector.
        offset_rotated = self.offset.rotate(self.angle)
        # Create a new rect with the center of the sprite + the offset.
        self.rect = self.image.get_rect(center=self.pos+offset_rotated)


def main():
    screen = pg.display.set_mode((640, 480))
    clock = pg.time.Clock()
    entity = Entity((320, 240))
    all_sprites = pg.sprite.Group(entity)

    while True:
        for event in pg.event.get():
            if event.type == pg.QUIT:
                return

        keys = pg.key.get_pressed()
        if keys[pg.K_d]:
            entity.pos.x += 5
        elif keys[pg.K_a]:
            entity.pos.x -= 5

        all_sprites.update()
        screen.fill((30, 30, 30))
        all_sprites.draw(screen)
        pg.draw.circle(screen, (255, 128, 0), [int(i) for i in entity.pos], 3)
        pg.draw.rect(screen, (255, 128, 0), entity.rect, 2)
        pg.draw.line(screen, (100, 200, 255), (0, 240), (640, 240), 1)
        pg.display.flip()
        clock.tick(30)


if __name__ == '__main__':
    pg.init()
    main()
    pg.quit()

你使用 rotozoom 而不是 rotate 有特定的原因吗?后者似乎稍微快一些,而且显然更易读。 - Spacha
1
据我所知,rotozoom 在自定义图像上实现更好的质量,而 rotate 在使用内置类创建的 pygame.Surface 上实现更好的质量。 - LMCuber

7
我也曾遇到这个问题,并找到了一个简单的解决方案: 你可以创建一个更大的表面(长度和高度加倍),并将较小的表面复制到更大的表面上,以使旋转点位于更大表面的中心。现在你可以绕中心旋转更大的表面。
def rotate(img, pos, angle):
    w, h = img.get_size()
    img2 = pygame.Surface((w*2, h*2), pygame.SRCALPHA)
    img2.blit(img, (w-pos[0], h-pos[1]))
    return pygame.transform.rotate(img2, angle)

(如果你能画一个草图,这将更有意义,但相信我:它有效,并且在我看来比其他解决方案更易于使用和理解。)

5

我同意MegaIng和skrx的观点。但是我必须承认,阅读他们的答案后我仍然不能真正理解这个概念。接着我找到了这个关于旋转炮台游戏教程

在运行了这个教程之后,我仍然有些问题不明白,但是我发现他们所使用的炮台图片是其中的一个技巧。

PNG Cannon image that was centered around its pivot.

这张图片并不是以炮台中心为中心,而是以枢轴点为中心,并且图片的另一半是透明的。在这个领悟之后,我将同样的方法应用到了我的虫脚上,它们现在都工作得很好。下面是我的旋转代码:

def rotatePivoted(im, angle, pivot):
    # rotate the leg image around the pivot
    image = pygame.transform.rotate(im, angle)
    rect = image.get_rect()
    rect.center = pivot
    return image, rect

希望这可以帮到您!

2
这正是我所做的,但我自动生成图像。 - MegaIng
1
@3yanlis1bos 我已经更新了我的答案。希望现在更清晰了。如果您有建议,请告诉我。 - skrx
1
@skrx,现在我明白了。使用您当前的实现方式,可以围绕独立的旋转中心进行旋转,而不必像我一样使用诡计图像,是吗?(您图片中的第四幅图示。) - Bedir Yilmaz
2
是的,如果您例如将其中心作为“枢轴”点传递给“旋转”函数,现在也可以围绕另一个对象旋转。使用“偏移”向量,您可以控制距离。 - skrx

3

可以使用以下函数将图像围绕图像上的一个锚点(origin)旋转,从而实现围绕一个 pivot 旋转:

def blitRotate(surf, image, origin, pivot, angle):
    image_rect = image.get_rect(topleft = (origin[0] - pivot[0], origin[1]-pivot[1]))
    offset_center_to_pivot = pygame.math.Vector2(origin) - image_rect.center
    rotated_offset = offset_center_to_pivot.rotate(-angle)
    rotated_image_center = (origin[0] - rotated_offset.x, origin[1] - rotated_offset.y)
    rotated_image = pygame.transform.rotate(image, angle)
    rotated_image_rect = rotated_image.get_rect(center = rotated_image_center)
    surf.blit(rotated_image, rotated_image_rect)

说明:

一个向量可以用pygame.math.Vector2表示,并可使用pygame.math.Vector2.rotate进行旋转。请注意,pygame.math.Vector2.rotate的旋转方向与pygame.transform.rotate相反。因此,角度必须被倒转:

计算图像中心到图像上支点的偏移向量:

image_rect = image.get_rect(topleft = (origin[0] - pivot[0], origin[1]-pivot[1]))
offset_center_to_pivot = pygame.math.Vector2(origin) - image_rect.center

将偏移向量旋转与您要旋转图像的角度相同:

rotated_offset = offset_center_to_pivot.rotate(-angle)

通过从世界中的旋转点减去旋转偏移向量来计算旋转后图像的新中心点:
rotated_image_center = (origin[0] - rotated_offset.x, origin[1] - rotated_offset.y)

旋转图像并设置矩形边界框的中心点。最后将图像叠加:

rotated_image = pygame.transform.rotate(image, angle)
rotated_image_rect = rotated_image.get_rect(center = rotated_image_center)

surf.blit(rotated_image, rotated_image_rect)

另请参见旋转表面


最简示例: repl.it/@Rabbid76/PyGame-RotateSpriteAroundOffCenterPivotCannon

import pygame

class SpriteRotate(pygame.sprite.Sprite):

    def __init__(self, imageName, origin, pivot):
        super().__init__() 
        self.image = pygame.image.load(imageName)
        self.original_image = self.image
        self.rect = self.image.get_rect(topleft = (origin[0]-pivot[0], origin[1]-pivot[1]))
        self.origin = origin
        self.pivot = pivot
        self.angle = 0

    def update(self):
        image_rect = self.original_image.get_rect(topleft = (self.origin[0] - self.pivot[0], self.origin[1]-self.pivot[1]))
        offset_center_to_pivot = pygame.math.Vector2(self.origin) - image_rect.center
        rotated_offset = offset_center_to_pivot.rotate(-self.angle)
        rotated_image_center = (self.origin[0] - rotated_offset.x, self.origin[1] - rotated_offset.y)
        self.image = pygame.transform.rotate(self.original_image, self.angle)
        self.rect = self.image.get_rect(center = rotated_image_center)
  
pygame.init()
size = (400,400)
screen = pygame.display.set_mode(size)
clock = pygame.time.Clock()

cannon = SpriteRotate('cannon.png', (200, 200), (33.5, 120))
cannon_mount = SpriteRotate('cannon_mount.png', (200, 200), (43, 16))
all_sprites = pygame.sprite.Group([cannon, cannon_mount])
angle_range = [-90, 0]
angle_step = -1

frame = 0
done = False
while not done:
    clock.tick(60)
    for event in pygame.event.get():
        if event.type == pygame.QUIT:
            done = True
    
    all_sprites.update()
    screen.fill((64, 128, 255))
    pygame.draw.rect(screen, (127, 127, 127), (0, 250, 400, 150))
    all_sprites.draw(screen)
    pygame.display.flip()
    frame += 1
    cannon.angle += angle_step
    if not angle_range[0] < cannon.angle < angle_range[1]:
        angle_step *= -1
    
pygame.quit()
exit()

请参考

Pygame中按照不同比例缩放宽度和高度,同时绕中心点旋转和缩放图像
Pygame中按照不同比例缩放宽度和高度,同时绕中心点旋转和缩放图像 Pygame中按照不同比例缩放宽度和高度,同时绕中心点旋转和缩放图像


0

我认为你需要自己编写一个函数来实现这个功能。

如果你创建一个向量类,那么就会更容易实现。

也许可以像下面这样:

def rotate(surf, angle, pos):
    pygame.transform.rotate(surf, angle)
    rel_pos = surf.blit_pos.sub(pos)
    new_rel_pos = rel_pos.set_angle(rel_pos.get_angle() + angle)
    surf.blit_pos = pos.add(new_rel_pos)

所以,你只需要编写一个名为Vector的类,并实现方法'add()', 'sub()', 'get_angle()'和'set_angle()'。如果你遇到困难,可以通过谷歌搜索来获取帮助。

最终,你将拥有一个漂亮的Vector类,可以在其他项目中扩展和使用。


网页内容由stack overflow 提供, 点击上面的
可以查看英文原文,
原文链接