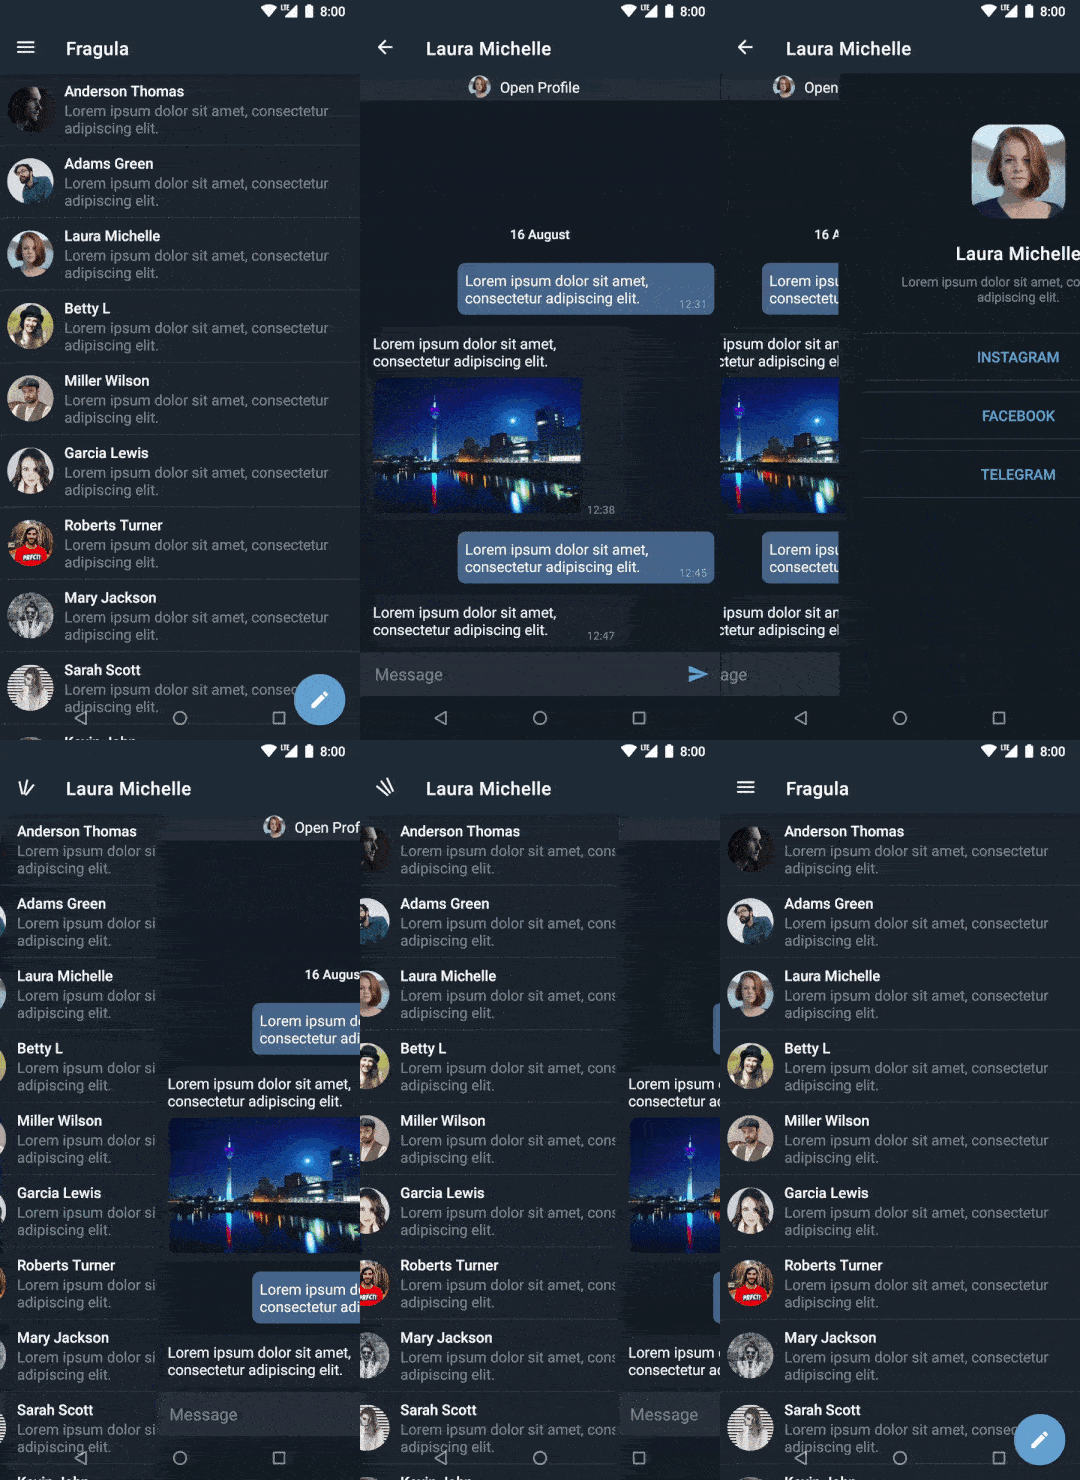
如何使用手势和动画向前滑动以前的活动,就像在Telegram和Tinder应用程序中一样?
安卓。如何像Telegram一样通过滑动返回Activity
9
- Дмитрий Колмогоров
2
1你怎么知道那些是活动,而不是片段? - CommonsWare
1好的,如何使用片段来实现这个? - Дмитрий Колмогоров
4个回答
6
- Adib Faramarzi
1
嗨@snaky,我已经学习了2个月的Telegram动画,以便将相同的动画应用于我的Android应用程序。我只需要“in”和“out”动画,就像我们在DialogFragment中单击任何聊天时一样。我不会实现所有ActionBarLayout功能,如fragmentcontainer和stackcontainer(我知道这些功能非常重要)
我唯一的问题是:只有使用ActionBarLayout.startLayoutAnimation和ActionBarLayout.onSlideAnimationEnd,我才能得到相同的Telegram动画吗?具有相同的柔和度? - Arthur Melo
3
在Github上有一个很好的库,我做出了贡献:它可以使用活动和片段来处理此功能。
- GabrieleG
3
虽然这个链接可能回答了问题,但最好在此处包含答案的基本部分并提供参考链接。仅有链接的答案如果链接页面发生更改可能会变得无效。 - eden
这是一个库(Slidr),链接在github上。我不能通过在这里编写整个库的代码来回答,而且它也不需要关于用法的详细介绍,因为在自述文件中已经很好地解释了。 - GabrieleG
1
其实你只需要在OnCreate中加入以下代码:
getWindow().getDecorView().setBackgroundResource(android.R.color.transparent);
MIN_DISTANCE = TypedValue.applyDimension(TypedValue.COMPLEX_UNIT_DIP, 25, this.getResources().getDisplayMetrics());
rootView = (ViewGroup) ((ViewGroup) this .findViewById(android.R.id.content)).getChildAt(0);
rootView.post(new Runnable() { @Override public void run() {

        rootWidth = rootView.getWidth();
    } });
}
// Custom Variables
ViewGroup rootView ;
int rootWidth;
boolean enableSwipe= false;
boolean lockSwipe = false;
float downX;
float downY;
float MIN_DISTANCE ;
// Detect touch Events
 @Override public boolean dispatchTouchEvent(MotionEvent event) {
switch(event.getAction()) {
    case MotionEvent.ACTION_DOWN:
    downX = event.getRawX();
    downY =event.getRawY();
    enableSwipe = false;
    lockSwipe = false;
    //convert activity to transparent

    try {   java.lang.reflect.Method getActivityOptions = Activity.class.getDeclaredMethod("getActivityOptions"); getActivityOptions.setAccessible(true); Object options = getActivityOptions.invoke(this); Class<?>[] classes = Activity.class.getDeclaredClasses(); Class<?> translucentConversionListenerClazz = null; for (Class clazz : classes) { if (clazz.getSimpleName().contains("TranslucentConversionListener")) { translucentConversionListenerClazz = clazz; } }
        java.lang.reflect.Method convertToTranslucent = Activity.class.getDeclaredMethod("convertToTranslucent", translucentConversionListenerClazz, ActivityOptions.class); convertToTranslucent.setAccessible(true); convertToTranslucent.invoke(this, null, options); } catch (Throwable t) {
    }
    break;
    case MotionEvent.ACTION_MOVE:
    if (!lockSwipe){
        if(enableSwipe){
            float translation = event.getRawX() -downX - MIN_DISTANCE;
            if (translation >= rootWidth || translation<= 0){
                rootView.setTranslationX(0);
            }else{
                rootView.setTranslationX(translation);
            }
        }else{
            float translation = event.getRawX() -downX;
            if(Math.abs(event.getRawY() - downY) >= MIN_DISTANCE){
                enableSwipe = false;
                lockSwipe = true;
            }else{
                enableSwipe = event.getRawX() -downX >= MIN_DISTANCE;
            }
        }
    }
    break;
    case MotionEvent.ACTION_UP:
    if(rootView.getTranslationX() > rootWidth / 5){
        rootView.animate()
        .translationX(rootWidth)
        .setListener(
        new AnimatorListenerAdapter() {
                    @Override public void onAnimationEnd(Animator animation) {

                    super.onAnimationEnd(animation);
                finish();
                overridePendingTransition(0, 0);

            } });
    }else{
        rootView.animate()
        .translationX(0)
        .setListener(
        new AnimatorListenerAdapter() {
                    @Override public void onAnimationEnd(Animator animation) {
                super.onAnimationEnd(animation);
                // convert activity back to normal
                try {
                                java.lang.reflect.Method method = Activity.class.getDeclaredMethod("convertFromTranslucent");
                                method.setAccessible(true);
                                method.invoke(this);
                            } catch (Throwable t) {
                            }
            } });
        enableSwipe =false;
        lockSwipe = false;
    }
    break;
    default:
    enableSwipe =false;
    lockSwipe = false;
    break;
}
if (enableSwipe){
    // Event will not be passed to next views
    return true;
}
else{
    // Event will be passed to next views
    return super.dispatchTouchEvent(event);
}
}
{
- lahds13
0
导航库
这是一个非常简单的库,与NavComponent完全集成。
我仍在开发中,但它已经很稳定,您可以在生产中使用它。
https://github.com/massivemadness/Fragula
(注意:它只适用于片段)

首先,您需要在布局中用FragulaNavHostFragment替换NavHostFragment:
<!-- activity_main.xml -->
<androidx.fragment.app.FragmentContainerView
    xmlns:android="http://schemas.android.com/apk/res/android"
    xmlns:app="http://schemas.android.com/apk/res-auto"
    android:layout_width="match_parent"
    android:layout_height="match_parent"
    android:name="com.fragula2.FragulaNavHostFragment"
    android:id="@+id/nav_host"
    app:navGraph="@navigation/nav_graph"
    app:defaultNavHost="true" />
第二步, 你需要将图表中的<fragment>目标替换为如下所示的<swipeable>:
<!-- nav_graph.xml -->
<navigation xmlns:android="http://schemas.android.com/apk/res/android"
    xmlns:app="http://schemas.android.com/apk/res-auto"
    xmlns:tools="http://schemas.android.com/tools"
    android:id="@+id/nav_graph"
    app:startDestination="@id/detailFragment">

    <swipeable
        android:id="@+id/detailFragment"
        android:name="com.example.fragula.DetailFragment"
        android:label="DetailFragment"
        tools:layout="@layout/fragment_detail" />

    ...

</navigation>
最后,您需要将不透明背景设置为片段的根布局,以避免滑动动画出现任何问题。
<!-- fragment_detail.xml -->
<androidx.constraintlayout.widget.ConstraintLayout
    xmlns:android="http://schemas.android.com/apk/res/android"
    android:layout_width="match_parent"
    android:layout_height="match_parent"
    android:background="?android:colorBackground">

    ...

</androidx.constraintlayout.widget.ConstraintLayout>
基本上就是这样
- massivemadness
网页内容由stack overflow 提供, 点击上面的可以查看英文原文,
原文链接
原文链接