好的,这是最终可用的脚本。还要感谢“code-lukas”提供的提示。
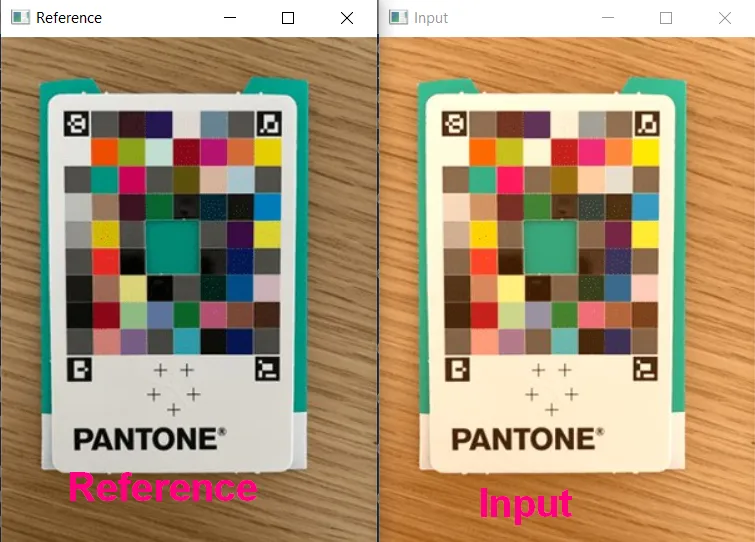
您只需要一个已经优化颜色的输入图像和另一个未经过颜色优化的图像。两个图像都带有彩色卡,使用
ArUCo标记(您可以将它们粘在每个图像卡的角落上以便于检测)
https://github.com/dazzafact/image_color_correction
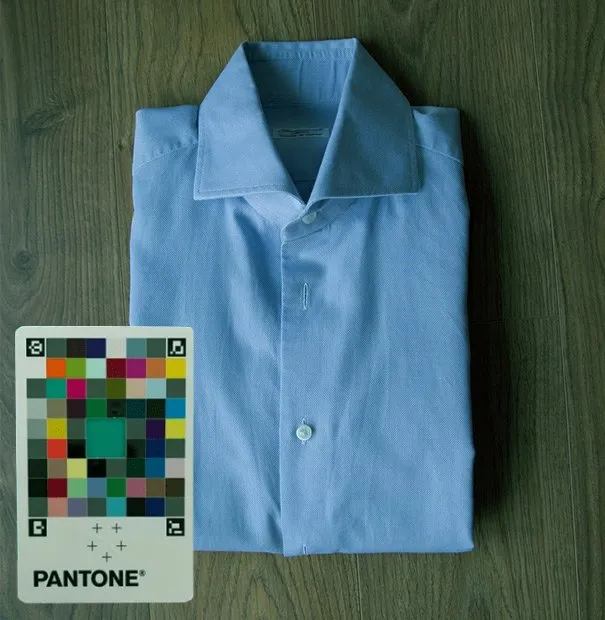
输入的颜色优化图像:
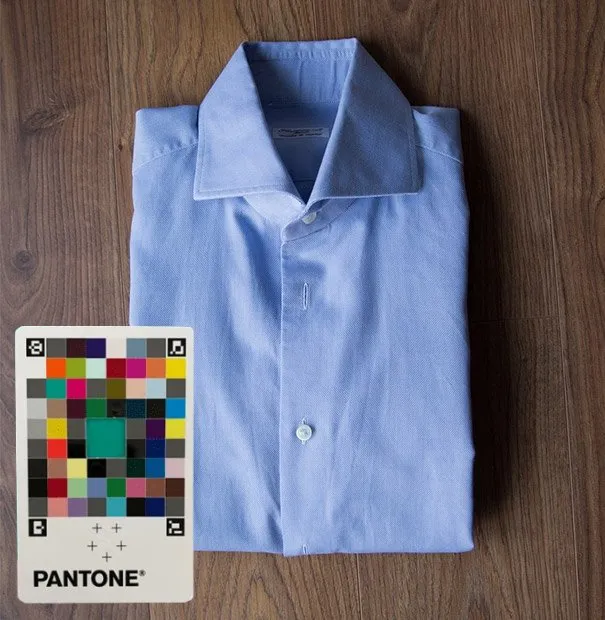
 输入未进行颜色优化的图像
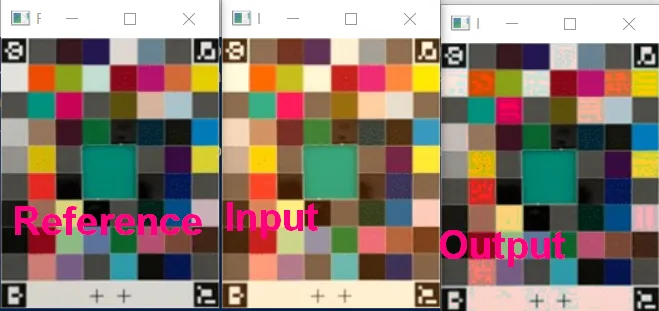
 颜色优化输出图像
使用以下参数运行脚本:
python color_correction.py --reference ref.jpg --input input.jpg --output out.jpg
https://github.com/dazzafact/image_color_correction
from imutils.perspective import four_point_transform
from skimage import exposure
import numpy as np
import argparse
import imutils
import cv2
import sys
from os.path import exists
import os.path as pathfile
from PIL import Image
def find_color_card(image):
arucoDict = cv2.aruco.Dictionary_get(cv2.aruco.DICT_ARUCO_ORIGINAL)
arucoParams = cv2.aruco.DetectorParameters_create()
(corners, ids, rejected) = cv2.aruco.detectMarkers(image,
arucoDict, parameters=arucoParams)
try:
ids = ids.flatten()
i = np.squeeze(np.where(ids == 923))
topLeft = np.squeeze(corners[i])[0]
i = np.squeeze(np.where(ids == 1001))
topRight = np.squeeze(corners[i])[1]
i = np.squeeze(np.where(ids == 241))
bottomRight = np.squeeze(corners[i])[2]
i = np.squeeze(np.where(ids == 1007))
bottomLeft = np.squeeze(corners[i])[3]
except:
return None
cardCoords = np.array([topLeft, topRight,
bottomRight, bottomLeft])
card = four_point_transform(image, cardCoords)
return card
def _match_cumulative_cdf_mod(source, template, full):
"""
Return modified full image array so that the cumulative density function of
source array matches the cumulative density function of the template.
"""
src_values, src_unique_indices, src_counts = np.unique(source.ravel(),
return_inverse=True,
return_counts=True)
tmpl_values, tmpl_counts = np.unique(template.ravel(), return_counts=True)
src_quantiles = np.cumsum(src_counts) / source.size
tmpl_quantiles = np.cumsum(tmpl_counts) / template.size
interp_a_values = np.interp(src_quantiles, tmpl_quantiles, tmpl_values)
interpb = []
for i in range(0, 256):
interpb.append(-1)
for i in range(0, len(interp_a_values)):
frm = src_values[i]
to = interp_a_values[i]
interpb[frm] = to
prev_value = -1
prev_index = -1
for i in range(0, 256):
if interpb[i] == -1:
next_index = -1
next_value = -1
for j in range(i + 1, 256):
if interpb[j] >= 0:
next_value = interpb[j]
next_index = j
if prev_index < 0:
interpb[i] = (i + 1) * next_value / (next_index + 1)
elif next_index < 0:
interpb[i] = prev_value + ((255 - prev_value) * (i - prev_index) / (255 - prev_index))
else:
interpb[i] = prev_value + (i - prev_index) * (next_value - prev_value) / (next_index - prev_index)
else:
prev_value = interpb[i]
prev_index = i
wid = full.shape[1]
hei = full.shape[0]
ret2 = np.zeros((hei, wid))
for i in range(0, hei):
for j in range(0, wid):
ret2[i][j] = interpb[full[i][j]]
return ret2
def match_histograms_mod(inputCard, referenceCard, fullImage):
"""
Return modified full image, by using histogram equalizatin on input and
reference cards and applying that transformation on fullImage.
"""
if inputCard.ndim != referenceCard.ndim:
raise ValueError('Image and reference must have the same number '
'of channels.')
matched = np.empty(fullImage.shape, dtype=fullImage.dtype)
for channel in range(inputCard.shape[-1]):
matched_channel = _match_cumulative_cdf_mod(inputCard[..., channel], referenceCard[..., channel],
fullImage[..., channel])
matched[..., channel] = matched_channel
return matched
ap = argparse.ArgumentParser()
ap.add_argument("-r", "--reference", required=True,
help="path to the input reference image")
ap.add_argument("-v", "--view", required=False, default=False, action='store_true',
help="Image Preview?")
ap.add_argument("-o", "--output", required=False, default=False,
help="Image Output Path")
ap.add_argument("-i", "--input", required=True,
help="path to the input image to apply color correction to")
args = vars(ap.parse_args())
print("[INFO] loading images...")
file_exists = pathfile.isfile(args["reference"])
print(file_exists)
if not file_exists:
print('[WARNING] Referenz File not exisits '+str(args["reference"]))
sys.exit()
raw = cv2.imread(args["reference"])
img1 = cv2.imread(args["input"])
raw = imutils.resize(raw, width=600)
img1 = imutils.resize(img1, width=600)
if args['view']:
cv2.imshow("Reference", raw)
cv2.imshow("Input", img1)
print("[INFO] finding color matching cards...")
rawCard = find_color_card(raw)
imageCard = find_color_card(img1)
if rawCard is None or imageCard is None:
print("[INFO] could not find color matching card in both images")
sys.exit(0)
if args['view']:
cv2.imshow("Reference Color Card", rawCard)
cv2.imshow("Input Color Card", imageCard)
print("[INFO] matching images...")
result2 = match_histograms_mod(imageCard, rawCard, img1)
cv2.imshow("Input Color Card After Matching", inputCard)
if args['view']:
cv2.imshow("result2", result2)
if args['output']:
file_ok = exists(args['output'].lower().endswith(('.png', '.jpg', '.jpeg', '.tiff', '.bmp', '.gif')))
if file_ok:
cv2.imwrite(args['output'], result2)
print("[SUCCESSUL] Your Image was written to: "+args['output']+"")
else:
print("[WARNING] Sorry, But this is no valid Image Name "+args['output']+"\nPlease Change Parameter!")
if args['view']:
cv2.waitKey(0)
if not args['view']:
if not args['output']:
print('[EMPTY] You Need at least one Paramter "--view" or "--output".')
 我们能保存 match_histpgram 函数的转换并将其应用于整个图像吗?
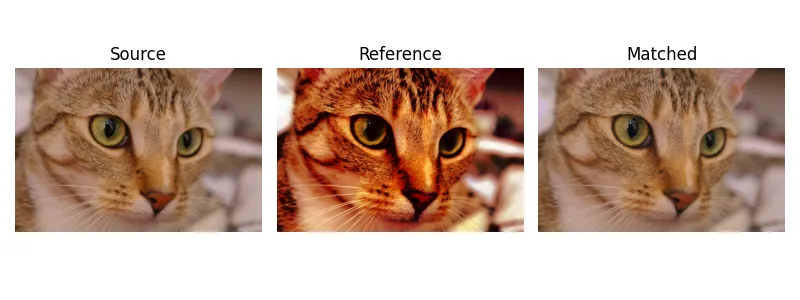
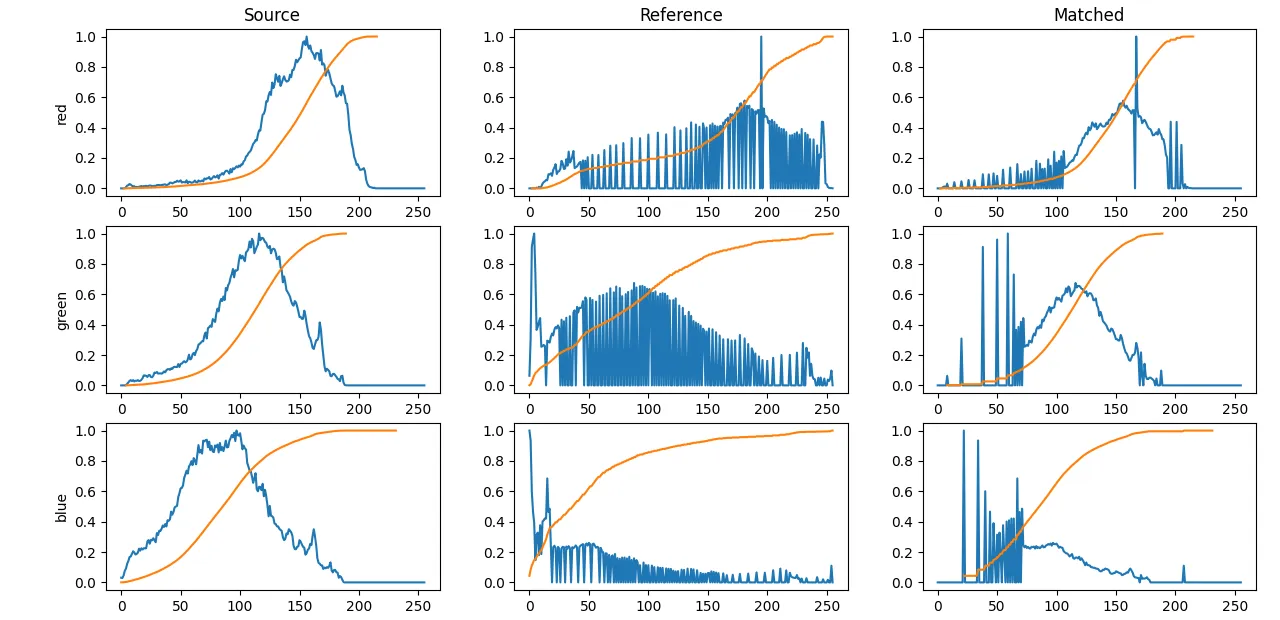
skimage.exposure.match_histograms... - Christoph Rackwitzmatch_histograms绝对不是正确的方法。它会破坏图像内容,颜色不会被正确地调整匹配。它仅仅重新塑形直方图。这只是看起来能够工作,但这是偶然的。 - Christoph Rackwitz