不要使用屏幕尺寸,在多窗口情况下,这种方法是无效的。
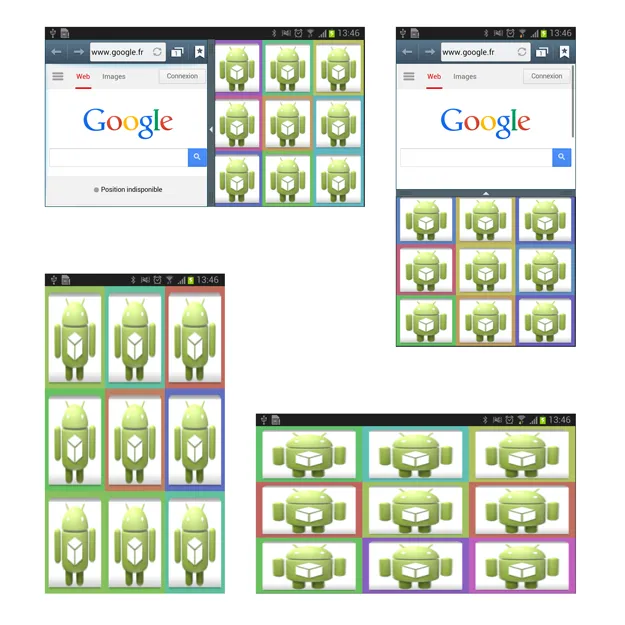
如果你的网格是一个3x3的项目,大小固定,那么请使用自定义布局ViewGroup,如下所示:(并设置RelativeLayout项目内容)
public class MainActivity extends Activity {
@Override
protected void onCreate(Bundle state) {
setContentView(new ViewGroup(this) {
private RelativeLayout[] items = new RelativeLayout[9];
private int width, height, itemWidth, itemHeight;
{
Random r = new Random();
for (int i = 0; i < 9; i++) {
items[i] = new RelativeLayout(getContext());
float[] hsv = new float[] {360 * r.nextFloat(), .50f, .75f};
items[i].setBackgroundColor(Color.HSVToColor(hsv));
addView(items[i]);
ImageView image = new ImageView(getContext());
switch (i) {
case 0:
case 1:
case 2:
case 3:
case 4:
case 5:
case 6:
case 7:
case 8:
image.setImageResource(R.drawable.ic_launcher);
break;
}
image.setScaleType(ScaleType.FIT_XY);
image.setLayoutParams(new RelativeLayout.LayoutParams(
RelativeLayout.LayoutParams.MATCH_PARENT,
RelativeLayout.LayoutParams.MATCH_PARENT
));
items[i].addView(image);
}
}
@Override
protected void onMeasure(int wMS, int hMS) {
width = MeasureSpec.getSize(wMS);
height = MeasureSpec.getSize(hMS);
itemWidth = width / 3;
itemHeight = height / 3;
wMS = MeasureSpec.makeMeasureSpec(itemWidth, MeasureSpec.EXACTLY);
hMS = MeasureSpec.makeMeasureSpec(itemHeight, MeasureSpec.EXACTLY);
measureChildren(wMS, hMS);
setMeasuredDimension(width, height);
}
@Override
protected void onLayout(boolean changed, int l, int t, int r, int b) {
for (int i = 0; i < 9; i++) {
l = itemWidth * (i % 3);
t = itemHeight * (i / 3);
r = l + itemWidth;
b = t + itemHeight;
items[i].layout(l, t, r, b);
}
}
});
super.onCreate(state);
}
}
编辑:请看我的代码更新,你只需将图片添加到项目容器中即可。使用这种方法,不需要XML布局文件,因为你自己管理内容和大小。
结果:
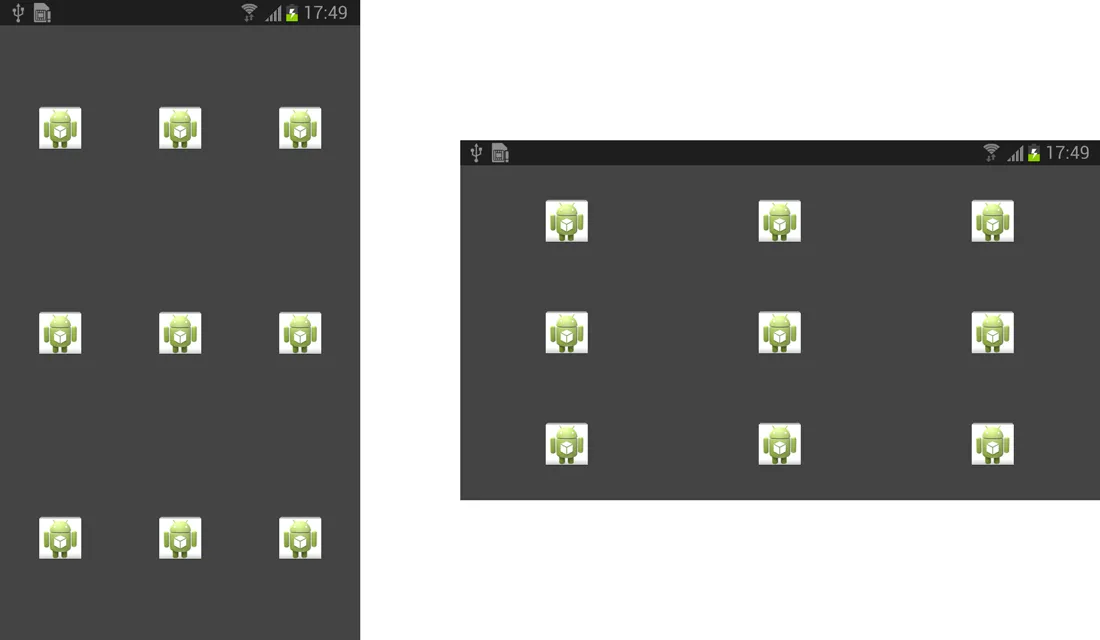
编辑:极简主义方式:
public class MainActivity extends Activity {

    @Override
    protected void onCreate(Bundle state) {
        setContentView(new ViewGroup(this) {
            private static final int SIZE_X = 3;
            private static final int SIZE_Y = 3;
            private ImageView[] items = new ImageView[SIZE_X * SIZE_Y];
            private int itemWidth, itemHeight;
            {
                setBackgroundColor(Color.DKGRAY);
                for (int i = 0; i < items.length; i++) {
                    items[i] = new ImageView(getContext());
                    items[i].setScaleType(ScaleType.CENTER);
                    items[i].setImageResource(R.drawable.ic_launcher);
                    addView(items[i]);
                }
            }
            @Override
            protected void onMeasure(int wMS, int hMS) {
                int width = MeasureSpec.getSize(wMS);
                int height = MeasureSpec.getSize(hMS);
                itemWidth = width / SIZE_X;
                itemHeight = height / SIZE_Y;
                wMS = MeasureSpec.makeMeasureSpec(itemWidth, MeasureSpec.EXACTLY);
                hMS = MeasureSpec.makeMeasureSpec(itemHeight, MeasureSpec.EXACTLY);
                measureChildren(wMS, hMS);
                setMeasuredDimension(width, height);
            }
            @Override
            protected void onLayout(boolean changed, int l, int t, int r, int b) {
                for (int i = 0; i < items.length; i++) {
                    l = itemWidth * (i % SIZE_X);
                    t = itemHeight * (i / SIZE_X);
                    r = l + itemWidth;
                    b = t + itemHeight;
                    items[i].layout(l, t, r, b);
                }
            }
        });
        super.onCreate(state);
    }

}
结果:
@Kanwaljit Singh:
在MainActivity中的项目创建循环中:
final int id = i;
items[i].setOnClickListener(new OnClickListener() {
    @Override
    public void onClick(View v) {
        startActivity(new Intent(getContext(), NextActivity.class).putExtra("id", id));
    }
});
在NextActivity中:
int id = getIntent().getIntExtra("id", -1);