我想在屏幕中央绘制一条线,并使其像蛇一样动起来。
以下是我想要制作的逐步动画:
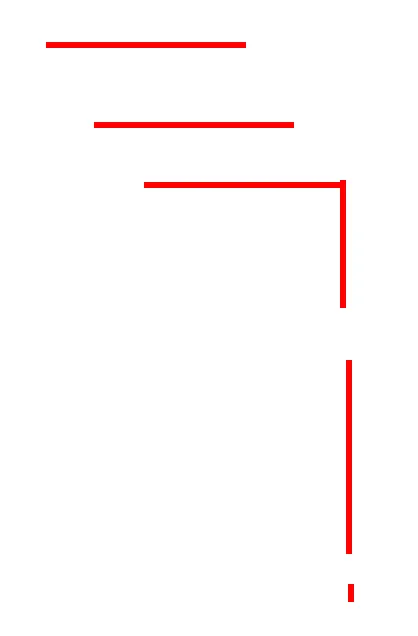
我该如何实现这个效果?
您可以在CAShapeLayer上动画绘制path的末尾,例如:
weak var shapeLayer: CAShapeLayer?

@IBAction func didTapButton(_ sender: Any) {
    // remove old shape layer if any

    self.shapeLayer?.removeFromSuperlayer()

    // create whatever path you want

    let path = UIBezierPath()
    path.move(to: CGPoint(x: 10, y: 50))
    path.addLine(to: CGPoint(x: 200, y: 50))
    path.addLine(to: CGPoint(x: 200, y: 240))

    // create shape layer for that path

    let shapeLayer = CAShapeLayer()
    shapeLayer.fillColor = #colorLiteral(red: 0, green: 0, blue: 0, alpha: 0).cgColor
    shapeLayer.strokeColor = #colorLiteral(red: 1, green: 0, blue: 0, alpha: 1).cgColor
    shapeLayer.lineWidth = 4
    shapeLayer.path = path.cgPath

    // animate it

    view.layer.addSublayer(shapeLayer)
    let animation = CABasicAnimation(keyPath: "strokeEnd")
    animation.fromValue = 0
    animation.duration = 2
    shapeLayer.add(animation, forKey: "MyAnimation")

    // save shape layer

    self.shapeLayer = shapeLayer
}
这将产生:

显然,您可以根据自己的兴趣更改 UIBezierPath。例如,路径中可以包含空格。或者你甚至不需要有直角路径:
let path = UIBezierPath()
path.move(to: CGPoint(x: 10, y: 130))
path.addCurve(to: CGPoint(x: 210, y: 200), controlPoint1: CGPoint(x: 50, y: -100), controlPoint2: CGPoint(x: 100, y: 350))
您还可以在CAAnimationGroup中同时组合起始和结束笔画的动画:
// create shape layer for that path (this defines what the path looks like when the animation is done)

let shapeLayer = CAShapeLayer()
shapeLayer.fillColor = #colorLiteral(red: 0, green: 0, blue: 0, alpha: 0).cgColor
shapeLayer.strokeColor = #colorLiteral(red: 1, green: 0, blue: 0, alpha: 1).cgColor
shapeLayer.lineWidth = 5
shapeLayer.path = path.cgPath
shapeLayer.strokeStart = 0.8

let startAnimation = CABasicAnimation(keyPath: "strokeStart")
startAnimation.fromValue = 0
startAnimation.toValue = 0.8

let endAnimation = CABasicAnimation(keyPath: "strokeEnd")
endAnimation.fromValue = 0.2
endAnimation.toValue = 1.0

let animation = CAAnimationGroup()
animation.animations = [startAnimation, endAnimation]
animation.duration = 2
shapeLayer.add(animation, forKey: "MyAnimation")
产生的结果:
CoreAnimation 让您对轮廓路径的渲染具有很高的控制权。
view.layer.addSublayer(shapeLayer) 这是最后一行代码。 - J A S K I E Rimport SpriteKit
import PlaygroundSupport
import AVFoundation
let start = CGPoint(x: 100, y: 50)
let end = CGPoint(x: 200, y: 50)
let control = CGPoint(x: 150, y: 100);
var motion: SKAction = SKAction();
let radius: CGFloat = 20;
let bounds = CGRect(x: 0, y: 0, width: 400, height: 200)
let skview = SKView(frame: bounds)
PlaygroundPage.current.liveView = skview
PlaygroundPage.current.needsIndefiniteExecution = true
class MyScene: SKScene,AVSpeechSynthesizerDelegate {
var motionComplete = false
var redline: SKShapeNode = SKShapeNode();
var greenball: SKShapeNode = SKShapeNode();
override func sceneDidLoad() {
greenball = SKShapeNode(circleOfRadius: radius);
greenball.position = start;
greenball.fillColor = .green;
let motionpath = CGMutablePath();
motionpath.move(to: start)
motionpath.addQuadCurve(to: end, control: control)
motion = SKAction.follow(motionpath, asOffset: false, orientToPath: true,duration: 2);
let linepath = CGMutablePath();
linepath.move(to: start);
redline = SKShapeNode(path: linepath);
redline.strokeColor = .red;
redline.lineWidth = 5;
greenball.run(motion) {
self.motionComplete = true;
};
self.addChild(greenball);
self.addChild(redline);
}
override func update(_ currentTime: TimeInterval) {
if (motionComplete == false) {
let cgpath = self.redline.path as! CGMutablePath;
cgpath.addLine(to: greenball.position);
self.redline.path = cgpath;
}
}
}
let scene = MyScene(size: CGSize(width: 400, height: 200));
scene.scaleMode = SKSceneScaleMode.aspectFill
scene.size = skview.bounds.size
skview.presentScene(scene)
结果:
这种技术也可以使用,它被添加为边框,您可以随意塑造它。首先创建路径,然后根据路径绘制线条。
let path = UIBezierPath()
我根据我的需求给出了x和y的值,您可以根据自己的需要进行更改。
path.move(to: CGPoint(x: 134, y: 209))//
    path.addLine(to: CGPoint(x: (131 + 93), y: 209))// for drawing line
    path.addQuadCurve(to: CGPoint(x: (131 + 97), y: 212) , controlPoint: CGPoint(x: (131 + 93), y: 209))// for drawing a curve
    path.addLine(to: CGPoint(x: (131 + 97) , y: (209 + 33 )))
    path.addQuadCurve(to: CGPoint(x: (131 + 93), y: (209 + 37)), controlPoint:  CGPoint(x: (131 + 97) , y: (209 + 33 )))
    path.addLine(to: CGPoint(x: 135, y: (209 + 37)))
    path.addQuadCurve(to: CGPoint(x: 131, y: 209 + 33), controlPoint: CGPoint(x: 135, y: 209 + 37))
    path.addLine(to: CGPoint(x: 131, y: 213))
    path.addQuadCurve(to: CGPoint(x: 134, y: 209), controlPoint:CGPoint(x: 131, y: 213) )
     let shapelayer = CAShapeLayer()//create shape layer object
    shapelayer.fillColor = #colorLiteral(red: 0, green: 0, blue: 0, alpha: 0).cgColor
    shapelayer.strokeColor = #colorLiteral(red: 0.06274510175, green: 0, blue: 0.1921568662, alpha: 1).cgColor
    shapelayer.lineWidth = 2
    shapelayer.path = path.cgPath
    view.layer.addSublayer(shapelayer)
    let animation = CABasicAnimation(keyPath: "strokeEnd")// create animation and add it to shape layer
    animation.fromValue = 0
    animation.duration = 3
    shapelayer.add(animation, forKey: "MyAnimation")
    self.shapelayer = shapelayer
就这些了。希望能对某些人有所帮助,因为我也是在花费几个小时的努力后才实现了这一点,因为没有找到确切的解决方案。也请查看此链接:
let screenWidth = UIScreen.main.bounds.width
let screenHeight = UIScreen.main.bounds.height
let redLine = UIView()
redline.backgroundColor = UIColor.red
redLine.frame = GCRect(x: screenWidth / 2, y: screenHeight / 2, width: 0, height: 0)

UIView.animate(withDuration: 2, animations: {
    redLine.frame = GCRect(x: screenWidth / 2, y: screenHeight / 2, width: 0, height: (screenHeight / 2) - 4)
}) { finished in
    redLine.frame = GCRect(x: screenWidth / 2, y: (screenHeight / 2) - 4, width: 0, height: 1)
}
通过这个,你可以实现任意数量的红线移动。
另一种方法是实际绘制一条线。我不会详细介绍,但建议参考this article。
最后一件事...在Stack Overflow上,我们欣赏那些在提问之前展示他们已经做了适当的研究的人。使用谷歌,我能够快速找到许多关于如何做你想要的事情的教程。尝试自己进行研究,因为通常教程会比Stack Overflow的答案提供更多重要的细节。