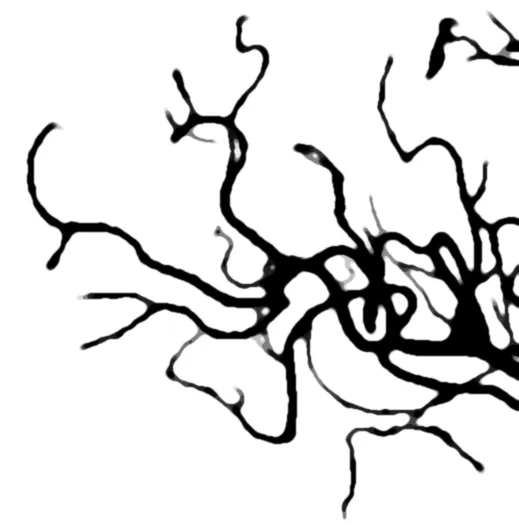
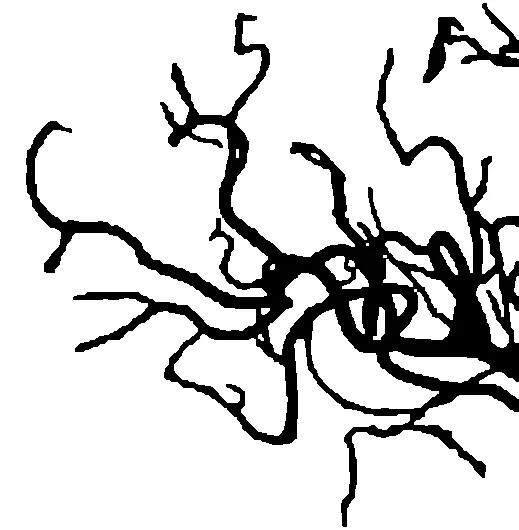
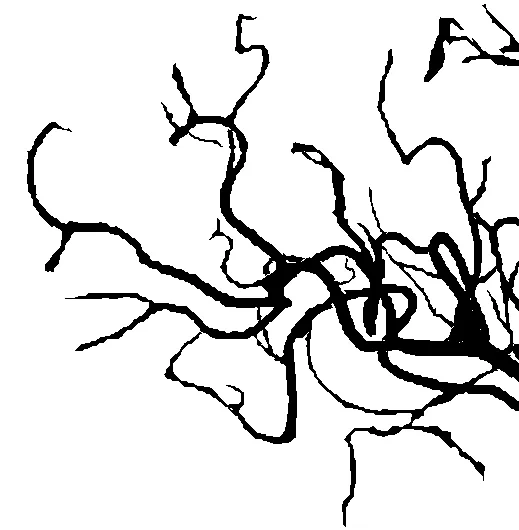
平滑二进制图像的边缘

22
如何在二值化血管图像中平滑边缘。

enter image description here

我尝试了一种与这种方法有些相似的方法,但并没有得到我期望的结果。

enter image description here

这是代码:

import cv2
import numpy as np

INPUT = cv2.imread('so-br-in.png',0)
MASK = np.array(INPUT/255.0, dtype='float32')

MASK = cv2.GaussianBlur(MASK, (5,5), 11)
BG = np.ones([INPUT.shape[0], INPUT.shape[1], 1], dtype='uint8')*255

OUT_F = np.ones([INPUT.shape[0], INPUT.shape[1], 1],dtype='uint8')

for r in range(INPUT.shape[0]):
    for c in range(INPUT.shape[1]):
        OUT_F[r][c]  = int(BG[r][c]*(MASK[r][c]) + INPUT[r][c]*(1-MASK[r][c]))

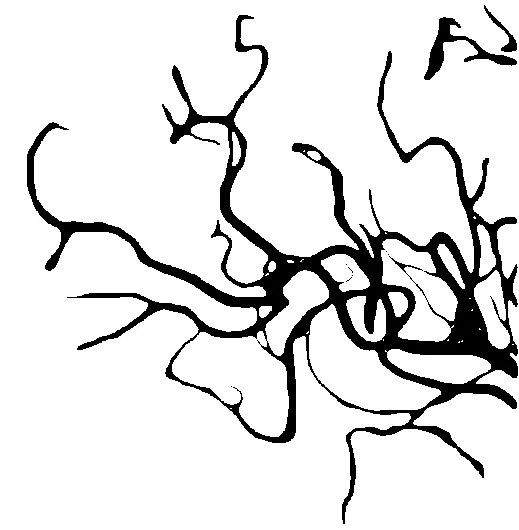
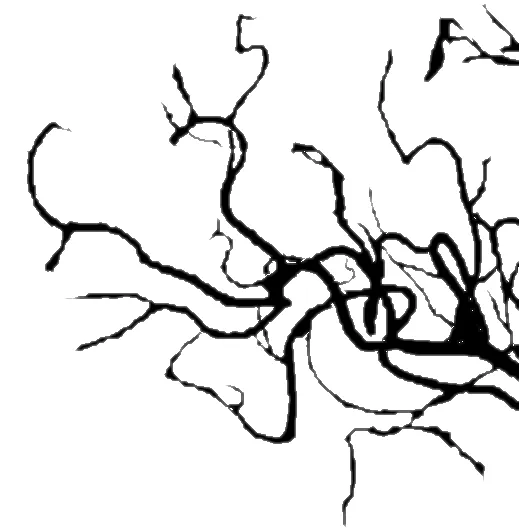
cv2.imwrite('brain-out.png', OUT_F)  

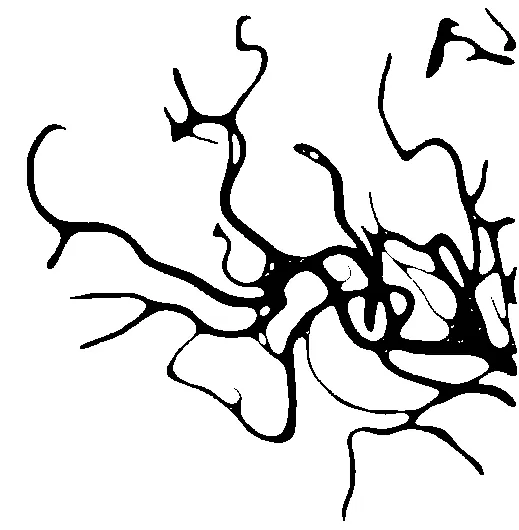
有什么方法可以改善这些锋利的边缘的平滑度吗?

编辑

我想要像http://pscs5.tumblr.com/post/60284570543那样平滑边缘。在OpenCV中如何实现?


1
看看这个链接是否是你想要的:https://dev59.com/OpLea4cB1Zd3GeqP3Yjy#34535023 - dhanushka
也许您可以更详细地描述您的期望... - tfv
@tfv 更新了问题。请检查是否有任何建议。 :) - Abdul Fatir
1
@Antonio http://i.stack.imgur.com/HWOA9.png - Abdul Fatir
@AbdulFatir 我想知道你是如何提取血管的?如果你有时间,可以详细说明一下。 - Jeru Luke
显示剩余7条评论
6个回答

26

以下是我使用您的图像得出的结果:在此输入图片描述

我的方法主要基于对放大后的图像应用几次cv::medianBlur

以下是代码:

cv::Mat vesselImage = cv::imread(filename); //the original image
cv::threshold(vesselImage, vesselImage, 125, 255, THRESH_BINARY);
cv::Mat blurredImage; //output of the algorithm
cv::pyrUp(vesselImage, blurredImage);

for (int i = 0; i < 15; i++)
    cv::medianBlur(blurredImage, blurredImage, 7);

cv::pyrDown(blurredImage, blurredImage);
cv::threshold(blurredImage, blurredImage, 200, 255, THRESH_BINARY);

锯齿状的边缘是由于阈值处理引起的。如果您可以接受一个非二进制的输出图像(即具有256个灰度级别),则可以将其删除,然后您将获得此图像:enter image description here


这是一个更好的结果。我已经点赞了你的回答,如果在接下来的几天里我没有得到更好的答案,我会接受这个答案。关于http://pscs5.tumblr.com/post/60284570543有什么想法吗? - Abdul Fatir
在这篇文章中,唯一应用的真正操作是高斯模糊。然后他调整了级别以获得更清晰的边缘。在您的情况下,图像中的缺陷太明显,无法通过简单的高斯模糊进行纠正。您可以尝试对我的结果图像应用高斯模糊,但我想它看起来会像我发布的第二张图片。 - Sunreef

6
你可以先膨胀再腐蚀处理这些区域。http://docs.opencv.org/2.4/doc/tutorials/imgproc/erosion_dilatation/erosion_dilatation.html
import cv2
import numpy as np
blur=((3,3),1)
erode_=(5,5)
dilate_=(3, 3)
cv2.imwrite('imgBool_erode_dilated_blured.png',cv2.dilate(cv2.erode(cv2.GaussianBlur(cv2.imread('so-br-in.png',0)/255, blur[0], blur[1]), np.ones(erode_)), np.ones(dilate_))*255)  

来自 到

在进行下面的操作之前,先将比例因子设置为4。输入图像描述


你好。如果可能的话,你能发布一些示例代码和结果吗? - Abdul Fatir
由于您在腐蚀和膨胀操作中使用了不同的内核大小,导致其轮廓被相当程度地膨胀。 :) 不确定这是否是期望的结果。 - Piglet
源图像质量很差,所以我选择了我认为最好的处理方式,但我将参数清楚地留出来,以便让他进行调整。 - user5698387
这样确实更好,但是即使在这张图片中,边缘也不太平滑。你能告诉我如何平滑这些边缘吗? - Abdul Fatir
在执行这些操作之前,您需要使用“resize”增加图像分辨率。 - tfv
显示剩余3条评论

5

我对@dhanushka的另一个问题的答案进行了一些修改,得到了这些图片。

抱歉,这是C++代码,但也许你可以将其转换为Python。

enter image description here

你可以更改以下参数以获得不同的结果。
// contour smoothing parameters for gaussian filter
int filterRadius = 10; // you can try to change this value
int filterSize = 2 * filterRadius + 1;
double sigma = 20; // you can try to change this value

enter image description here

#include <opencv2/highgui.hpp>
#include <opencv2/imgproc.hpp>
#include <iostream>

using namespace cv;
using namespace std;

int main( int argc, const char** argv )
{
    Mat im = imread(argv[1], 0);

    Mat cont = ~im;
    Mat original = Mat::zeros(im.rows, im.cols, CV_8UC3);
    Mat smoothed = Mat(im.rows, im.cols, CV_8UC3, Scalar(255,255,255));

    // contour smoothing parameters for gaussian filter
    int filterRadius = 5;
    int filterSize = 2 * filterRadius + 1;
    double sigma = 10;

    vector<vector<Point> > contours;
    vector<Vec4i> hierarchy;
    // find contours and store all contour points
    findContours(cont, contours, hierarchy, CV_RETR_CCOMP, CV_CHAIN_APPROX_NONE, Point(0, 0));
    for(size_t j = 0; j < contours.size(); j++)
    {
        // extract x and y coordinates of points. we'll consider these as 1-D signals
        // add circular padding to 1-D signals
        size_t len = contours[j].size() + 2 * filterRadius;
        size_t idx = (contours[j].size() - filterRadius);
        vector<float> x, y;
        for (size_t i = 0; i < len; i++)
        {
            x.push_back(contours[j][(idx + i) % contours[j].size()].x);
            y.push_back(contours[j][(idx + i) % contours[j].size()].y);
        }
        // filter 1-D signals
        vector<float> xFilt, yFilt;
        GaussianBlur(x, xFilt, Size(filterSize, filterSize), sigma, sigma);
        GaussianBlur(y, yFilt, Size(filterSize, filterSize), sigma, sigma);
        // build smoothed contour
        vector<vector<Point> > smoothContours;
        vector<Point> smooth;
        for (size_t i = filterRadius; i < contours[j].size() + filterRadius; i++)
        {
            smooth.push_back(Point(xFilt[i], yFilt[i]));
        }
        smoothContours.push_back(smooth);

        Scalar color;

        if(hierarchy[j][3] < 0 )
        {
            color = Scalar(0,0,0);
        }
        else
        {
            color = Scalar(255,255,255);
        }
        drawContours(smoothed, smoothContours, 0, color, -1);
    }
    imshow( "result", smoothed );
    waitKey(0);
}

2
这是正确的答案,但需要转换为Python。 - Bade
这个程序是用Python编写的吗? - Bharath_Raja

3
你可以增加图像的分辨率(例如使用resize将其加倍或加三倍)。之后,根据上面的另一个回答所述进行腐蚀和膨胀将导致更好的结果。

1
我们的大脑是否连接?我刚才用4个比例因子完成了这件事,效果更好了。但是有了新的原始图像在手,我们可以做得更好 :) - user5698387

2
您很可能首先得到了血管的灰度图像,然后进行了阈值处理。它看起来仍然不平滑,因为原始的灰度图像内部有噪声。现在要求平滑边缘将导致较低的分辨率。例如,在另一个答案中建议的稀释和侵蚀可能会在稀释步骤中融合相邻的血管,然后在侵蚀步骤中无法再次分离。

最好先去除灰度图像中的噪声(也称为进行平滑处理),并将阈值处理作为最后一步。

由于您没有提供灰度图像,我在二进制图像上进行了轻微的平滑处理(约1像素宽),然后再次进行了阈值处理。

enter image description here

我进行了平滑处理(使用固定大小的高斯核)和阈值处理(使用阈值参数)。我建议您在灰度图像数据上进行此操作,并调整这两个参数,直到您喜欢结果。

如果您感兴趣,这是Matlab代码:

% read
img = imread('YyNQV.png');
img = double(img(:, :, 1) ~= 255); % png is RGB -> binary

% smooth
kernel = fspecial('gaussian', 10, 1.5);
kernel = kernel / sum(kernel(:)); % normalize to 1
img_smooth = conv2(img, kernel, 'same');

% binarize again
threshold = 0.4; % experiment with values between 0 and 1
img_smooth_threshold = img_smooth > threshold;

% save (exchange black and white)
imwrite(~img_smooth_threshold, 'YyNQV_smooth.png');

0

这是从sturkmen在上方发布的算法转换成Python语言。

import numpy as np
import cv2 as cv

def smooth_raster_lines(im, filterRadius, filterSize, sigma):
    smoothed = np.zeros_like(im)
    contours, hierarchy = cv.findContours(im, cv.RETR_CCOMP, cv.CHAIN_APPROX_NONE)
    hierarchy = hierarchy[0]
    for countur_idx, contour in enumerate(contours):
        len_ = len(contour) + 2 * filterRadius
        idx = len(contour) - filterRadius

        x = []
        y = []    
        for i in range(len_):
            x.append(contour[(idx + i) % len(contour)][0][0])
            y.append(contour[(idx + i) % len(contour)][0][1])

        x = np.asarray(x, dtype=np.float32)
        y = np.asarray(y, dtype=np.float32)

        xFilt = cv.GaussianBlur(x, (filterSize, filterSize), sigma, sigma)
        xFilt = [q[0] for q in xFilt]
        yFilt = cv.GaussianBlur(y, (filterSize, filterSize), sigma, sigma)
        yFilt = [q[0] for q in yFilt]


        smoothContours = []
        smooth = []
        for i in range(filterRadius, len(contour) + filterRadius):
            smooth.append([xFilt[i], yFilt[i]])

        smoothContours = np.asarray([smooth], dtype=np.int32)


        color = (0,0,0) if hierarchy[countur_idx][3] > 0 else (255,255,255)
        cv.drawContours(smoothed, smoothContours, 0, color, -1)
    
    return(smoothed)

网页内容由stack overflow 提供, 点击上面的
可以查看英文原文,
原文链接