如何在WPF应用程序中实现气球提示消息
22
- tronda
1
我已经在以下链接中给出了答案,请按照它的步骤操作。
如何创建大写锁定警告气球 - NASSER
5个回答
10
我已经为此创建了一个CodePlex网站,其中包括“Toast Popups”和控件“Help Balloons”。这些版本比下面描述的功能更多。 Code Plex 项目。
这是Nuget 包的链接。
这是我的气球说明的解决方案。我希望它有以下不同之处:
- 当鼠标进入时淡入。
- 当鼠标离开并且透明度达到0时淡出并关闭窗口。
- 如果鼠标在窗口上,则透明度将为100%并保持打开状态。
- 气球窗口的高度是动态的。
- 使用事件触发器而非计时器。
- 将气球定位于控件的左侧或右侧。
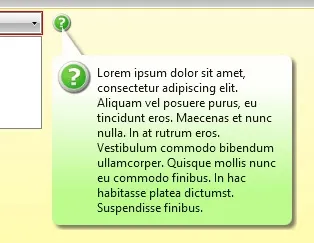
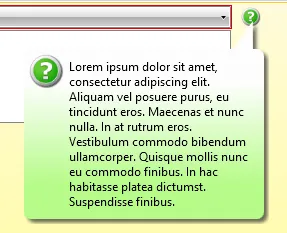
这是我使用的帮助图片。


我创建了一个带有简单“帮助”图标的UserControl。
<UserControl x:Class="Foundation.FundRaising.DataRequest.Windows.Controls.HelpBalloon"
         xmlns="http://schemas.microsoft.com/winfx/2006/xaml/presentation"
         xmlns:x="http://schemas.microsoft.com/winfx/2006/xaml"
         xmlns:mc="http://schemas.openxmlformats.org/markup-compatibility/2006"
         xmlns:d="http://schemas.microsoft.com/expression/blend/2008"
         mc:Ignorable="d"
         Name="HelpBalloonControl"
         d:DesignHeight="20" d:DesignWidth="20" Background="Transparent">
    <Image Width="20" Height="20"
           MouseEnter="ImageMouseEnter"
           Cursor="Hand"
           IsManipulationEnabled="True"
           Source="/Foundation.FundRaising.DataRequest.Windows;component/Resources/help20.png" />
然后将此代码添加到后台代码中。
public partial class HelpBalloon : UserControl
{
    private Balloon balloon = null;

    public HelpBalloon()
    {
        InitializeComponent();
    }

    public string Caption { get; set; }

    public Balloon.Position Position { get; set; }

    private void ImageMouseEnter(object sender, MouseEventArgs e)
    {
        if (balloon == null)
        {
            balloon = new Balloon(this, this.Caption);
            balloon.Closed += BalloonClosed;
            balloon.Show();
        }
    }

    private void BalloonClosed(object sender, EventArgs e)
    {
        this.balloon = null;
    }
}
这是用户控件打开的气球窗口的XAML代码。
<Window x:Class="Foundation.FundRaising.DataRequest.Windows.Balloon"
    xmlns="http://schemas.microsoft.com/winfx/2006/xaml/presentation"
    xmlns:x="http://schemas.microsoft.com/winfx/2006/xaml"
    Height="90" Width="250" WindowStyle="None"
    ResizeMode="NoResize" ShowInTaskbar="False"
    Topmost="True" IsTabStop="False"
    OverridesDefaultStyle="False"
    SizeToContent="Height"
    AllowsTransparency="True"
    Background="Transparent" >
   <Grid RenderTransformOrigin="0,1" >
    <StackPanel Orientation="Vertical">
        <StackPanel Orientation="Horizontal">
            <StackPanel.Resources>
                <Style TargetType="Path">
                    <Setter Property="Fill" Value="#fdfdfd"/>
                    <Setter Property="Stretch" Value="Fill"/>
                    <Setter Property="Width" Value="22"/>
                    <Setter Property="Height" Value="31"/>
                    <Setter Property="Panel.ZIndex" Value="99"/>
                    <Setter Property="VerticalAlignment" Value="Top"/>
                    <Setter Property="Effect">
                        <Setter.Value>
                            <DropShadowEffect Color="#FF757575" Opacity=".7"/>
                        </Setter.Value>
                    </Setter>
                </Style>
            </StackPanel.Resources>
            <Path
              HorizontalAlignment="Left"
              Margin="15,3,0,0"
                Data="M10402.99154,55.5381L10.9919,0.64 0.7,54.9"
              x:Name="PathPointLeft"/>
            <Path
                HorizontalAlignment="Right"
                Margin="175,3,0,0"
                Data="M10402.992,55.5381 L10284.783,3.2963597 0.7,54.9"
                x:Name="PathPointRight">
            </Path>
        </StackPanel>

        <Border Margin="5,-3,5,5"
                CornerRadius="7" Panel.ZIndex="100"
                VerticalAlignment="Top">
            <Border.Background>
                <LinearGradientBrush StartPoint="0,0" EndPoint="1,0">
                    <LinearGradientBrush.RelativeTransform>
                        <RotateTransform Angle="90" CenterX="0.7" CenterY="0.7" />
                    </LinearGradientBrush.RelativeTransform>
                    <GradientStop Color="#FFFDFDFD" Offset=".2"/>
                    <GradientStop Color="#FFB6FB88" Offset=".8"/>
                </LinearGradientBrush>
            </Border.Background>
            <Border.Effect>
                <DropShadowEffect Color="#FF757575" Opacity=".7"/>
            </Border.Effect>
            <Grid>
                <Grid.ColumnDefinitions>
                    <ColumnDefinition Width="Auto"/>
                    <ColumnDefinition Width="*"/>
                </Grid.ColumnDefinitions>

                <Image Grid.Column="0"
                       Width="35"
                       Margin="5"
                       VerticalAlignment="Top" Height="35"
                       Source="Resources/help.png" />

                <TextBlock Grid.Column="1"
                           TextWrapping="Wrap"
                           Margin="0,10,10,10"
                           TextOptions.TextFormattingMode="Display"
                           x:Name="textBlockCaption"
                           Text="This is the caption"/>
            </Grid>
        </Border>
    </StackPanel>

    <!-- Animation -->
    <Grid.Triggers>
        <EventTrigger RoutedEvent="FrameworkElement.Loaded">
            <BeginStoryboard x:Name="StoryboardLoad">
                <Storyboard>
                    <DoubleAnimation Storyboard.TargetProperty="(UIElement.Opacity)" From="0.0" To="1.0" Duration="0:0:2" />
                    <DoubleAnimation Storyboard.TargetProperty="(UIElement.Opacity)" From="1.0" To="0.0" Duration="0:0:3" BeginTime="0:0:3" Completed="DoubleAnimationCompleted"/>
                </Storyboard>
            </BeginStoryboard>
        </EventTrigger>

        <EventTrigger RoutedEvent="Mouse.MouseEnter">
            <EventTrigger.Actions>
                <RemoveStoryboard BeginStoryboardName="StoryboardLoad"/>
                <RemoveStoryboard BeginStoryboardName="StoryboardFade"/>
            </EventTrigger.Actions>
        </EventTrigger>

        <EventTrigger RoutedEvent="Mouse.MouseLeave">
            <BeginStoryboard x:Name="StoryboardFade">
                <Storyboard>
                    <DoubleAnimation Storyboard.TargetProperty="(UIElement.Opacity)" From="1.0" To="0.0" Duration="0:0:2" BeginTime="0:0:1" Completed="DoubleAnimationCompleted"/>
                </Storyboard>
            </BeginStoryboard>
        </EventTrigger>
    </Grid.Triggers>

    <Grid.RenderTransform>
        <ScaleTransform ScaleY="1" />
    </Grid.RenderTransform>
</Grid>
还有气球窗口背后的代码。
public partial class Balloon : Window
{
    public enum Position
    {
        Left,

        Right
    }

    public Balloon(Control control, string caption, Position position)
    {
        InitializeComponent();

        this.textBlockCaption.Text = caption;

        // Compensate for the bubble point
        double captionPointMargin = this.PathPointLeft.Margin.Left;

        Point location = GetControlPosition(control);

        if (position == Position.Left)
        {
            this.PathPointRight.Visibility = Visibility.Hidden;
            this.Left = location.X + (control.ActualWidth / 2) - captionPointMargin;
        }
        else
        {
            this.PathPointLeft.Visibility = Visibility.Hidden;
            this.Left = location.X - this.Width + control.ActualWidth + (captionPointMargin / 2);
        }

        this.Top = location.Y + (control.ActualHeight / 2);
    }

    private static Point GetControlPosition(Control control)
    {
        Point locationToScreen = control.PointToScreen(new Point(0, 0));
        var source = PresentationSource.FromVisual(control);
        return source.CompositionTarget.TransformFromDevice.Transform(locationToScreen);
    }

    private void DoubleAnimationCompleted(object sender, EventArgs e)
    {
        if (!this.IsMouseOver)
        {
            this.Close();
        }
    }
}
- LawMan
2
我已经整天在寻找能够完全做到这一点的东西。不幸的是,尽管很棒,您CodePlex项目中的工具提示是自定义样式的,与标准系统外观不符。有没有简单的方法让您的控件看起来像标准的气球提示? - Ani
目前,我还没有将此公开更改的计划。这个控件开始受到一些关注,我被要求添加一些其他功能。请将您的请求添加到CodePlex网站上,我会在下一个版本中加入它。同时,您可以下载源代码并修改XAML,这应该很容易做到。感谢您的评论和支持。 - LawMan
9
UX指南指出气球和工具提示之间的区别是:
就WPF而言,最后一个是唯一需要考虑的问题。如果您需要用户能够与气球内容进行交互,则需要使用Popup而不是ToolTip。(如果您选择这种方式,您可能会从this论坛帖子中受益。)
气球可以独立于当前指针位置显示,因此它们有一个指示其来源的尾巴。
气球有标题、正文和图标。
气球可以是交互式的,而无法单击提示。
但如果你只是在显示通知,你可以使用ToolTip。你不需要使用修饰符,只需为ToolTip构建一个控件模板,看起来像你想要的样子,创建一个使用该样式的ToolTip资源,并将目标控件的ToolTip属性设置为该ToolTip。使用ToolTipService控制它相对于放置目标的位置。
- Robert Rossney
2
挑战在于当光标不在字段上时触发工具提示的显示。我放弃了这个解决方案。考虑使用特定的AdornerLayer,它比常规的红色边框更加视觉化。 - tronda
我也在考虑将其实现为自定义装饰器实现,就像Validation.ErrorTemplate ControlTemplate一样,但不确定如何解决它。 - tronda
5
我最终将一个TextBlock放在了adorner层中:
<Setter Property="Validation.ErrorTemplate">
    <Setter.Value>
        <ControlTemplate>
            <StackPanel Orientation="Vertical">
                <Border>
                    <AdornedElementPlaceholder  x:Name="adorner"/>
                </Border>
                <TextBlock
                    Height="20" Margin="10 0" Style="{StaticResource NormalColorBoldWeightSmallSizeTextStyle}"
                    Text="{Binding ElementName=adorner, Path=AdornedElement.(Validation.Errors)[0].ErrorContent}"/>
            </StackPanel>
        </ControlTemplate>
    </Setter.Value>
</Setter>
我也像所有WPF示例一样使用了工具提示:
<Style.Triggers>
    <Trigger Property="Validation.HasError" Value="True">
        <Setter Property="ToolTip"
                Value="{Binding RelativeSource={RelativeSource Self}, Path=(Validation.Errors)[0].ErrorContent}">
        </Setter>
    </Trigger>
</Style.Triggers>
虽然不是最优的(我们真的很希望有一个气球消息控件),但对于我们的需求来说足够好用了。
- tronda
3
我已经为我的WPF项目制作了警告气球,以解决大写锁定警告问题。
如果您想在您的项目中添加此气球警告,请按照以下步骤操作:
- 在您的项目中添加一个新窗口,并将其命名为“WarningBalloon”。 - 添加以下XAML代码到新窗口,并将警告图标添加到项目的图像文件夹中。
如果您想在您的项目中添加此气球警告,请按照以下步骤操作:
- 在您的项目中添加一个新窗口,并将其命名为“WarningBalloon”。 - 添加以下XAML代码到新窗口,并将警告图标添加到项目的图像文件夹中。
<Window x:Class="MyNameSpace.WarningBalloon"
            xmlns="http://schemas.microsoft.com/winfx/2006/xaml/presentation"
            xmlns:x="http://schemas.microsoft.com/winfx/2006/xaml"
            Height="160" Width="469" WindowStyle="None" ResizeMode="NoResize" ShowInTaskbar="False" Topmost="True" IsTabStop="False" OverridesDefaultStyle="False" AllowsTransparency="True" Background="Transparent" Opacity="1" >
        <Grid Height="126" Width="453">
            <Grid.RowDefinitions>
                <RowDefinition Height="81" />
                <RowDefinition Height="45*" />
            </Grid.RowDefinitions>
            <Grid.ColumnDefinitions>
                <ColumnDefinition Width="177*" />
                <ColumnDefinition Width="72*" />
                <ColumnDefinition Width="0*" />
                <ColumnDefinition Width="170*" />
            </Grid.ColumnDefinitions>
            <Border Margin="12,32,0,0"
          CornerRadius="10,10,10,10" Grid.ColumnSpan="4" HorizontalAlignment="Left" Width="429" Height="82" VerticalAlignment="Top" Grid.RowSpan="2">
                <Border.Effect>
                    <DropShadowEffect
              Color="#FF474747" />
                </Border.Effect>
                <Border.Background>
                    <LinearGradientBrush
              EndPoint="0.5,1"
              StartPoint="0.5,0">
                        <GradientStop
                Color="#FF58C2FF"
                Offset="0" />
                        <GradientStop
                Color="#FFFFFFFF"
                Offset="1" />
                    </LinearGradientBrush>
                </Border.Background>
                <Grid Height="76" Name="grid1" Width="441">
                    <Image Height="35" HorizontalAlignment="Left" Margin="6,6,0,0" Name="image1" Stretch="Fill" VerticalAlignment="Top" Width="35" Source="/MyNameSpace;component/Images/warning-icon.png" />
                    <Label Content="Caps Lock is ON" Height="31" HorizontalAlignment="Left" Margin="125,-6,0,0" Name="lblWarningHeader" VerticalAlignment="Top" FontSize="16" FontWeight="Bold" />
                    <TextBlock HorizontalAlignment="Right" Margin="0,22,17,-1" Name="txbMessage" Width="379">Having Caps Lock on may cause you to enter your password incorrectly. <LineBreak/> <LineBreak/> You should press Caps Lock to turn it of before entering your password. VerticalAlignment="Top" Width="346" FontSize="11"</TextBlock>
                </Grid>
            </Border>
            <Image
            Source="{Binding Path=IconSource}" Width="16" HorizontalAlignment="Left" Margin="-56,0,0,-38" Height="16" VerticalAlignment="Bottom" Grid.Row="1" />
            <Path Data="M10402.99154,55.5381L10.9919,0.64 0.7,54.9" Fill="LightSkyBlue" HorizontalAlignment="Left" Margin="32,3,0,0" Stretch="Fill" Stroke="Black" Width="22" Height="31" VerticalAlignment="Top" />
        </Grid>
    </Window>
- 在LoginForm后面输入以下代码。
    private Point location;
    public static  bool balloonVisFlag = false;
    private DispatcherTimer timer;
    WarningBalloon Balloon = null;

    private void ShowHideBalloon()
    {
        if (System.Windows.Forms.Control.IsKeyLocked(System.Windows.Forms.Keys.CapsLock))
        {
            if (timer == null)
            {
                timer = new DispatcherTimer();
            }
            location = GetControlPosition(psbPassword);
            Balloon.Left = location.X;
            Balloon.Top = location.Y;
            Balloon.Show();
            balloonVisFlag = true;
            timer.Interval = TimeSpan.FromMilliseconds(5000);
            timer.IsEnabled = true;
            timer.Tick += new EventHandler(Timer_Tick);
            psbPassword.Focus();
        }
        else
        {
            Balloon.Hide();
            balloonVisFlag = false;
            psbPassword.Focus();
        }
    }

    Point GetControlPosition(Control myControl)
    {
        Point locationToScreen = myControl.PointToScreen(new Point(0, 0));
        PresentationSource source = PresentationSource.FromVisual(myControl);
        return source.CompositionTarget.TransformFromDevice.Transform(locationToScreen);
    }

    private void psbPassword_KeyDown(object sender, KeyEventArgs e)
    {
        ShowHideBalloon();
    }

    private void Window_LocationChanged(object sender, EventArgs e)
    {
        if (balloonVisFlag == true)
        {
            ShowHideBalloon();
        }
    }

    private void Timer_Tick(object sender, EventArgs e)
    {
        if (balloonVisFlag == true)
        {
            Balloon.Hide();
            balloonVisFlag = false;
        }
    }
}
- NASSER
1
对于生产来说,这需要大量的工作。首先需要实现窗口调整大小和位置更改事件处理程序。如果控件指向底部、右侧或其他位置,则箭头和大小应自动调整,否则效果会很糟糕。这段代码只是个起点,而不是解决方案。 - Krafty
2
在我们的应用程序中,我们将气球实现为一个简单的WPF窗口。该窗口的位置受到父控件模型属性的限制。以下是一个示例代码(其中BalloonContainerWindow从Window继承):
        BaloonContainterWindow newBalloon = new BaloonContainterWindow();
        newBalloon.CreateBaloon(balloonType, balloonData);

        // Allow input and output when theis window is on top of winforms window
        SetBalloonLocation(newBalloon, sequenceId, stepId, rulerModel);

        newBalloon.Show();
        newBalloon.CloseOnDeactivation = false;
        newBalloon.Activate();
- Amittai Shapira
1
这篇文章能否加入一些简化的示例代码? - tronda
网页内容由stack overflow 提供, 点击上面的可以查看英文原文,
原文链接
原文链接