我想创建一个自定义按钮,这个按钮最好能在左侧显示图像,在右侧显示文本框。我该如何实现?
6个回答
22
最快的方法
创建一个可点击的视图,其中使用按钮图形作为背景,该视图包含ImageView和TextView。
<RelativeLayout
    android:clickable="true"
    android:background="@android:drawable/btn_default"
    android:layout_width="wrap_content"
    android:layout_height="wrap_content">
    <ImageView
        android:id="@+id/image"
        android:layout_alignParentLeft="true"
        android:layout_centerVertical="true"
        android:src="@android:drawable/ic_input_add"
        android:layout_width="wrap_content"
        android:layout_height="wrap_content">
    </ImageView>
    <TextView
        android:id="@+id/text"
        android:text="Sample text"
        android:textAppearance="?android:attr/textAppearanceButton"
        android:layout_toRightOf="@id/image"
        android:layout_centerVertical="true"
        android:layout_width="wrap_content"
        android:layout_height="wrap_content"></TextView>
</RelativeLayout>
另一种方法
创建自己的类,扩展RelativeLayout,将内容视图设置为上述内容,添加自定义方法以设置文本、图片等,这就是全部。 使用你自己的自定义布局。
- pawelzieba
10
你可以使用如下代码来完成该任务:
<Button
 android:layout_width="fill_parent"
 android:layout_height="50dp"
 android:id="@+id/btnLogin"
 android:text="@string/text"
 android:gravity="center"
 android:drawableLeft="@drawable/your_image"
 android:background="@drawable/login"/> // this is for nice background - *.9.png
- Anton Derevyanko
4
创建一个包含所需布局的XML文件,创建一个外观符合您期望的drawable(可绘制对象),将该drawable作为LinearLayout的背景添加,并通过充气(inflate)XML文件来创建自定义视图。
示例drawable:
示例drawable:
  <?xml version="1.0" encoding="utf-8"?>
  <selector xmlns:android="http://schemas.android.com/apk/res/android">
<item android:state_pressed="true" >
    <shape>
        <solid android:color="#f3ae1b" />
        <stroke android:width="1dp" android:color="#bb6008" />
        <corners android:radius="3dp" />
        <padding android:left="10dp" android:top="10dp" android:right="10dp" android:bottom="10dp" />
    </shape>
</item>
<item>
    <shape>
        <gradient
            android:startColor="#f3ae1b"
            android:endColor="#bb6008"
            android:angle="270" />
        <stroke
            android:width="1dp"
            android:color="#bb6008" />
        <corners
            android:radius="4dp" />
        <padding
            android:left="10dp"
            android:top="10dp"
            android:right="10dp"
            android:bottom="10dp" />
    </shape>
</item>
  </selector>
编辑:用于膨胀的代码
private LayoutInflater mInflater;
mInflater = LayoutInflater.from(this);
public LinearLayout yourButton;
yourButton = (LinearLayout)  mInflater.inflate(R.xml.yourButton, null);
- 2red13
6
我总是使用那段代码,两位投反对票的人能否解释一下? - 2red13
我没有点踩,但在我看来,对于他的要求来说,这是不必要的复杂化。如果他只需使用一个按钮标签并将可绘制对象设置到左侧,为什么要使用布局填充器和XML布局呢?请参见Anton Derevyanko下面的回复。 - Mathias Conradt
没错,我甚至不知道drawableLeft的值,在各种情况下都非常有用,但有时我很喜欢自定义视图的充气效果,因为可以实现各种功能和行为。 - 2red13
drawableLeft属性并不是很有用,它不能正确地进行缩放,并且你对它的控制力也不大。 - BrainSlugs83
另外,在LinearLayout上确保设置android:clickable="true" -- 当仅将其设置为背景时,这非常有效;虽然我无法弄清楚您尝试使用LayoutInflator实现的目标--没有那一点似乎一切都可以正常工作。 - BrainSlugs83
此外,我发现只需将LinearLayout的“style”属性值设置为“?android:attr/buttonStyle”即可 - 你不必进行任何自定义XML操作。 - BrainSlugs83
1
在Xml布局中使用这些可绘制的布局选项,可以获得简单的布局。以下代码行将图像放置在文本左侧。
android:drawableLeft="@drawable/image"
- Ramesh Akula
0
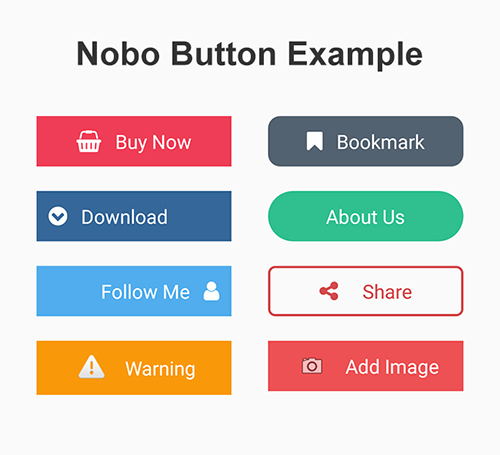
您可以使用NoboButton来实现这一点
一种简单快捷的方式,用于创建带有图标、半径和背景的Android按钮
库地址 https://github.com/alex31n/NoboButton
截图 https://raw.githubusercontent.com/alex31n/NoboButton/master/Assets/button_screenshot.jpg
- Alex Beshine
1
2请在您的帖子中至少包含建议的要点 - (外部)链接可能会过时。 - greybeard
0
如果你想写代码来实现这个功能,可以使用Button类的setCompoundDrawables()方法来决定图标相对文本的位置。请查看API获取更多细节。
- 2ndlife
网页内容由stack overflow 提供, 点击上面的可以查看英文原文,
原文链接
原文链接
- 相关问题
- 8 Android约束布局水平居中对齐TextView和ImageView无效
- 5 使用带有ImageView和TextView的GridView出现问题
- 3 自定义按钮中的TextView
- 3 Android - TextView 和 ImageView 使用同一个 OnClickListener
- 9 带有ImageView和TextView的SimpleCursorAdapter
- 3 Android:带有自定义标题的圆角TextView XML布局
- 19 ImageView和TextView在Android中如何浮动(左/右)
- 12 禁用带有自定义背景的Android按钮
- 3 ImageView 中的 TextView
- 3 TextView带有ImageView的滚动字幕