使用Pillow像素化图像

8
我正在开发一个项目,想要使用彩色网格的图片(例如用乐高积木制成)作为输入,并返回一个更小的修改后的图片。
下面是一个示例输入: Input 
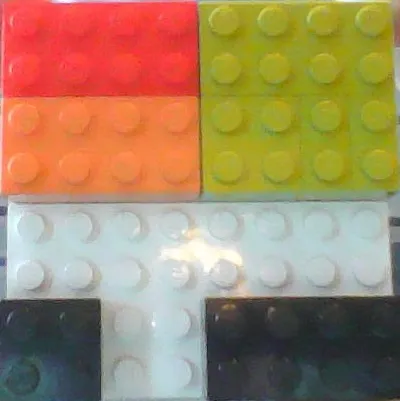
以下是一个8×8的非常小的图片输出结果:
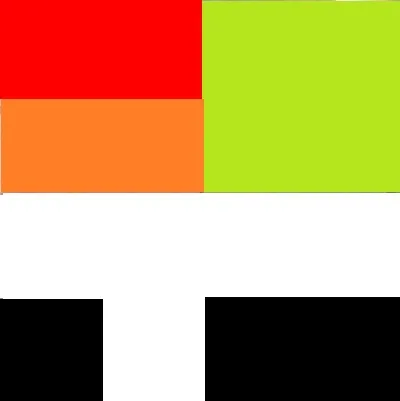
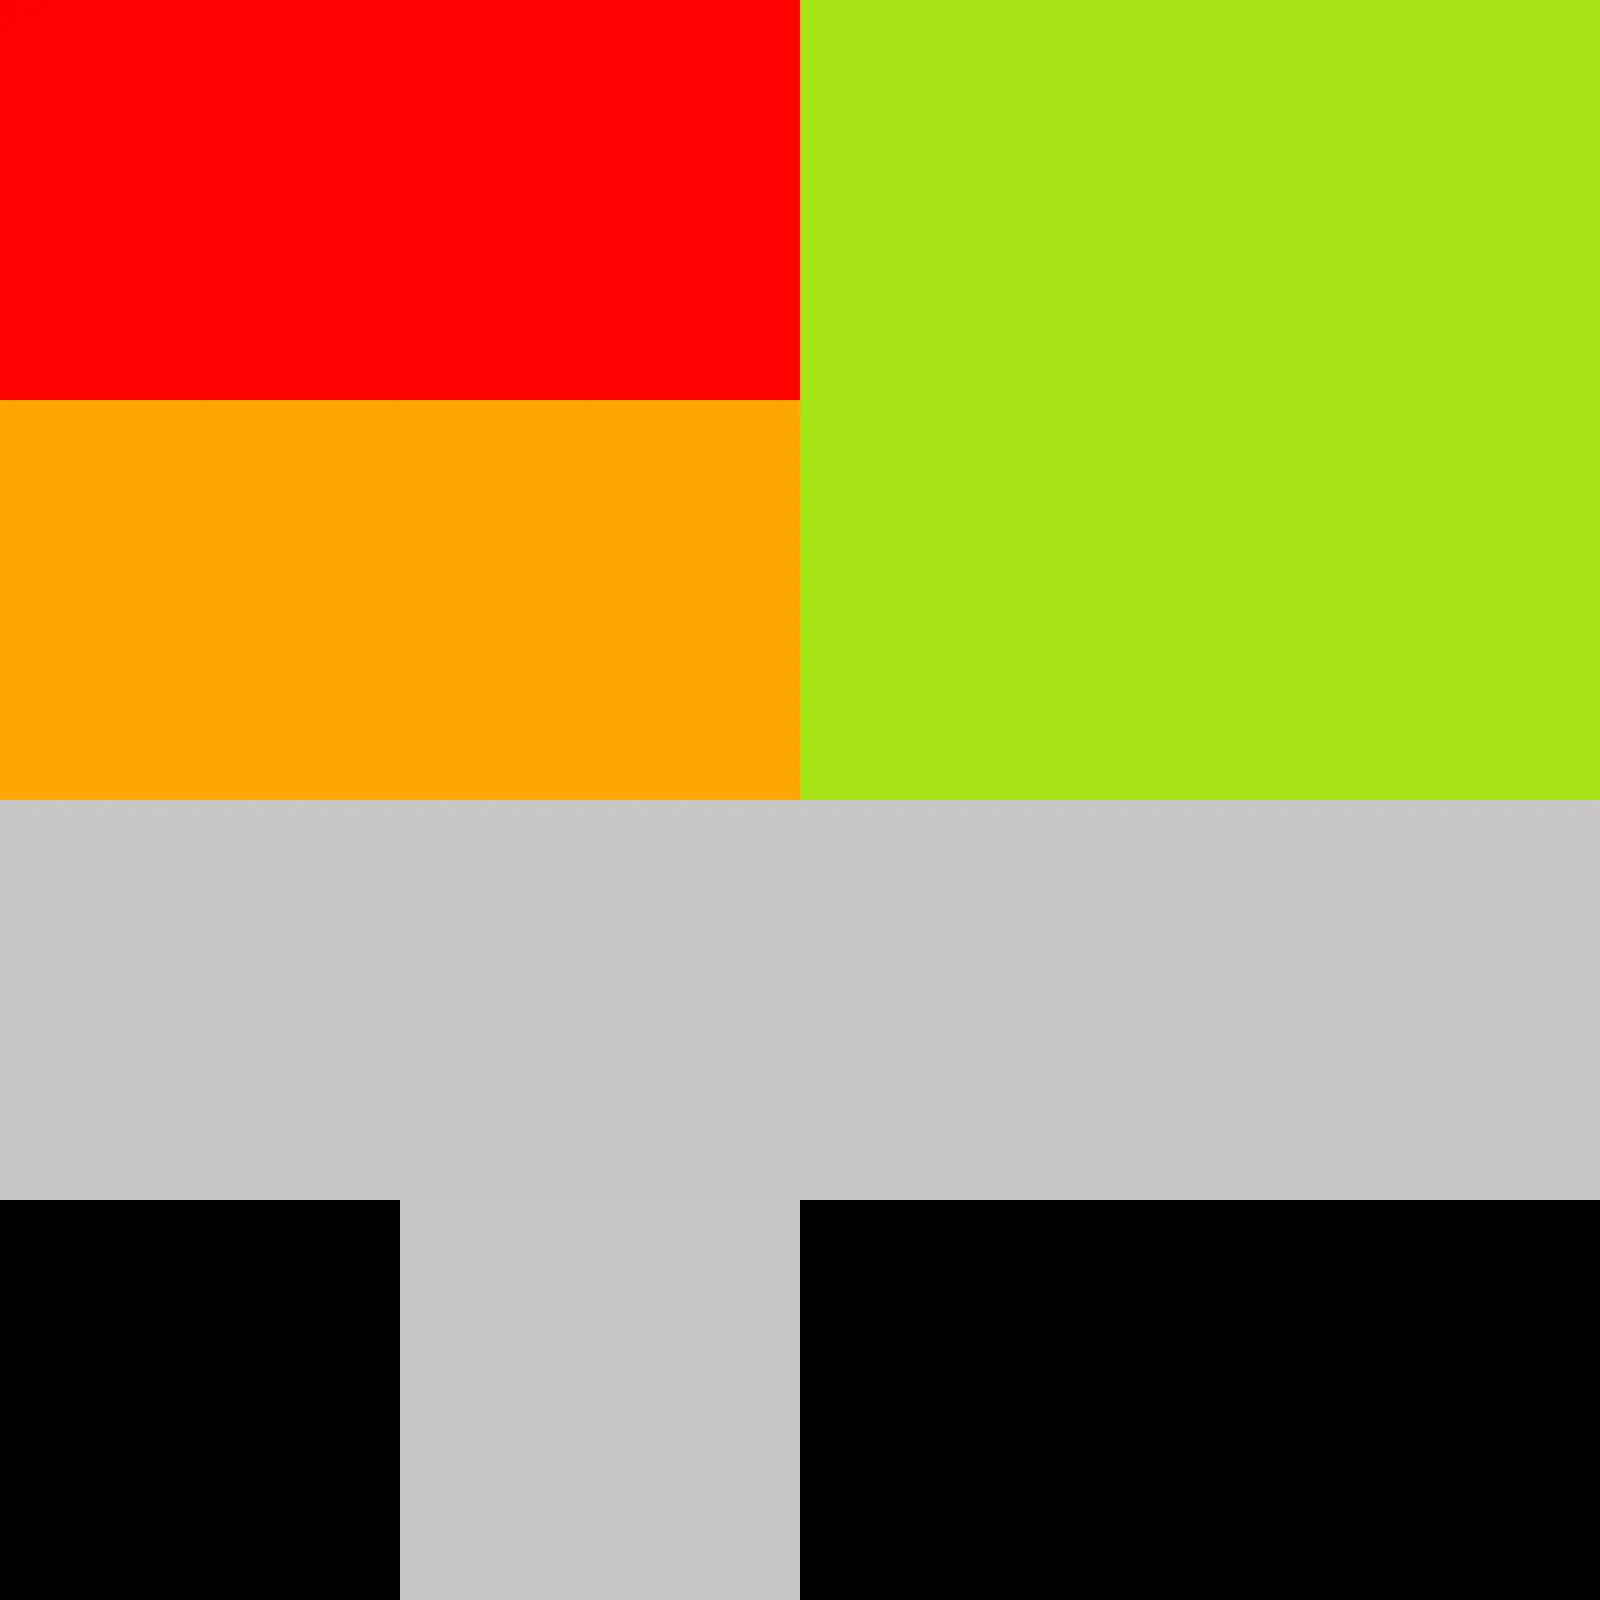
 Output 下面展示了预期输出结果的大型版本: Big Output 这是我目前的代码: 它只适用于黑白图像。
from PIL import Image
import re

black = [(110,110,110),(0,0,0)] #The highest value and the lowest RGB value for the color black

img = Image.open("input.jpg") #The input image
size = (8,8) #The dimensions of the output image

out = img.resize(size,resample=Image.LANCZOS) #Resize the image

for y in range(size[0]): #loop through every pixel
    for x in range(size[1]):

        if out.getpixel((x,y)) <= black[0] and out.getpixel((x,y)) >= black[1]: #check to see if the pixel is within the accepted black values

            out.putpixel((x,y), (0,0,0)) #Give the current pixel true color
        else:
            #otherwise make the pixel black
            out.putpixel((x,y), (255,255,255)) #Give the current pixel true color

"""Save the pixelated image"""
out.save("output.jpg")

我的代码的输出结果:

实际输出

我的程序可以处理黑白图像,但我需要帮助将其改为可以处理多种颜色(红色、橙色、黄色、浅绿色、深绿色、浅蓝色、深蓝色、紫色、黑色和白色)。

提前感谢!


缩略图不是你想要的吗? - Mark Ransom
3个回答

10

你做了一些错误的事情。

首先,你应该使用PNG而不是JPG作为你的输出格式。JPG会引入很多伪影,导致像你的输出这样的小图像完全失真。

然后,你应该减少调色板。处理没有噪声的输入要容易得多。

首先,初始化过于乏味:

from PIL import Image
import operator
from collections import defaultdict
import re

input_path = 'input.jpg'
output_path = 'output.png'
size = (4,4)

然后我们声明调色板 - 这应该包含所有可能的乐高积木颜色。我从您的图像中采样了以下值,但您可以像在您的代码中一样使用黑色和白色,或者任何您想要的颜色,只要它们与源图像中的颜色相似:

palette = [
    (45,  50,  50),  #black
    (240, 68,  64),  #red
    (211, 223, 223), #white
    (160, 161, 67),  #green
    (233, 129, 76),  #orange
]
while len(palette) < 256:
    palette.append((0, 0, 0))
下面的代码将为PIL声明调色板,因为PIL需要扁平数组而不是元组数组:
flat_palette = reduce(lambda a, b: a+b, palette)
assert len(flat_palette) == 768

现在我们可以声明一个图像来保存调色板。稍后我们将使用它来减少原始图像中的颜色。

palette_img = Image.new('P', (1, 1), 0)
palette_img.putpalette(flat_palette)

这里我们打开图片并量化它。我们将其缩放为比所需大小大八倍,因为之后我们将对平均输出进行采样。

multiplier = 8
img = Image.open(input_path)
img = img.resize((size[0] * multiplier, size[1] * multiplier), Image.BICUBIC)
img = img.quantize(palette=palette_img) #reduce the palette

经过这个操作,我们的图像看起来是这样的:

量化图像

现在我们需要将它转换回RGB格式,这样我们才能对像素进行采样:

img = img.convert('RGB')
现在我们要构建最终的图像。为了做到这一点,我们将抽样每个调色板颜色在较大图像中的每个方块包含多少像素。然后我们会选择出现最频繁的颜色。
out = Image.new('RGB', size)
for x in range(size[0]):
    for y in range(size[1]):
        #sample at get average color in the corresponding square
        histogram = defaultdict(int)
        for x2 in range(x * multiplier, (x + 1) * multiplier):
            for y2 in range(y * multiplier, (y + 1) * multiplier):
                histogram[img.getpixel((x2,y2))] += 1
        color = max(histogram.iteritems(), key=operator.itemgetter(1))[0]
        out.putpixel((x, y), color)

最后,我们保存输出结果:

out.save(output_path)
结果:

结果:

small image

放大1600%后:

big image


你好,我刚开始使用这段代码,但是它给我抛出了一些错误,看起来似乎与Python的版本有关。我正在使用Python 3.4.2。请问这段代码是用哪个版本编写的? - Josh B.
1
Python 3.4.3,但我使用的是Pillow而不是PIL(它是一个更活跃的分支)。可能有一些最小的API更改。 - rr-
2
谢谢提供的信息。很高兴地告诉你,我现在已经把它全部搞定了。 - Josh B.

4

为了好玩,我用ImageMagick进行了尝试-它也可以从Python调用...

首先,我创建了一个小的定制调色板来匹配您的颜色-您的白色不是很白,而且您的绿色与ImageMagick的绿色概念不同,所以我使用了十六进制代码代替颜色名称。

convert xc:black xc:red xc:"rgb(200,200,200)" xc:"rgb(168,228,23)"  xc:orange +append palette.png

如果我将这个调色板放大,它看起来像这样:

enter image description here

然后我将您的图像缩小到4x4,并将结果映射到自定义调色板,然后再将其放大,以便您可以看到它如下所示:
convert lego.jpg -resize 4x4! +dither -remap palette.png -scale 1600 result.png

这是结果:

enter image description here

白色已经调整好了以匹配原始文件中的"white"


0

Pixelator可以解决问题。它是基于rr-的答案的软件包。它还具有一些用于AI和ML应用程序的附加优势。

在bash中

pip install pixelator==0.1

在Python中

from pixelator import pixelator
palette = [
    (45,  50,  50),  #black
    (240, 68,  64),  #red
    (211, 223, 223), #white
    (160, 161, 67),  #green
    (233, 129, 76),  #orange
]

sensitivity_multiplier = 10

size = (4,4)

output=pixelator(
    in_path='./images/input.jpg',
    palette=palette,
    size=size,
    sensitivity_multiplier=sensitivity_multiplier
    )

output.resize_out_img().save_out_img(path='./images/output.jpg', overwrite=True)

更新:

Pixelator 1.0.0 已发布,基于 open cv2...

在 Bash 中:

pip install pixelator==1.0.0

在Python中:

from pixelator import Pixelator
# Use the input filename provided
image = Pixelator(filename='./images/input.jpg')
# Define a custom palette
palette = [
    [50,50,45],     #black
    [64,68,240],    #red
    [223,223,211],  #white
    [67,161,160],   #green
    [76,129,233],   #orange
]


# Pixelate the image to a 4x4 multi colored array
pixelated_image = image.pixelate(
    width=4,
    height=4,
    palette=palette
)
# Write to `output.png` scaled up to a 300x300 image (to be easily viewed)
pixelated_image.write(filename='./images/output_test_2.jpg', width=300, height=300)

网页内容由stack overflow 提供, 点击上面的
可以查看英文原文,
原文链接