UIImage
放入一个UISegmentedControl
中时,它会自动着色以匹配分段控件的色调。我觉得这很酷,并且想知道是否可以在其他地方也这样做。例如,我有一堆按钮,它们具有统一的形状但颜色不同。我能否通过使用这种颜色遮罩来为它们所有设置相同的图像,然后设置一种色调或其他东西来改变它们的实际颜色,而不是为每个按钮制作一个PNG文件呢?UIImage
放入一个UISegmentedControl
中时,它会自动着色以匹配分段控件的色调。我觉得这很酷,并且想知道是否可以在其他地方也这样做。例如,我有一堆按钮,它们具有统一的形状但颜色不同。我能否通过使用这种颜色遮罩来为它们所有设置相同的图像,然后设置一种色调或其他东西来改变它们的实际颜色,而不是为每个按钮制作一个PNG文件呢?从iOS 7开始,UIImage
上有一个新的方法可以指定渲染模式。使用渲染模式UIImageRenderingModeAlwaysTemplate
将允许按钮的色调控制图像颜色。
Objective-C
UIButton *button = [UIButton buttonWithType:UIButtonTypeCustom];
UIImage *image = [[UIImage imageNamed:@"image_name"] imageWithRenderingMode:UIImageRenderingModeAlwaysTemplate];
[button setImage:image forState:UIControlStateNormal];
button.tintColor = [UIColor redColor];
快捷
let button = UIButton(type: .custom)
let image = UIImage(named: "image_name")?.withRenderingMode(.alwaysTemplate)
button.setImage(image, for: .normal)
button.tintColor = UIColor.red
tintColor
太暗,请确保adjustsImageWhenHighlighted
为NO。(或在IB中:未选中“高亮时调整图像”) - Jason Moore为了使tintColor
影响UIImage,您必须将图像渲染模式设置为UIImageRenderingModeAlwaysTemplate
。以下是Swift中的解决方案:
let image = UIImage(named: "image-name")
let button = UIButton()
button.setImage(image?.imageWithRenderingMode(UIImageRenderingMode.AlwaysTemplate), forState: .Normal)
button.tintColor = UIColor.whiteColor()
SWIFT 4x
button.setImage(image.withRenderingMode(UIImage.RenderingMode.alwaysTemplate), for: .normal)
button.tintColor = UIColor.blue
var exampleImage = UIImage(named: "ExampleImage.png")?.imageWithRenderingMode(.AlwaysTemplate)
然后在您的viewDidLoad方法中
exampleButtonOutlet.setImage(exampleImage, forState: UIControlState.Normal)
并且修改颜色
exampleButtonOutlet.tintColor = UIColor(red: 1, green: 0, blue: 0, alpha: 1) //your color
编辑 Xcode 8
现在您可以将图像在.xcassets中的渲染模式设置为“模板图像”,这样您就不需要再在var exampleImage
中专门声明它了。
我不确定你具体想要什么,但是这个类别方法可以使用指定的颜色遮盖UIImage,这样你就可以拥有一张单独的图片并将其颜色更改为任何你想要的颜色。
ImageUtils.h
- (UIImage *) maskWithColor:(UIColor *)color;
ImageUtils.m
-(UIImage *) maskWithColor:(UIColor *)color
{
CGImageRef maskImage = self.CGImage;
CGFloat width = self.size.width;
CGFloat height = self.size.height;
CGRect bounds = CGRectMake(0,0,width,height);
CGColorSpaceRef colorSpace = CGColorSpaceCreateDeviceRGB();
CGContextRef bitmapContext = CGBitmapContextCreate(NULL, width, height, 8, 0, colorSpace, kCGImageAlphaPremultipliedLast);
CGContextClipToMask(bitmapContext, bounds, maskImage);
CGContextSetFillColorWithColor(bitmapContext, color.CGColor);
CGContextFillRect(bitmapContext, bounds);
CGImageRef cImage = CGBitmapContextCreateImage(bitmapContext);
UIImage *coloredImage = [UIImage imageWithCGImage:cImage];
CGContextRelease(bitmapContext);
CGColorSpaceRelease(colorSpace);
CGImageRelease(cImage);
return coloredImage;
}
导入ImageUtils类别并执行以下操作...
#import "ImageUtils.h"
...
UIImage *icon = [UIImage imageNamed:ICON_IMAGE];
UIImage *redIcon = [icon maskWithColor:UIColor.redColor];
UIImage *blueIcon = [icon maskWithColor:UIColor.blueColor];
CGBitmapContextCreate
中使用kCGBitmapAlphaInfoMask&kCGImageAlphaPremultipliedLast
。 - Luis AscorbeUIDevice
类的比例属性:CGFloat scale = [UIScreen mainScreen].scale; CGFloat width = self.size.width * scale; CGFloat height = self.size.height * scale;
scale
属性从iOS 4.0开始存在。 - Philipp FrischmuthUIImage
时,您还需要使用 scale
值:UIImage *coloredImage = [UIImage imageWithCGImage:cImage scale:scale orientation:self.imageOrientation];
- Philipp Frischmuth使用Swift 4和自定义类型:
let button = UIButton(frame: aRectHere)
let buttonImage = UIImage(named: "imageName")
button.setImage(buttonImage?.withRenderingMode(.alwaysTemplate), for: .normal)
button.tintColor = .white
Swift 3:
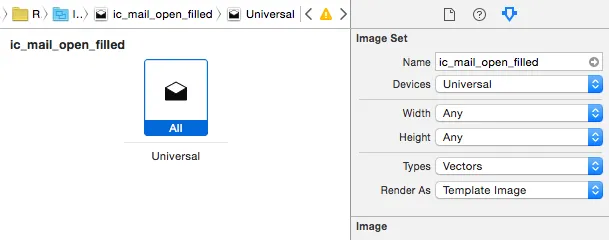
如果您已经通过xCode界面构建器设置了图像,则此解决方案可能很舒适。基本上,您有一个扩展来着色图像:
extension UIImage {
public func image(withTintColor color: UIColor) -> UIImage{
UIGraphicsBeginImageContextWithOptions(self.size, false, self.scale)
let context: CGContext = UIGraphicsGetCurrentContext()!
context.translateBy(x: 0, y: self.size.height)
context.scaleBy(x: 1.0, y: -1.0)
context.setBlendMode(CGBlendMode.normal)
let rect: CGRect = CGRect(x: 0, y: 0, width: self.size.width, height: self.size.height)
context.clip(to: rect, mask: self.cgImage!)
color.setFill()
context.fill(rect)
let newImage: UIImage = UIGraphicsGetImageFromCurrentImageContext()!
UIGraphicsEndImageContext()
return newImage
}
}
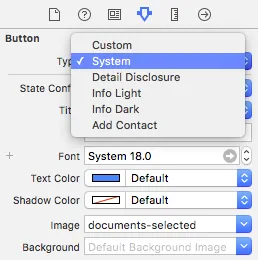
接着,你可以准备这个UIButton扩展来为特定状态着色图像:
extension UIButton {
func imageWith(color:UIColor, for: UIControlState) {
if let imageForState = self.image(for: state) {
self.image(for: .normal)?.withRenderingMode(.alwaysTemplate)
let colorizedImage = imageForState.image(withTintColor: color)
self.setImage(colorizedImage, for: state)
}
}
}
用法:
myButton.imageWith(.red, for: .normal)
P.S.(在表格单元格中也能正常工作,无需调用setNeedDisplay()
方法,由于UIImage扩展,颜色的改变是即时的。)
对于 Xamarin.iOS (C#):
UIButton messagesButton = new UIButton(UIButtonType.Custom);
UIImage icon = UIImage.FromBundle("Images/icon.png");
messagesButton.SetImage(icon.ImageWithRenderingMode(UIImageRenderingMode.AlwaysTemplate), UIControlState.Normal);
messagesButton.TintColor = UIColor.White;
messagesButton.Frame = new RectangleF(0, 0, 25, 25);