import 'package:flutter/material.dart';
import 'package:font_awesome_flutter/font_awesome_flutter.dart';
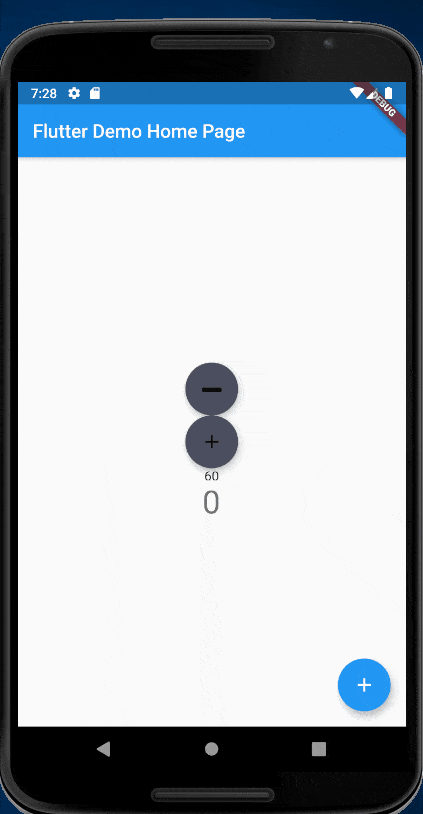
int _weight =60;
class RoundIconData extends StatefulWidget {
@override
_RoundIconDataState createState() => _RoundIconDataState();
}
class _RoundIconDataState extends State<RoundIconData> {
RoundIconData({@required this.icon,@required this.pressme});
final IconData icon;
final int pressme;
@override
Widget build(BuildContext context) {
return RawMaterialButton(
child: Icon(icon),
onPressed: (){
setState(() {
if(icon == FontAwesomeIcons.minus){
_weight--;
}
else{
_weight++
}
});
},
elevation: 6.0,
constraints: BoxConstraints.tightFor(
width: 56.0,
height: 56.0,
),
shape: CircleBorder(),
fillColor: Color(0xFF4C4F5E),
);
}
}
我在创建这个过程中遇到了错误。
我的需求
自定义小部件,通过RawmaterialButton添加图标。如果我添加icon.minus,那么我的给定私有权重将被减少,否则给定的私有权重将增加。