具有描边和圆角的位图图像

10

我有一张边缘锐利的图片。输入图片描述

tile_mode.xml 文件

<?xml version="1.0" encoding="utf-8"?>
<bitmap xmlns:android="http://schemas.android.com/apk/res/android"
    android:src="@drawable/background"
    android:tileMode="repeat">
</bitmap>

背部.xml

<?xml version="1.0" encoding="UTF-8"?>
<layer-list xmlns:android="http://schemas.android.com/apk/res/android">  
       <item android:drawable="@drawable/tile_mode" />
    <item>
        <shape>
            <solid/>
            <stroke android:width="1dip" android:color="#225786" />
            <corners android:radius="10dip"/>
            <padding android:left="0dip" android:top="0dip" android:right="0dip" android:bottom="0dip" />
        </shape>
    </item> 

布局文件.xml

<LinearLayout
                android:id="@+id/frame1"
                android:background="@drawable/back"
                android:layout_width="fill_parent"
                android:layout_height="wrap_content">
            </LinearLayout>

我将图片设置为此布局的背景,并在其周围绘制一个边框,但问题是图片是带有尖角的正方形,而我在xml中绘制的边框是圆角的。那么如何使图片也带有圆角?

8个回答

20

以下是一种解决方案,您需要将圆形背景应用于主布局,然后在内部放置您希望显示的图像视图:

类似下面这样:

back.xml

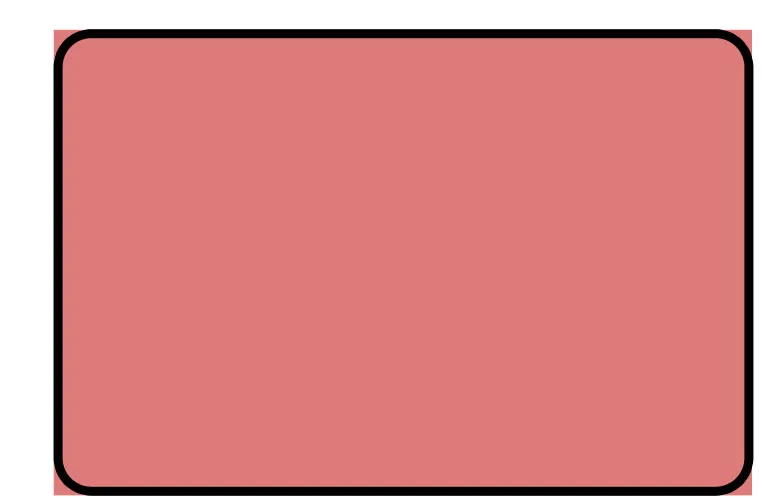
这将使您的图像具有圆角

<?xml version="1.0" encoding="UTF-8"?> 
<shape xmlns:android="http://schemas.android.com/apk/res/android" android:shape="rectangle"> 
     <stroke android:width="1dp" android:color="#dd7b7a"/>
     <corners android:bottomRightRadius="10dp" android:bottomLeftRadius="10dp" 
     android:topLeftRadius="10dp" android:topRightRadius="10dp"/> 
     <solid android:color="#dd7b7a"/>
 </shape>

tile_mode.xml

<?xml version="1.0" encoding="utf-8"?>
<bitmap xmlns:android="http://schemas.android.com/apk/res/android"
android:src="@drawable/background"
android:tileMode="repeat" />

layout.xml

<?xml version="1.0" encoding="utf-8"?>
<LinearLayout xmlns:android="http://schemas.android.com/apk/res/android"
    android:orientation="vertical"
    android:layout_width="fill_parent"
    android:layout_height="fill_parent"
    android:gravity="center"
    >
<LinearLayout 
     android:padding="4dip"
    android:orientation="vertical"
    android:layout_width="wrap_content"
    android:layout_height="wrap_content"
    android:background="@drawable/back"
    android:gravity="center_horizontal"
    >
<LinearLayout  
    android:layout_width="wrap_content" 
    android:layout_height="wrap_content" 
   android:background="@drawable/tile_mode"
    />
</LinearLayout>  
</LinearLayout>

更新

经过大量搜索,我找到了一个解决方案,该方案已经在 stackoverflow 上发布。

将图像更改为圆角

如何使ImageView具有圆角

步骤1@

main.xml

 <RelativeLayout xmlns:android="http://schemas.android.com/apk/res/android"
        xmlns:tools="http://schemas.android.com/tools"
        android:layout_width="match_parent"
        android:layout_height="match_parent"
        android:gravity="center"
        tools:context=".MainActivity" >

        <ImageView
            android:id="@+id/image"
            android:layout_width="wrap_content"
            android:layout_height="wrap_content"
            android:layout_centerHorizontal="true"

          />

    </RelativeLayout>

制作一个使用画布将位图进行圆角处理的函数。

public static Bitmap getRoundedCornerBitmap(Bitmap bitmap, int pixels) {
        Bitmap output = Bitmap.createBitmap(bitmap.getWidth(), bitmap
                .getHeight(), Config.ARGB_8888);
        Canvas canvas = new Canvas(output);

        final int color = 0xff424242;
        final Paint paint = new Paint();
        final Rect rect = new Rect(0, 0, bitmap.getWidth(), bitmap.getHeight());
        final RectF rectF = new RectF(rect);
        final float roundPx = pixels;

        paint.setAntiAlias(true);
        canvas.drawARGB(0, 0, 0, 0);
        paint.setColor(color);
        canvas.drawRoundRect(rectF, roundPx, roundPx, paint);

        paint.setXfermode(new PorterDuffXfermode(Mode.SRC_IN));
        canvas.drawBitmap(bitmap, rect, rect, paint);

        return output;
    }

第三步 @

public class MainActivity extends Activity {

    @Override
    protected void onCreate(Bundle savedInstanceState) {
        super.onCreate(savedInstanceState);
        setContentView(R.layout.main);
        ImageView image=(ImageView)findViewById(R.id.image);


        Bitmap bitmap = BitmapFactory.decodeResource(getResources(), R.drawable.testing);


    image.setImageBitmap(getRoundedCornerBitmap(bitmap, 20));
我是这样的<layer-list xmlns:android="http://schemas.android.com/apk/res/android">
<item android:drawable="@drawable/tile_mode" />
- Goofy
关于getRoundedCornerBitmap,是否可以在不创建新位图的情况下完成?也许通过使用一个包装位图并决定不绘制角落(使它们变圆)的可绘制对象来实现? - android developer
您IP地址为143.198.54.68,由于运营成本限制,当前对于免费用户的使用频率限制为每个IP每72小时10次对话,如需解除限制,请点击左下角设置图标按钮(手机用户先点击左上角菜单按钮)。 - AmmY
这个答案需要编辑,第一部分没有起作用。 - Yuriy
你也可以使用 RoundedBitmapDrawableFactory.create(getResources(), bitmap):https://dev59.com/0mMl5IYBdhLWcg3wp4ak#33698127 - Ultimo_m
显示剩余9条评论

3

将原始位图传递给以下函数,您将获得一个圆形位图作为结果:)。希望这能帮助某些人。

 public Bitmap getRoundedBitmap(Bitmap bitmap) {
        Bitmap resultBitmap;
        int originalWidth = bitmap.getWidth();
        int originalHeight = bitmap.getHeight();
        float r;

        if (originalWidth > originalHeight) {
            resultBitmap = Bitmap.createBitmap(originalHeight, originalHeight,
                    Bitmap.Config.ARGB_8888);
            r = originalHeight / 2;
        } else {
            resultBitmap = Bitmap.createBitmap(originalWidth, originalWidth,
                    Bitmap.Config.ARGB_8888);
            r = originalWidth / 2;
        }

        Canvas canvas = new Canvas(resultBitmap);

        final Paint paint = new Paint();
        final Rect rect = new Rect(ConstsCore.ZERO_INT_VALUE,
                ConstsCore.ZERO_INT_VALUE, originalWidth, originalHeight);

        paint.setAntiAlias(true);
        canvas.drawARGB(ConstsCore.ZERO_INT_VALUE, ConstsCore.ZERO_INT_VALUE,
                ConstsCore.ZERO_INT_VALUE, ConstsCore.ZERO_INT_VALUE);
        canvas.drawCircle(r, r, r, paint);
        paint.setXfermode(new PorterDuffXfermode(PorterDuff.Mode.SRC_IN));
        canvas.drawBitmap(bitmap, rect, rect, paint);

        return resultBitmap;
    }

2

好的,让我们尝试以下方式:

     <?xml version="1.0" encoding="utf-8"?>
 <shape
    android:shape="rectangle" xmlns:android="http://schemas.android.com/apk/res/android">
    <corners android:radius="30dp"/>
    <stroke android:width="2dp" android:color="#000000"/>
</shape>

<LinearLayout
    android:id="@+id/frame1"
    android:background="@drawable/corner_background"
    android:layout_width="fill_parent"
    android:layout_height="wrap_content"
    android:padding="5dp"
    >
    <ImageView 
    android:layout_width="wrap_content"
    android:layout_height="wrap_content"
    android:src="@drawable/background" 
    />
</LinearLayout>

我该如何引用我的位图 XML? - Goofy
你不需要使用自己的位图图像,只需使用我的XML图像文件名即可处理它,你只需放置相同的位图档案。让我知道。 - Bhavdip Sagar
对于边缘的更改,请在我发送给你的以下代码中更改:<stroke android:width="5dp" android:color="#000000"/> - Bhavdip Sagar
好的,让我们试试 <?xml version="1.0" encoding="utf-8"?> <shape android:shape="rectangle" xmlns:android="http://schemas.android.com/apk/res/android"> <corners android:radius="30dp"/> <stroke android:width="2dp" android:color="#000000"/> </shape><LinearLayout android:id="@+id/frame1" android:background="@drawable/corner_background" android:layout_width="fill_parent" android:layout_height="wrap_content"> </LinearLayout> - Bhavdip Sagar
让我们在聊天中继续这个讨论。点击此处进入聊天室 - Bhavdip Sagar
显示剩余2条评论

2

由于我在变量赋值方面遇到了错误,RobinHood的回答对我很有用,但需要做一些修改。

我不得不更改以下这行代码:

        paint.setXfermode(new PorterDuffXfermode(Mode.SRC_IN));

从这一行开始:

        paint.setXfermode(new PorterDuffXfermode(PorterDuff.Mode.SRC_IN));        

把我的完整代码变成这样:
public class MainActivity extends Activity {

@Override
protected void onCreate(Bundle savedInstanceState) {
    super.onCreate(savedInstanceState);

    requestWindowFeature(Window.FEATURE_NO_TITLE);
    this.getWindow().setFlags(WindowManager.LayoutParams.FLAG_FULLSCREEN,WindowManager.LayoutParams.FLAG_FULLSCREEN);

    setContentView(R.layout.activity_main);

    TextView textViewTitle = (TextView) findViewById(R.id.MYTEXTIDHERE);
    textViewTitle.setText("Some Text");

    ImageButton imageButtonSetter = (ImageButton) findViewById(R.id.MYIMAGEIDHERE);
    Bitmap myBitmap = BitmapFactory.decodeResource(getResources(), R.drawable.MYIMAGENAMEHERE);     
    imageButtonSetter.setImageBitmap(getRoundedCornerBitmap(myBitmap, 40));
}   

public static Bitmap getRoundedCornerBitmap(Bitmap bitmap, int pixels) {
    Bitmap output = Bitmap.createBitmap(bitmap.getWidth(), bitmap
            .getHeight(), Config.ARGB_8888);
    Canvas canvas = new Canvas(output);

    final int color = 0xff424242;
    final Paint paint = new Paint();
    final Rect rect = new Rect(0, 0, bitmap.getWidth(), bitmap.getHeight());
    final RectF rectF = new RectF(rect);
    final float roundPx = pixels;

    paint.setAntiAlias(true);
    canvas.drawARGB(0, 0, 0, 0);
    paint.setColor(color);
    canvas.drawRoundRect(rectF, roundPx, roundPx, paint);
    paint.setXfermode(new PorterDuffXfermode(PorterDuff.Mode.SRC_IN));        
    canvas.drawBitmap(bitmap, rect, rect, paint);

    return output;
}

2
实际上,我制作了一个完全满足您需求的库,您不必再费心处理那些xml文件。
使用这个开源项目,您可以像下面这样设置不同的角半径,并设置边框(宽度和颜色)等等。希望它能对您有所帮助。
图片:Rounded ImageView inside CardView
项目链接:https://github.com/pungrue26/SelectableRoundedImageView

0
<?xml version="1.0" encoding="utf-8"?>

<item>
    <bitmap
        android:src="@drawable/bg_striped_img"
        android:tileMode="repeat" />
</item>
<item android:left="-20dp" android:top="-20dp" android:right="-20dp" android:bottom="-20dp">
    <shape android:shape="oval" >
        <stroke
            android:width="20dp"
            android:color="#ffffffff" />

        <solid android:color="#00000000" />

        <size
            android:height="120dp"
            android:width="120dp" />
    </shape>
</item>

    <item >
    <shape android:shape="oval" >
        <stroke
            android:width="1dp"
            android:color="#ff999999" />

        <solid android:color="#00000000" />

        <size
            android:height="120dp"
            android:width="120dp" />
    </shape>
</item>


0

尝试像这样返回你的back.xml文件。

<?xml version="1.0" encoding="UTF-8"?>

<shape xmlns:android="http://schemas.android.com/apk/res/android" android:shape="rectangle"> 
<solid android:color="#ffffffff"/>    

<stroke android:width="3dp"
        android:color="#ff000000"
        />

<padding android:left="1dp"
         android:top="1dp"
         android:right="1dp"
         android:bottom="1dp"
         /> 

<corners android:bottomRightRadius="7dp" android:bottomLeftRadius="7dp" 
 android:topLeftRadius="7dp" android:topRightRadius="7dp"/> 
</shape>

在哪里添加平铺模式为repeat的位图XML? - Goofy

0
今天我遇到了类似的问题,只不过我的图片是谷歌地图。你实际上需要隐藏角落,而做法是创建一个如下所示的9Patch:

enter image description here

并将其应用为覆盖整个布局或覆盖您的布局的另一个布局的背景。 请查看以下链接获取更多信息:

有没有一种方法可以实现Mapfragment的圆角?

我实际上已经去了这个网站:http://www.sumopaint.com/app/
并手工绘制了它,您可以使用我的示例并更改颜色以满足您的喜好。 你可能需要下一个:

enter image description here

您可以在以下链接中获取有关如何创建9Patch的更多信息:

http://radleymarx.com/blog/simple-guide-to-9-patch/

http://android9patch.blogspot.co.il/


请指导我如何做,我已经卡了很长时间了。 - Goofy
嘿,怎么做呢?我需要创建一个像这样的图像,并用这个图像隐藏它? - Goofy
角落周围的颜色会是什么?白色吗? - Emil Adz
那么这种方式对你没有帮助。 - Emil Adz

网页内容由stack overflow 提供, 点击上面的
可以查看英文原文,
原文链接