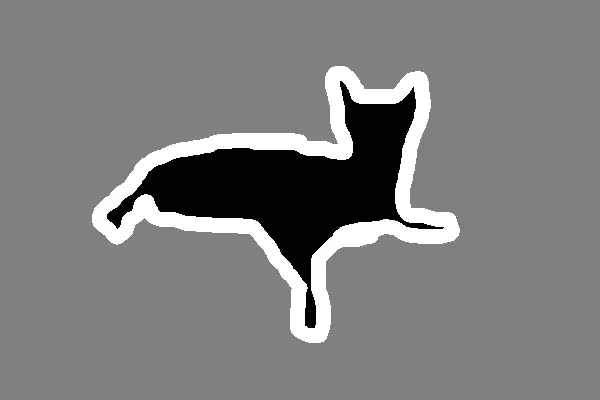
由于它们仅包含0-255范围内介于0-2之间的像素值,因此trimap看起来是黑色的,其中:
以文本形式查看像素:
identify -verbose Abyssinian_1trimap.png | more
输出
  Histogram:
     22938: (  1,  1,  1) #010101 gray(1)
    198766: (  2,  2,  2) #020202 gray(2)
     18296: (  3,  3,  3) #030303 gray(3)
如果你对修剪映射进行对比拉伸,那么可以看得更好。我在这里使用的是 Abyssinian1 图像:
convert Abyssinian_1trimap.png -auto-level trimap.jpg
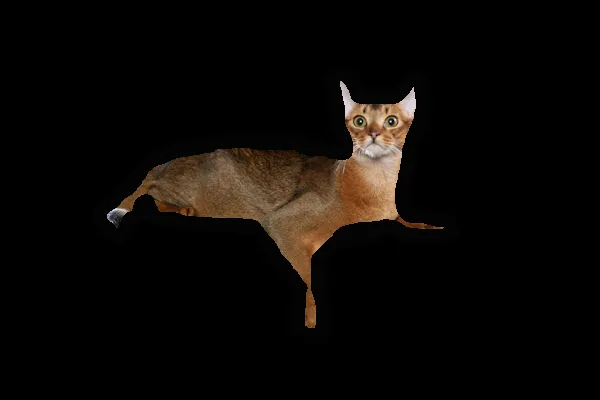
如果您将拍摄的照片与修剪地图相结合,其中所有
1 像素是白色的,所有
2 像素是黑色的,所有
3 像素是白色的,并使用
darken 混合模式进行混合,则可得到您想要的效果:
convert Abyssinian_1.jpg \( Abyssinian_1trimap.png -fill white -opaque "rgb(1,1,1)" -opaque "rgb(3,3,3)" -fill black -opaque "rgb(2,2,2)" \) -compose darken -composite pet.png
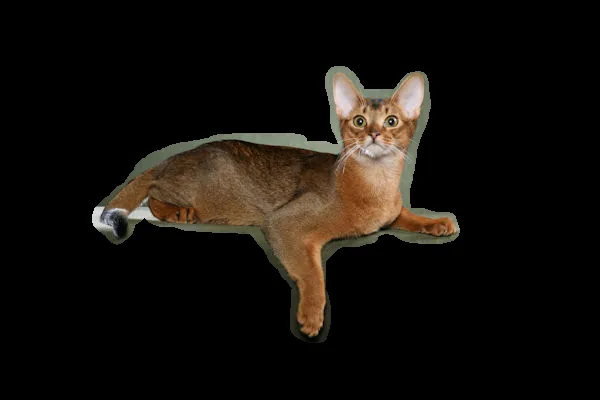
如果您想要边框和宠物,请这样做:
convert Abyssinian_1.jpg \( Abyssinian_1trimap.png -fill white -opaque "rgb(1,1,1)" -opaque "rgb(3,3,3)" -fill black -opaque "rgb(2,2,2)" \) -compose darken -composite pet.png
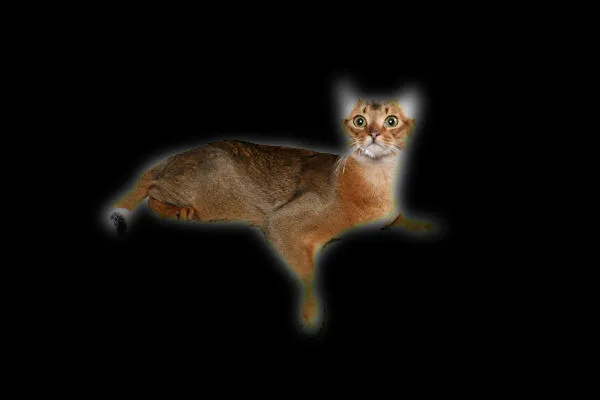
您也可以尝试模糊遮罩以软化边缘:
convert Abyssinian_1.jpg \( Abyssinian_1trimap.png -fill white -opaque "rgb(1,1,1)" -fill black -opaque "rgb(3,3,3)" -opaque "rgb(2,2,2)" -blur 0x8 \) -compose darken -composite pet.png
抱歉,我使用了
ImageMagick 进行操作,因为我发现它更容易使用,并且它已经安装在大多数 Linux 发行版上,同时也适用于 macOS 和 Windows。对于 OpenCV,原理是相同的。