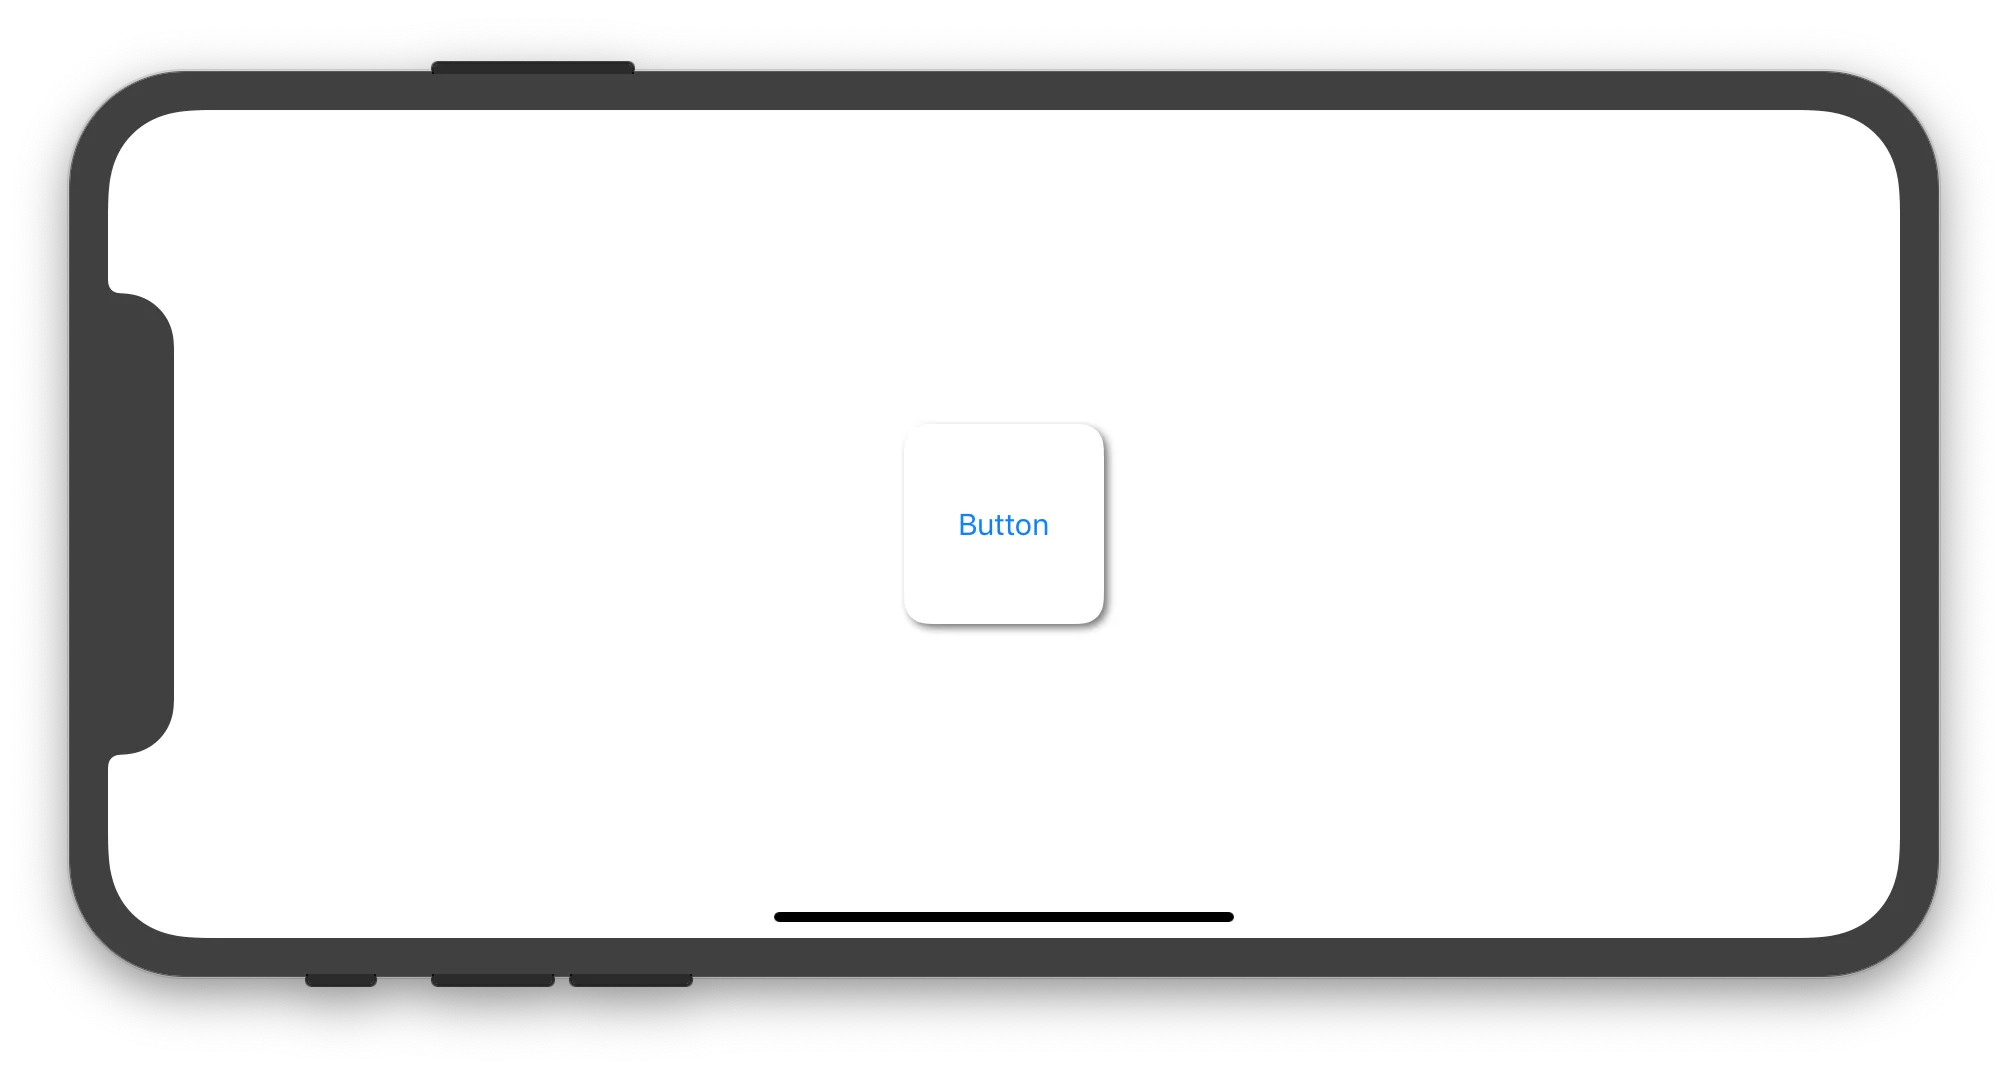
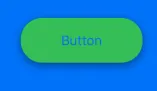
Swift - 圆角和阴影问题

108

我试图创建一个带有圆角阴影的按钮。无论我如何尝试修改,按钮都无法正确显示。我已经尝试了masksToBounds = falsemasksToBounds = true,但是要么圆角可以正常工作而阴影不显示,要么阴影可以正常工作而圆角无法剪裁按钮的角落。

import UIKit
import QuartzCore

@IBDesignable
class Button : UIButton
{
    @IBInspectable var masksToBounds: Bool    = false                {didSet{updateLayerProperties()}}
    @IBInspectable var cornerRadius : CGFloat = 0                    {didSet{updateLayerProperties()}}
    @IBInspectable var borderWidth  : CGFloat = 0                    {didSet{updateLayerProperties()}}
    @IBInspectable var borderColor  : UIColor = UIColor.clearColor() {didSet{updateLayerProperties()}}
    @IBInspectable var shadowColor  : UIColor = UIColor.clearColor() {didSet{updateLayerProperties()}}
    @IBInspectable var shadowOpacity: CGFloat = 0                    {didSet{updateLayerProperties()}}
    @IBInspectable var shadowRadius : CGFloat = 0                    {didSet{updateLayerProperties()}}
    @IBInspectable var shadowOffset : CGSize  = CGSizeMake(0, 0)     {didSet{updateLayerProperties()}}

    override func drawRect(rect: CGRect)
    {
        updateLayerProperties()
    }

    func updateLayerProperties()
    {
        self.layer.masksToBounds = masksToBounds
        self.layer.cornerRadius = cornerRadius
        self.layer.borderWidth = borderWidth
        self.layer.borderColor = borderColor.CGColor
        self.layer.shadowColor = shadowColor.CGColor
        self.layer.shadowOpacity = CFloat(shadowOpacity)
        self.layer.shadowRadius = shadowRadius
        self.layer.shadowOffset = shadowOffset
    }
}

你需要将阴影和剪辑放在不同的图层上。在drawRect中设置图层属性不是一个很好的主意,最好将它们放在initWithCoder中。 - David Berry
仅供谷歌搜索此处的任何人参考,正如经常发生在非常古老的问题上,这里的顶级答案虽然通常是正确的,但现在有一些关键错误。 (我提供了一个更正的答案。)大多数人,特别是我,盲目地从顶部SO答案中复制和粘贴 - 如果它是一个非常古老的QA,请小心!(现在是2020年 - 5年后有人将不得不替换我的答案!) - Fattie
如果您的按钮有图像,则需要为按钮的imageView添加圆角。这将是最简单的方法。 - Garnik
14个回答

171
以下是Swift 5 / iOS 12代码,展示了如何设置UIButton的子类,使其可以创建带有圆角和阴影的实例:
import UIKit

final class CustomButton: UIButton {

    private var shadowLayer: CAShapeLayer!

    override func layoutSubviews() {
        super.layoutSubviews()

        if shadowLayer == nil {
            shadowLayer = CAShapeLayer()
            shadowLayer.path = UIBezierPath(roundedRect: bounds, cornerRadius: 12).cgPath
            shadowLayer.fillColor = UIColor.white.cgColor

            shadowLayer.shadowColor = UIColor.darkGray.cgColor
            shadowLayer.shadowPath = shadowLayer.path
            shadowLayer.shadowOffset = CGSize(width: 2.0, height: 2.0)
            shadowLayer.shadowOpacity = 0.8
            shadowLayer.shadowRadius = 2

            layer.insertSublayer(shadowLayer, at: 0)
            //layer.insertSublayer(shadowLayer, below: nil) // also works
        }        
    }

}

根据您的需求,您可以在Storyboard中添加一个UIButton并将其类设置为CustomButton,或者您可以通过编程方式创建一个CustomButton实例。以下UIViewController实现展示了如何编程创建和使用CustomButton实例:

import UIKit

class ViewController: UIViewController {

    override func viewDidLoad() {
        super.viewDidLoad()

        let button = CustomButton(type: .system)
        button.setTitle("Button", for: .normal)
        view.addSubview(button)

        button.translatesAutoresizingMaskIntoConstraints = false
        let horizontalConstraint = button.centerXAnchor.constraint(equalTo: view.centerXAnchor)
        let verticalConstraint = button.centerYAnchor.constraint(equalTo: view.centerYAnchor)        
        let widthConstraint = button.widthAnchor.constraint(equalToConstant: 100)
        let heightConstraint = button.heightAnchor.constraint(equalToConstant: 100)
        NSLayoutConstraint.activate([horizontalConstraint, verticalConstraint, widthConstraint, heightConstraint])
    }

}

这段代码在iPhone模拟器中生成了下面的图片:

enter image description here


1
你怎样从主视图控制器 @POB 中调用类? - arled
1
有没有一种方法可以修剪阴影层,只保留可见部分? - JTing
9
由于阴影层是按钮自身图层的子层,而该图层具有 masksToBounds = YES 来显示圆角,那么阴影是否也会被剪裁掉? - mattsson
3
可以正常工作,但我无法再更改按钮背景了。这可能是因为阴影层的填充颜色所致。您有什么建议吗?谢谢! - GrayFox
1
@ImanouPetit 各位,如果你们还在看,这个答案有一个严重的错误。每次运行布局时,你必须-当然!-设置路径(更不用说框架了!!!)!我为了记录放了一个正确的答案,谢谢。 - Fattie
显示剩余11条评论

48

我使用带有阴影圆角的自定义按钮,我可以直接在Storyboard中使用,无需通过编程进行操作

Swift 4

class RoundedButtonWithShadow: UIButton {
    override func awakeFromNib() {
        super.awakeFromNib()
        self.layer.masksToBounds = false
        self.layer.cornerRadius = self.frame.height/2
        self.layer.shadowColor = UIColor.black.cgColor
        self.layer.shadowPath = UIBezierPath(roundedRect: self.bounds, cornerRadius: self.layer.cornerRadius).cgPath
        self.layer.shadowOffset = CGSize(width: 0.0, height: 3.0)
        self.layer.shadowOpacity = 0.5
        self.layer.shadowRadius = 1.0
    }
}

输入图像描述


快速简便。 - Devbot10
3
当我把代码放回“layoutSubviews()”中时,它对我很有帮助。 - Yash Bedi

18
为了进一步解释Imanou的帖子,可以在自定义按钮类中通过编程方式添加阴影层。
@IBDesignable class CustomButton: UIButton {
    var shadowAdded: Bool = false

    @IBInspectable var cornerRadius: CGFloat = 0 {
        didSet {
            layer.cornerRadius = cornerRadius
            layer.masksToBounds = cornerRadius > 0
        }
    }

    override func drawRect(rect: CGRect) {
        super.drawRect(rect)

        if shadowAdded { return }
        shadowAdded = true

        let shadowLayer = UIView(frame: self.frame)
        shadowLayer.backgroundColor = UIColor.clearColor()
        shadowLayer.layer.shadowColor = UIColor.darkGrayColor().CGColor
        shadowLayer.layer.shadowPath = UIBezierPath(roundedRect: bounds, cornerRadius: self.cornerRadius).CGPath
        shadowLayer.layer.shadowOffset = CGSize(width: 1.0, height: 1.0)
        shadowLayer.layer.shadowOpacity = 0.5
        shadowLayer.layer.shadowRadius = 1
        shadowLayer.layer.masksToBounds = true
        shadowLayer.clipsToBounds = false

        self.superview?.addSubview(shadowLayer)
        self.superview?.bringSubviewToFront(self)
    }
}

3
你正在遮盖图层的阴影,但我真的不建议将阴影视图放在按钮的父视图上。 - mattsson

15

另一种获取更加易用且一致的按钮的方法。

Swift 2:

func getImageWithColor(color: UIColor, size: CGSize, cornerRadius:CGFloat) -> UIImage {
    let rect = CGRectMake(0, 0, size.width, size.height)
    UIGraphicsBeginImageContextWithOptions(size, false, 1)
    UIBezierPath(
        roundedRect: rect,
        cornerRadius: cornerRadius
        ).addClip()
    color.setFill()
    UIRectFill(rect)
    let image: UIImage = UIGraphicsGetImageFromCurrentImageContext()
    UIGraphicsEndImageContext()
    return image
}

let button = UIButton(type: .Custom)
button.frame = CGRectMake(20, 20, 200, 50)
button.setTitle("My Button", forState: UIControlState.Normal)
button.setTitleColor(UIColor.blackColor(), forState: UIControlState.Normal)
self.addSubview(button)

let image = getImageWithColor(UIColor.whiteColor(), size: button.frame.size, cornerRadius: 5)
button.setBackgroundImage(image, forState: UIControlState.Normal)

button.layer.shadowRadius = 5
button.layer.shadowColor = UIColor.blackColor().CGColor
button.layer.shadowOpacity = 0.5
button.layer.shadowOffset = CGSizeMake(0, 1)
button.layer.masksToBounds = false

Swift 3:

func getImageWithColor(_ color: UIColor, size: CGSize, cornerRadius:CGFloat) -> UIImage? {
    let rect = CGRect(x: 0, y: 0, width: size.width, height: size.height)
    UIGraphicsBeginImageContextWithOptions(size, false, 0)
    color.setFill()
    UIBezierPath(roundedRect: rect, cornerRadius: cornerRadius).addClip()
    color.setFill()
    UIRectFill(rect)
    let image: UIImage = UIGraphicsGetImageFromCurrentImageContext()!
    UIGraphicsEndImageContext()
    return image
}

let button = UIButton(type: .custom)
button.frame = CGRect(x:20, y:20, width:200, height:50)
button.setTitle("My Button", for: .normal)
button.setTitleColor(UIColor.black, for: .normal)
self.addSubview(button)

if let image = getImageWithColor(UIColor.white, size: button.frame.size, cornerRadius: 5) {
    button.setBackgroundImage(image, for: .normal)
}

button.layer.shadowRadius = 5
button.layer.shadowColor = UIColor.black.cgColor
button.layer.shadowOpacity = 0.5
button.layer.shadowOffset = CGSize(width:0, height:1)
button.layer.masksToBounds = false

1
这种方法是最好的,因为您可以为.normal和highlighted设置不同的背景颜色。 - Ryan Heitner
1
不错。尝试了许多不同的方法来使我的按钮具有背景颜色、圆角和阴影效果,但这是唯一有效的方法!谢谢! - Harry Bloom
这是完美的解决方案,感谢您!请注意,如果在程序中使用UITableViewCell内部的UIButton,那么它必须放置在layoutSubviews()函数中。 - bra.Scene
有一个问题,当我在 iPhone 5s 模拟器上测试它(iOS 12.4),按钮标题颜色没有生效,仍然是白色。不幸的是,我没有同样 iOS 版本的实际设备来测试这个问题。我不得不将它移到 layoutSubviews 中才能使其正常工作。不太确定原因。 - CyberMew

12

Swift 5和无需使用"UIBezierPath"

    view.layer.cornerRadius = 15
    view.clipsToBounds = true
    view.layer.masksToBounds = false
    view.layer.shadowRadius = 7
    view.layer.shadowOpacity = 0.6
    view.layer.shadowOffset = CGSize(width: 0, height: 5)
    view.layer.shadowColor = UIColor.red.cgColor

7
它不会在视图上添加任何圆角,你需要使用 UIBezierPath 是为了提高性能,以便在需要重用特定视图的情况下使用。 - Sharkes Monken
1
@SharkesMonken "从来没有" 真的吗!!!?请再次检查。我在整个项目中都在使用这种方法。如果您有任何疑问,请查看此视频 https://youtu.be/5qdF5ocDU7w - Hari R Krishna
请检查视频。 - Hari R Krishna
如果按钮有背景图片,则无法正常工作。图像的角半径不会被设置。 - varoons
1
@SharkesMonken 我在寻找有关阴影的解决方案,看到了你的评论。很高兴认识你,伙计。 - Vizllx
我猜它可能存在一些缺陷和隐藏问题,但目前使用UIButton只有文本的情况下它运行良好。 - atereshkov

4
此代码重构以支持任何视图。将您的视图从这个类派生,它应该具有圆角。如果您将像UIVisualEffectView这样的子视图添加到此视图中,则可能需要在该UIVisualEffectView上使用相同的圆角,否则它将没有圆角。 UIView的带阴影的圆角-屏幕截图还使用了模糊效果,这是一个正常的UIVisualEffectView,它也具有圆角
/// Inspiration: https://dev59.com/_WAf5IYBdhLWcg3wcyWr#25475536
class ViewWithRoundedcornersAndShadow: UIView {
    private var theShadowLayer: CAShapeLayer?

    override func layoutSubviews() {
        super.layoutSubviews()

        if self.theShadowLayer == nil {
            let rounding = CGFloat.init(22.0)

            let shadowLayer = CAShapeLayer.init()
            self.theShadowLayer = shadowLayer
            shadowLayer.path = UIBezierPath.init(roundedRect: bounds, cornerRadius: rounding).cgPath
            shadowLayer.fillColor = UIColor.clear.cgColor

            shadowLayer.shadowPath = shadowLayer.path
            shadowLayer.shadowColor = UIColor.black.cgColor
            shadowLayer.shadowRadius = CGFloat.init(3.0)
            shadowLayer.shadowOpacity = Float.init(0.2)
            shadowLayer.shadowOffset = CGSize.init(width: 0.0, height: 4.0)

            self.layer.insertSublayer(shadowLayer, at: 0)
        }
    }
}

3

带阴影的圆角

简单易懂的方法!!!

extension CALayer {
    func applyCornerRadiusShadow(
        color: UIColor = .black,
        alpha: Float = 0.5,
        x: CGFloat = 0,
        y: CGFloat = 2,
        blur: CGFloat = 4,
        spread: CGFloat = 0,
        cornerRadiusValue: CGFloat = 0)
    {
        cornerRadius = cornerRadiusValue
        shadowColor = color.cgColor
        shadowOpacity = alpha
        shadowOffset = CGSize(width: x, height: y)
        shadowRadius = blur / 2.0
        if spread == 0 {
            shadowPath = nil
        } else {
            let dx = -spread
            let rect = bounds.insetBy(dx: dx, dy: dx)
            shadowPath = UIBezierPath(rect: rect).cgPath
        }
    }
}

代码的使用

btn.layer.applyCornerRadiusShadow(color: .black, 
                            alpha: 0.38, 
                            x: 0, y: 3, 
                            blur: 10, 
                            spread: 0, 
                            cornerRadiusValue: 24)

不需要 maskToBound

请确认 clipsToBounds 为 false。

输出结果

enter image description here


谢谢你提供的代码,但是对我来说不起作用,为什么?请查看这张图片:https://imgur.com/dY5M3BL - iOS.Lover
@Mc.Lover 你使用了maskToBound吗?还是clipsToBounds? - Pankaj Bhalala

3

2020语法的精确解决方案

import UIKit
class ColorAndShadowButton: UIButton {
    override init(frame: CGRect) { super.init(frame: frame), common() }
    required init?(coder aDecoder: NSCoder) { super.init(coder: aDecoder), common() }
    private func common() {
        // UIButton is tricky: you MUST set the clear bg in bringup;  NOT in layout
        backgroundColor = .clear
        clipsToBounds = false
        layer.insertSublayer(colorAndShadow, below: layer)
    }
    
   lazy var colorAndShadow: CAShapeLayer = {
        let s = CAShapeLayer()
        // set your button color HERE (NOT on storyboard)
        s.fillColor = UIColor.black.cgColor
        // now set your shadow color/values
        s.shadowColor = UIColor.red.cgColor
        s.shadowOffset = CGSize(width: 0, height: 10)
        s.shadowOpacity = 1
        s.shadowRadius = 10
        // now add the shadow
        layer.insertSublayer(s, at: 0)
        return s
    }()
    
    override func layoutSubviews() {
        super.layoutSubviews()
        // you MUST layout these two EVERY layout cycle:
        colorAndShadow.frame = bounds
        colorAndShadow.path = UIBezierPath(roundedRect: bounds, cornerRadius: 12).cgPath
    }
}

enter image description here

  • 请注意,这里非常古老的顶部答案是正确的,但存在严重错误

请注意,在iOS中,UIButtonUIView有很大的区别。

  • 由于iOS中的奇怪行为,您必须在初始化时设置背景颜色(当然,在这种情况下必须是清晰的),而不是在布局中设置。您可以在Storyboard中将其设置为透明(但通常您会单击它以成为一些实心颜色,以便在Storyboard中工作时可以看到它)。

通常,在iOS中,阴影/圆角的组合是真正麻烦的。类似的解决方案:

https://dev59.com/IFgR5IYBdhLWcg3wUL4J#57465440 - 图像 + 圆角 + 阴影
https://dev59.com/I10b5IYBdhLWcg3wGN0s#41553784 - 两个角的问题
https://dev59.com/R6Dia4cB1Zd3GeqPG6WQ#59092828 - "阴影 + 孔" 或 "发光框" 问题
https://dev59.com/s1wY5IYBdhLWcg3w7rr6#57400842 - "边框和间隙" 问题
https://dev59.com/yGox5IYBdhLWcg3w9o-i#57514286 - 基本 "添加" 贝塞尔曲线


backgroundAndShadow 是什么? - CyberMew
抱歉应该是colorAndShadow,我认为需要更改。 - Fattie

2
为了改进PiterPan的回答并在Swift 3中展示真正的阴影(而不仅仅是没有模糊的背景),您可以使用圆形按钮。
override func viewDidLoad() {
    super.viewDidLoad()
    myButton.layer.masksToBounds = false
    myButton.layer.cornerRadius = myButton.frame.height/2
    myButton.clipsToBounds = true
}

override func viewDidLayoutSubviews() {
    addShadowForRoundedButton(view: self.view, button: myButton, opacity: 0.5)
}

func addShadowForRoundedButton(view: UIView, button: UIButton, opacity: Float = 1) {
    let shadowView = UIView()
    shadowView.backgroundColor = UIColor.black
    shadowView.layer.opacity = opacity
    shadowView.layer.shadowRadius = 5
    shadowView.layer.shadowOpacity = 0.35
    shadowView.layer.shadowOffset = CGSize(width: 0, height: 0)
    shadowView.layer.cornerRadius = button.bounds.size.width / 2
    shadowView.frame = CGRect(origin: CGPoint(x: button.frame.origin.x, y: button.frame.origin.y), size: CGSize(width: button.bounds.width, height: button.bounds.height))
    self.view.addSubview(shadowView)
    view.bringSubview(toFront: button)
}

0

UIButton扩展

许多人建议使用自定义的UIButton类,这是完全可以的。但是如果你像我一样想要一个扩展,那么这里有一个。 使用Swift 5编写。

extension UIButton {
    /// Adds a shadow to the button, with a corner radius
    /// - Parameters:
    ///   - corner: The corner radius to apply to the shadow and button
    ///   - color: The color of the shaodw
    ///   - opacity: The opacity of the shadow
    ///   - offset: The offset of the shadow
    ///   - radius: The radius of the shadow
    func addShadow(corner: CGFloat = 20, color: UIColor = .black, opacity: Float = 0.3, offset: CGSize = CGSize(width: 0, height: 5), radius: CGFloat = 5) {
        let shadowLayer = CAShapeLayer()
        layer.cornerRadius = corner
        shadowLayer.path = UIBezierPath(roundedRect: bounds, cornerRadius: corner).cgPath
        shadowLayer.fillColor = UIColor.clear.cgColor
        shadowLayer.shadowColor = color.cgColor
        shadowLayer.shadowPath = shadowLayer.path
        shadowLayer.shadowOffset = offset
        shadowLayer.shadowOpacity = opacity
        shadowLayer.shadowRadius = radius
        
        layer.insertSublayer(shadowLayer, at: 0)
    }
}

网页内容由stack overflow 提供, 点击上面的
可以查看英文原文,
原文链接