自定义Laravel默认验证电子邮件(更改标题)

5

我正在尝试修改 Laravel 中的默认验证电子邮件,我已经找到了可以更改默认电子邮件内容的文件,但在该文件内部,它只有主题和行,我找不到要更改的电子邮件头部,那么我应该在哪里找到并更改头部的行?

我指的是标题部分:

"Hello" 这个词

文件的代码位于

Vendor/Laravel/Framework/src/illuminate/Auth/Notifications/VerifyEmail.php

protected function buildMailMessage($url)
    {
        return (new MailMessage)
            ->subject(Lang::get('Verify Email Address'))
            ->line(Lang::get('Please click the button below to verify your email address.'))
            ->action(Lang::get('Verify Email Address'), $url)
            ->line(Lang::get('If you did not create an account, no further action is required.'));
    }

请查看此链接 https://dev59.com/uFQK5IYBdhLWcg3wHsZJ - Basharmal
4个回答

5

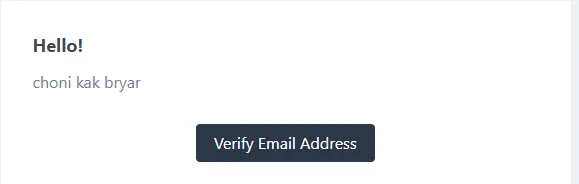
如何自定义Laravel通知邮件模板(头部和底部)

Laravel最初会使用其内核中隐藏的组件,您可以通过执行以下操作导出这些组件:

    php artisan vendor:publish --tag=laravel-mail

它将在你的resources/view/vendor文件夹下创建一个mail和markdown文件夹。在里面,你会找到像layout或header等组件。

创建通知 你想做的是创建一个通知、事件或邮件类,以便在发生某些事情时触发电子邮件。 我决定使用通知。创建任何通知时(您可以通过artisan了解更多有关如何创建通知的信息),您将获得一个类似以下内容的类:

<?php

namespace App\Notifications;

use Illuminate\Bus\Queueable;
use Illuminate\Notifications\Notification;
use Illuminate\Contracts\Queue\ShouldQueue;
use Illuminate\Notifications\Messages\MailMessage;

class UserRegistered extends Notification {
    use Queueable;

    public $user;

    public function __construct($user) {
        $this->user = $user;
    }


    public function via($notifiable) {
        return ['mail'];
    }

    /**
     * Get the mail representation of the notification.
     *
     * @param mixed $notifiable
     * @return \Illuminate\Notifications\Messages\MailMessage
     */
    public function toMail($notifiable) {
        return (new MailMessage)
            ->from('info@sometimes-it-wont-work.com', 'Admin')
            ->subject('Welcome to the the Portal')
            ->markdown('mail.welcome.index', ['user' => $this->user]);
    }

    /**
     * Get the array representation of the notification.
     *
     * @param mixed $notifiable
     * @return array
     */
    public function toArray($notifiable) {
        return [
            //
        ];
    }
}

请注意toMail方法以及类的构造函数,因为我们将向其传递一个对象。还要注意,我们正在使用->markdown('some.blade.php'); 下一步是将此通知推送到工作区。在您的RegisterController中的某个地方,您可能想调用此函数(不涉及如何执行它,无论是同步还是排队...)。不要忘记在顶部包含通知的命名空间。

  $user = User::create([
        'name' => $data['name'],
        'email' => $data['email'],
        'lastname' => $data['lastname'],
        'password' => bcrypt($data['password']),
    ]);

  $user->notify(new UserRegistered($user));

为什么我要深入探讨呢?因为我还想向你展示如何将数据传递到电子邮件模板中。

接下来,你可以打开 resources/views/mail/welcome/index.blade.php(可以是任何文件夹和文件名),并复制粘贴以下内容:

@component('mail::layout')
{{-- Header --}}
@slot('header')
    @component('mail::header', ['url' => config('app.url')])
        Header Title
    @endcomponent
@endslot

{{-- 正文 --}} 这是我们的主要信息 {{ $user }}

{{-- Subcopy --}}
@isset($subcopy)
    @slot('subcopy')
        @component('mail::subcopy')
            {{ $subcopy }}
        @endcomponent
    @endslot
@endisset

  {{-- Footer --}}
    @slot('footer')
    @component('mail::footer')
        © {{ date('Y') }} {{ config('app.name') }}. Super FOOTER!
    @endcomponent
    @endslot
    @endcomponent

现在您可以轻松地将任何图像添加到标题中,或更改页脚中的链接等。 希望这可以帮到您。


5

就像在官方Laravel文档中提到的那样,您可以通过向App\Providers\AuthServiceProviderboot方法添加代码来实现。

use Illuminate\Auth\Notifications\VerifyEmail;
use Illuminate\Notifications\Messages\MailMessage;

public function boot()
{
    // ...

    VerifyEmail::toMailUsing(function ($notifiable, $url) {
        return (new MailMessage)
            ->subject('Verify Email Address')
            ->line('Click the button below to verify your email address.')
            ->action('Verify Email Address', $url);
    });
}

1
谢谢,这绝对是最简单的方法。请确保将此放在AuthServiceProvider而不是AppServiceProvider中。 - Zephni

4

针对您的问题,两个回答都给出了正确的解决方案,即不应该在“vendor”文件夹内修改电子邮件模板。但我认为,您的问题主要关于如何修改“Hello!”字符串,上面的回答并未回答这个问题。 根据 https://laravel.com/api/8.x/Illuminate/Notifications/Messages/MailMessage.html ,您应该使用“greeting” 方法。换句话说,您的代码应该如下:

return (new MailMessage)
        ->greeting(Lang::get('Hi there!'))
        ->subject(Lang::get('Verify Email Address'))
        ->line(Lang::get('Please click the button below to verify your email address.'))
        ->action(Lang::get('Verify Email Address'), $url)
        ->line(Lang::get('If you did not create an account, no further action is required.'));

0

我最终在用户模型中使用了邮件门面。

public function sendPasswordResetNotification($token){
    // $this->notify(new MyCustomResetPasswordNotification($token)); <--- remove this, use Mail instead like below

    $data = [
        $this->email
    ];

    Mail::send('email.reset-password', [
        'fullname'      => $this->fullname,
        'reset_url'     => route('user.password.reset', ['token' => $token, 'email' => $this->email]),
    ], function($message) use($data){
        $message->subject('Reset Password Request');
        $message->to($data[0]);
    });
}

网页内容由stack overflow 提供, 点击上面的
可以查看英文原文,
原文链接