你在代码片段中错过了一个简单的步骤,
cv2.findContours() 最适合用于二值图像,但你只是将灰度图像传递给了
cv2.findContours。我按照以下步骤从背景中分割出苹果:
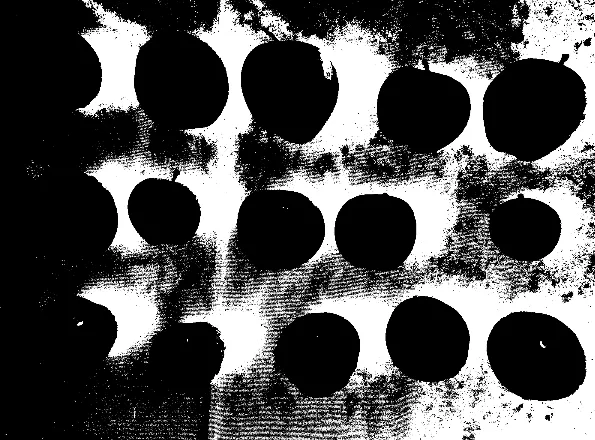
第一步:分割出主要包含灰度像素的背景。
你可以在这里使用 HSV 颜色域,其中饱和度的低值会将背景分割为:
img_hsv = cv2.cvtColor(img_bgr, cv2.COLOR_BGR2HSV_FULL)

# Filter out low saturation values, which means gray-scale pixels(majorly in background)
bgd_mask = cv2.inRange(img_hsv, np.array([0, 0, 0]), np.array([255, 30, 255]))
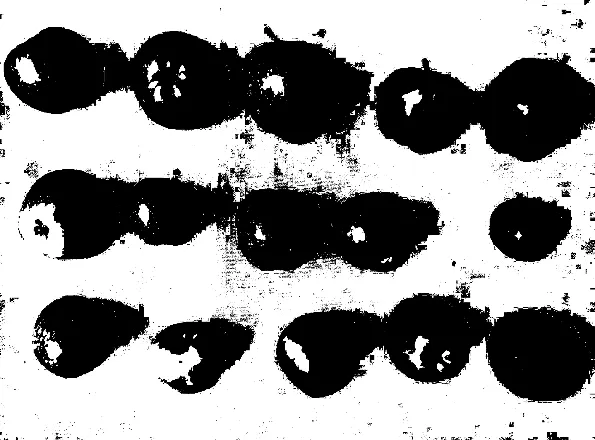
步骤2:对于纯黑像素,饱和度值很突然,因此我们将极端的黑色和白色像素分割:
black_pixels_mask = cv2.inRange(img_bgr, np.array([0, 0, 0]), np.array([70, 70, 70]))
white_pixels_mask = cv2.inRange(img_bgr, np.array([230, 230, 230]), np.array([255, 255, 255]))

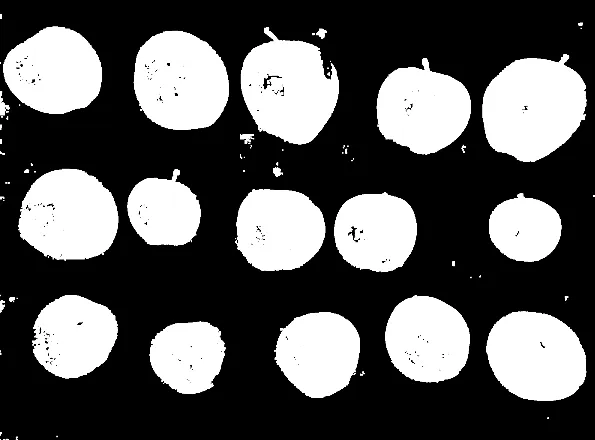
步骤三:合并这些掩模以获取用于cv2.findContours的最终掩模:
final_mask = cv2.max(bgd_mask, black_pixels_mask)
final_mask = cv2.min(final_mask, ~white_pixels_mask)
final_mask = ~final_mask

第四步:现在我们要填补空洞,我们对图像进行侵蚀和膨胀:
final_mask = cv2.erode(final_mask, np.ones((3, 3), dtype=np.uint8))
final_mask = cv2.dilate(final_mask, np.ones((5, 5), dtype=np.uint8))
步骤5:使用cv2.findContours()获取轮廓并根据面积过滤掉较小的轮廓:
im, contours, hierarchy = cv2.findContours(final_mask.copy(), cv2.RETR_EXTERNAL, cv2.CHAIN_APPROX_NONE)
final_contours = []
for contour in contours:
area = cv2.contourArea(contour)
if area > 2000:
final_contours.append(contour)
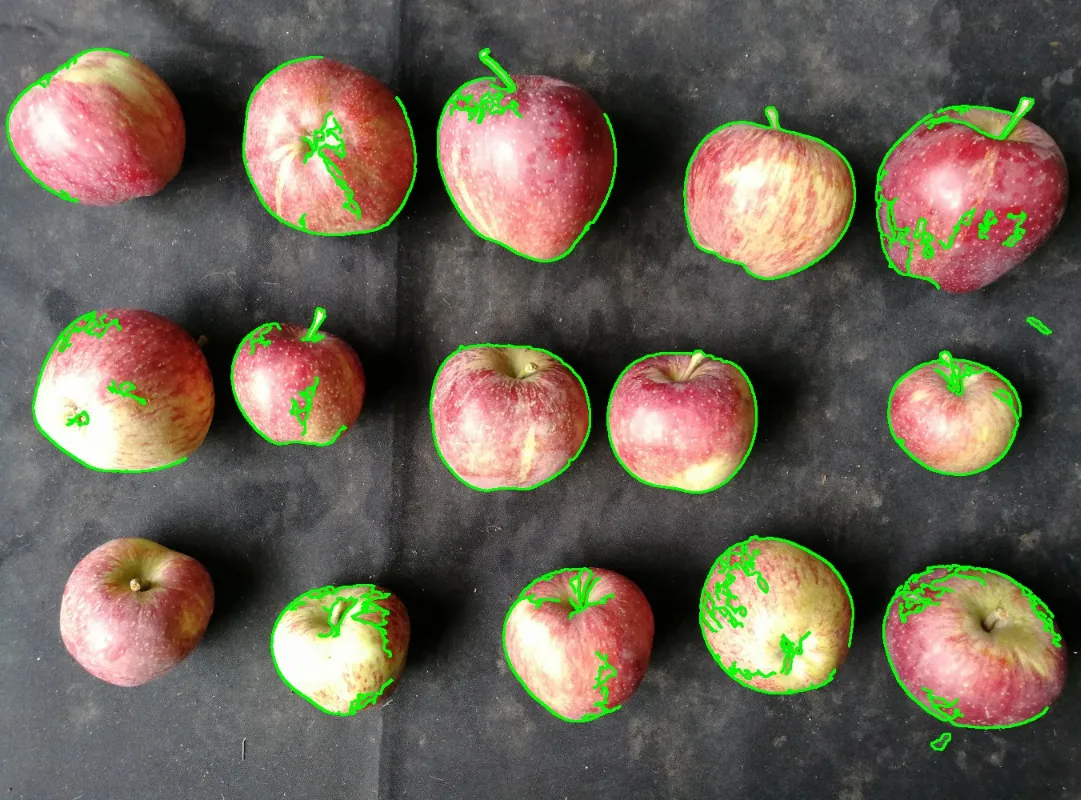
步骤6:显示最终轮廓
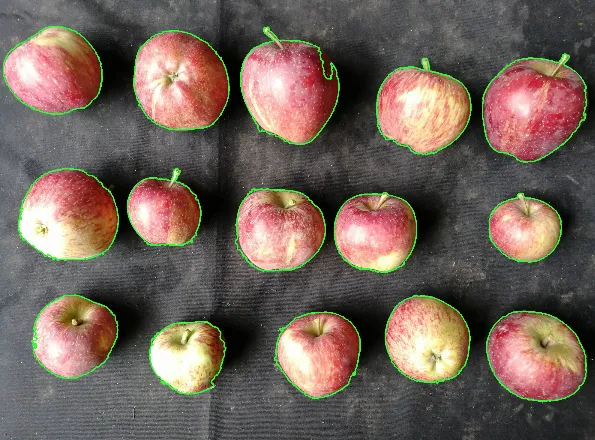
这是完整的代码片段:
import cv2
import numpy as np
img_bgr = cv2.imread("/home/anmol/Downloads/tWuTW.jpg")
img_hsv = cv2.cvtColor(img_bgr, cv2.COLOR_BGR2HSV_FULL)
bgd_mask = cv2.inRange(img_hsv, np.array([0, 0, 0]), np.array([255, 30, 255]))
black_pixels_mask = cv2.inRange(img_bgr, np.array([0, 0, 0]), np.array([70, 70, 70]))
white_pixels_mask = cv2.inRange(img_bgr, np.array([230, 230, 230]), np.array([255, 255, 255]))
final_mask = cv2.max(bgd_mask, black_pixels_mask)
final_mask = cv2.min(final_mask, ~white_pixels_mask)
final_mask = ~final_mask
final_mask = cv2.erode(final_mask, np.ones((3, 3), dtype=np.uint8))
final_mask = cv2.dilate(final_mask, np.ones((5, 5), dtype=np.uint8))
im, contours, hierarchy = cv2.findContours(final_mask.copy(), cv2.RETR_EXTERNAL, cv2.CHAIN_APPROX_NONE)
final_contours = []
for contour in contours:
area = cv2.contourArea(contour)
if area > 2000:
final_contours.append(contour)
for i in xrange(len(final_contours)):
img_bgr = cv2.drawContours(img_bgr, final_contours, i, np.array([50, 250, 50]), 4)
debug_img = img_bgr
debug_img = cv2.resize(debug_img, None, fx=0.3, fy=0.3)
cv2.imwrite("./out.png", debug_img)