这种方法只适用于点。您不需要为此创建掩码。
主要思想是:
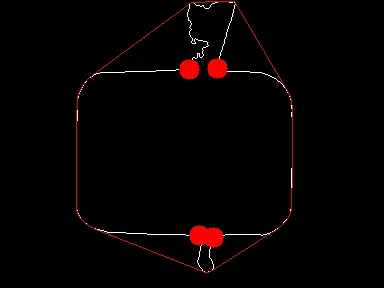
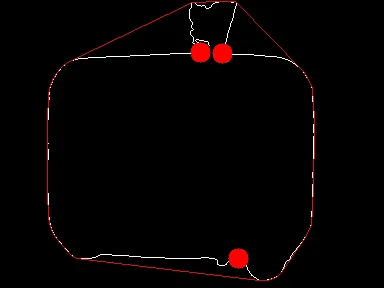
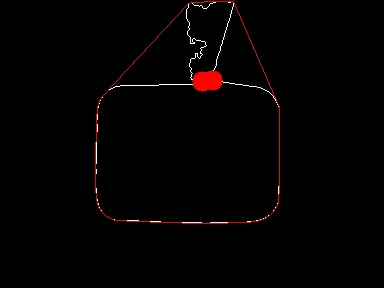
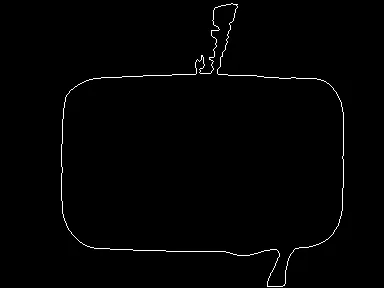
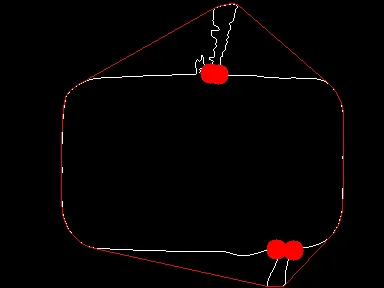
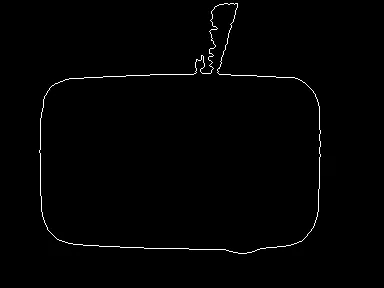
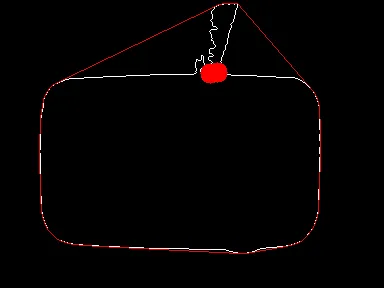
- 在轮廓上查找缺陷
- 如果我找到至少两个缺陷,请找到最近的两个缺陷
- 从轮廓中删除最接近的两个缺陷之间的点
- 在新轮廓上重新开始从1
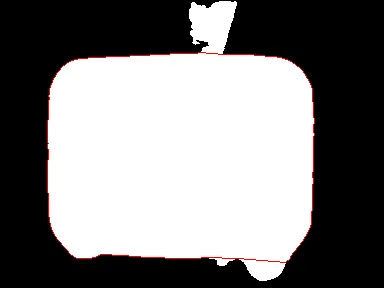
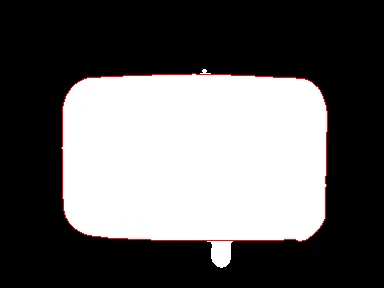
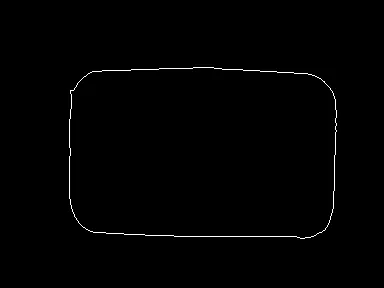
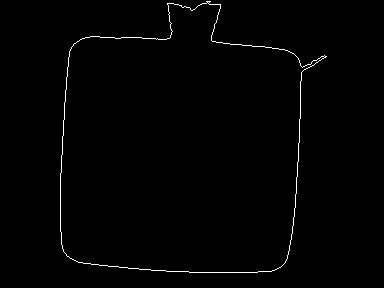
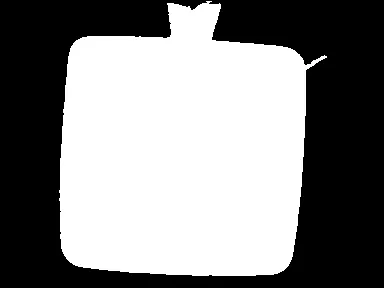
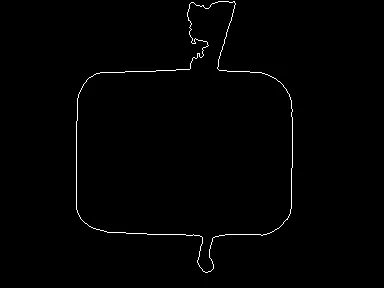
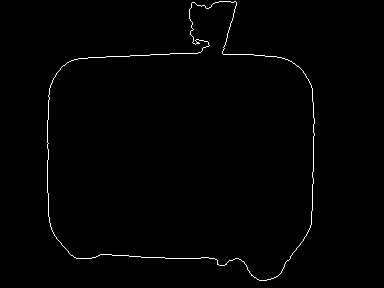
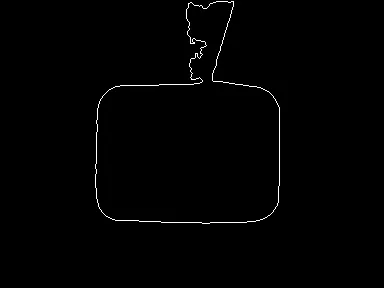
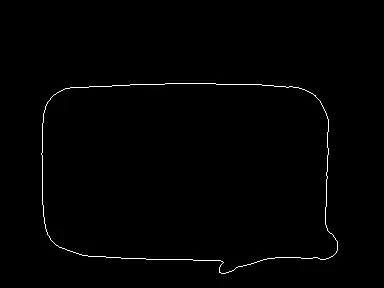
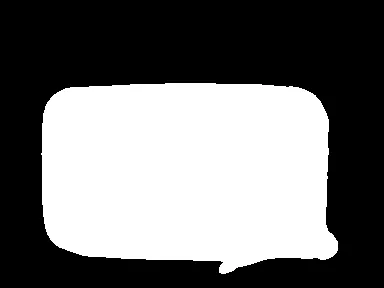
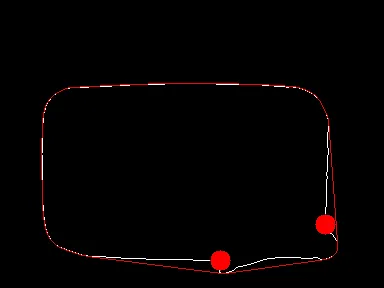
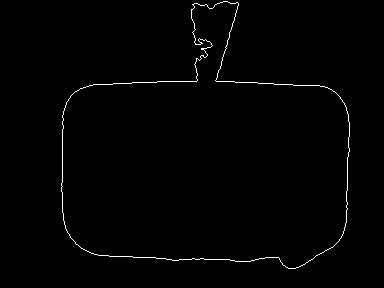
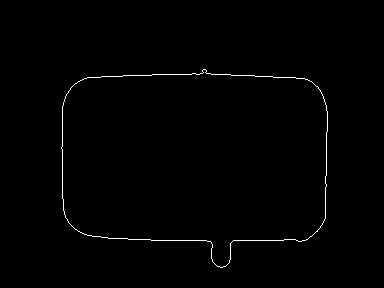
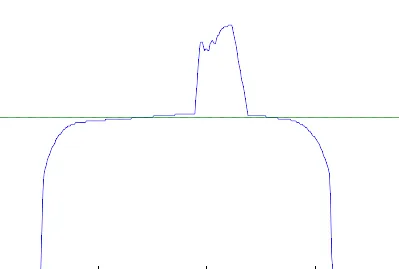
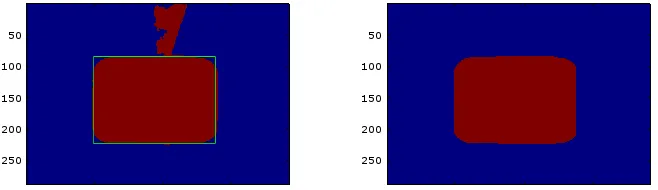
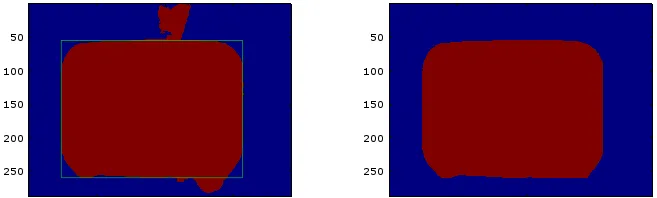
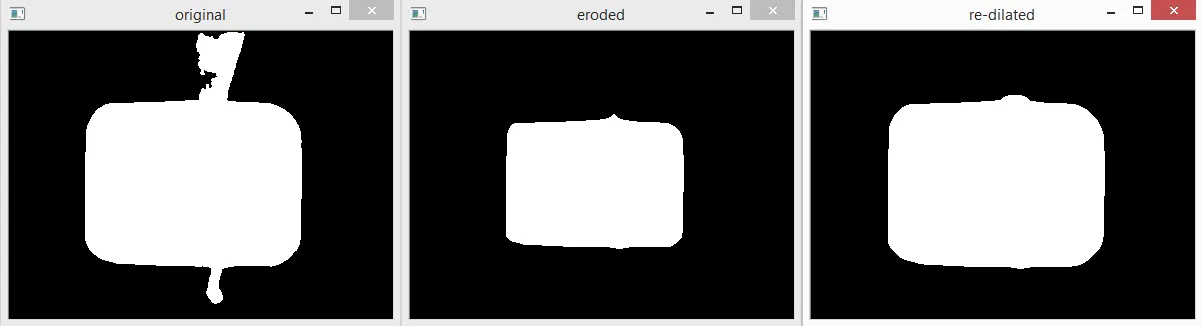
我得到了以下结果。如您所见,对于平滑的缺陷(例如第7张图像),它具有一些缺点,但对于清晰可见的缺陷效果很好。我不知道这是否会解决您的问题,但可以作为一个起点。实践中应该很快(您肯定可以优化下面的代码,特别是“removeFromContour”函数)。此外,此方法的唯一参数是凸性缺陷的数量,因此它适用于小型和大型缺陷斑块。


#include <opencv2/opencv.hpp>
using namespace cv;
using namespace std;
int ed2(const Point& lhs, const Point& rhs)
{
return (lhs.x - rhs.x)*(lhs.x - rhs.x) + (lhs.y - rhs.y)*(lhs.y - rhs.y);
}
vector<Point> removeFromContour(const vector<Point>& contour, const vector<int>& defectsIdx)
{
int minDist = INT_MAX;
int startIdx;
int endIdx;
for (int i = 0; i < defectsIdx.size(); ++i)
{
for (int j = i + 1; j < defectsIdx.size(); ++j)
{
float dist = ed2(contour[defectsIdx[i]], contour[defectsIdx[j]]);
if (minDist > dist)
{
minDist = dist;
startIdx = defectsIdx[i];
endIdx = defectsIdx[j];
}
}
}
if (startIdx <= endIdx)
{
int len1 = endIdx - startIdx;
int len2 = contour.size() - endIdx + startIdx;
if (len2 < len1)
{
swap(startIdx, endIdx);
}
}
else
{
int len1 = startIdx - endIdx;
int len2 = contour.size() - startIdx + endIdx;
if (len1 < len2)
{
swap(startIdx, endIdx);
}
}
vector<Point> out;
if (startIdx <= endIdx)
{
out.insert(out.end(), contour.begin(), contour.begin() + startIdx);
out.insert(out.end(), contour.begin() + endIdx, contour.end());
}
else
{
out.insert(out.end(), contour.begin() + endIdx, contour.begin() + startIdx);
}
return out;
}
int main()
{
Mat1b img = imread("path_to_mask", IMREAD_GRAYSCALE);
Mat3b out;
cvtColor(img, out, COLOR_GRAY2BGR);
vector<vector<Point>> contours;
findContours(img.clone(), contours, RETR_EXTERNAL, CHAIN_APPROX_NONE);
vector<Point> pts = contours[0];
vector<int> hullIdx;
convexHull(pts, hullIdx, false);
vector<Vec4i> defects;
convexityDefects(pts, hullIdx, defects);
while (true)
{
Mat3b dbg;
cvtColor(img, dbg, COLOR_GRAY2BGR);
vector<vector<Point>> tmp = {pts};
drawContours(dbg, tmp, 0, Scalar(255, 127, 0));
vector<int> defectsIdx;
for (const Vec4i& v : defects)
{
float depth = float(v[3]) / 256.f;
if (depth > 2)
{
defectsIdx.push_back(v[2]);
int startidx = v[0]; Point ptStart(pts[startidx]);
int endidx = v[1]; Point ptEnd(pts[endidx]);
int faridx = v[2]; Point ptFar(pts[faridx]);
line(dbg, ptStart, ptEnd, Scalar(255, 0, 0), 1);
line(dbg, ptStart, ptFar, Scalar(0, 255, 0), 1);
line(dbg, ptEnd, ptFar, Scalar(0, 0, 255), 1);
circle(dbg, ptFar, 4, Scalar(127, 127, 255), 2);
}
}
if (defectsIdx.size() < 2)
{
break;
}
pts = removeFromContour(pts, defectsIdx);
convexHull(pts, hullIdx, false);
convexityDefects(pts, hullIdx, defects);
}
vector<vector<Point>> tmp = { pts };
drawContours(out, tmp, 0, Scalar(0, 0, 255), 1);
imshow("Result", out);
waitKey();
return 0;
}
更新
使用近似轮廓(例如在findContours中使用CHAIN_APPROX_SIMPLE)可能更快,但必须使用arcLength()计算轮廓的长度。
这是在removeFromContour的交换部分替换的代码片段:
// Check if intervals are swapped
if (startIdx <= endIdx)
{
    //int len11 = endIdx - startIdx;
    vector<Point> inside(contour.begin() + startIdx, contour.begin() + endIdx);
    int len1 = (inside.empty()) ? 0 : arcLength(inside, false);

    //int len22 = contour.size() - endIdx + startIdx;
    vector<Point> outside1(contour.begin(), contour.begin() + startIdx);
    vector<Point> outside2(contour.begin() + endIdx, contour.end());
    int len2 = (outside1.empty() ? 0 : arcLength(outside1, false)) + (outside2.empty() ? 0 : arcLength(outside2, false));

    if (len2 < len1)
    {
        swap(startIdx, endIdx);
    }
}
else
{
    //int len1 = startIdx - endIdx;
    vector<Point> inside(contour.begin() + endIdx, contour.begin() + startIdx);
    int len1 = (inside.empty()) ? 0 : arcLength(inside, false);


    //int len2 = contour.size() - startIdx + endIdx;
    vector<Point> outside1(contour.begin(), contour.begin() + endIdx);
    vector<Point> outside2(contour.begin() + startIdx, contour.end());
    int len2 = (outside1.empty() ? 0 : arcLength(outside1, false)) + (outside2.empty() ? 0 : arcLength(outside2, false));

    if (len1 < len2)
    {
        swap(startIdx, endIdx);
    }
}
 或
或 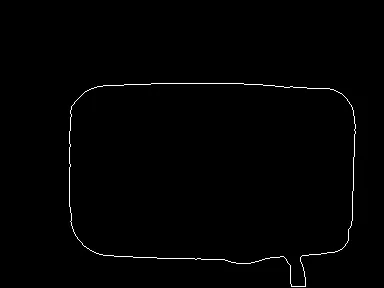 例如。
例如。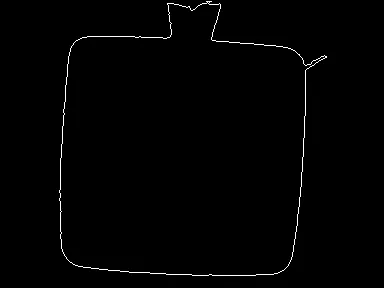


convexityDefects吗?http://docs.opencv.org/2.4/modules/imgproc/doc/structural_analysis_and_shape_descriptors.html#convexitydefects - zeFrenchy