我需要将小图标(类似自定义符号)嵌入到我的 iOS7 的 UILabel 中。
在界面设计中,我该如何实现?或者至少在代码中怎么做呢?
在 Android 中,标签有左侧和右侧的 drawable 属性,但在 iOS 中该如何实现呢? Android 示例:

我需要将小图标(类似自定义符号)嵌入到我的 iOS7 的 UILabel 中。
在界面设计中,我该如何实现?或者至少在代码中怎么做呢?
在 Android 中,标签有左侧和右侧的 drawable 属性,但在 iOS 中该如何实现呢? Android 示例:
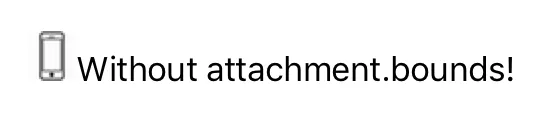
你可以使用iOS 7的文本附件来实现此操作,这是TextKit的一部分。以下是一些示例代码:
NSTextAttachment *attachment = [[NSTextAttachment alloc] init];
attachment.image = [UIImage imageNamed:@"MyIcon.png"];

NSAttributedString *attachmentString = [NSAttributedString attributedStringWithAttachment:attachment];

NSMutableAttributedString *myString= [[NSMutableAttributedString alloc] initWithString:@"My label text"];
[myString appendAttributedString:attachmentString];

myLabel.attributedText = myString;
UIImageView。 - Scott BerrevoetsNSAttributedString *attachmentString = [NSAttributedString attributedStringWithAttachment:attachment]; NSMutableAttributedString *myString = [[NSMutableAttributedString alloc] initWithAttributedString:attachmentString]; NSAttributedString *myText = [[NSMutableAttributedString alloc] initWithString:text]; [myString appendAttributedString:myText]; - reVerse这里是在UILabel中嵌入图标的方法。
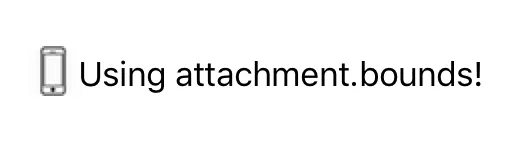
另外,要对图标进行对齐,请使用attachment.bounds
Swift 5.1
// Create Attachment
let imageAttachment = NSTextAttachment()
imageAttachment.image = UIImage(named:"iPhoneIcon")
// Set bound to reposition
let imageOffsetY: CGFloat = -5.0
imageAttachment.bounds = CGRect(x: 0, y: imageOffsetY, width: imageAttachment.image!.size.width, height: imageAttachment.image!.size.height)
// Create string with attachment
let attachmentString = NSAttributedString(attachment: imageAttachment)
// Initialize mutable string
let completeText = NSMutableAttributedString(string: "")
// Add image to mutable string
completeText.append(attachmentString)
// Add your text to mutable string
let textAfterIcon = NSAttributedString(string: "Using attachment.bounds!")
completeText.append(textAfterIcon)
self.mobileLabel.textAlignment = .center
self.mobileLabel.attributedText = completeText
Objective-C版本
NSTextAttachment *imageAttachment = [[NSTextAttachment alloc] init];
imageAttachment.image = [UIImage imageNamed:@"iPhoneIcon"];
CGFloat imageOffsetY = -5.0;
imageAttachment.bounds = CGRectMake(0, imageOffsetY, imageAttachment.image.size.width, imageAttachment.image.size.height);
NSAttributedString *attachmentString = [NSAttributedString attributedStringWithAttachment:imageAttachment];
NSMutableAttributedString *completeText = [[NSMutableAttributedString alloc] initWithString:@""];
[completeText appendAttributedString:attachmentString];
NSAttributedString *textAfterIcon = [[NSAttributedString alloc] initWithString:@"Using attachment.bounds!"];
[completeText appendAttributedString:textAfterIcon];
self.mobileLabel.textAlignment = NSTextAlignmentRight;
self.mobileLabel.attributedText = completeText;
Swift 4.2:
let attachment = NSTextAttachment()
attachment.image = UIImage(named: "yourIcon.png")
let attachmentString = NSAttributedString(attachment: attachment)
let myString = NSMutableAttributedString(string: price)
myString.append(attachmentString)
label.attributedText = myString
Swift 3 版本
let attachment = NSTextAttachment()
attachment.image = UIImage(named: "plus")
attachment.bounds = CGRect(x: 0, y: 0, width: 10, height: 10)
let attachmentStr = NSAttributedString(attachment: attachment)
let myString = NSMutableAttributedString(string: "")
myString.append(attachmentStr)
let myString1 = NSMutableAttributedString(string: "My label text")
myString.append(myString1)
lbl.attributedText = myString
UILabel扩展
extension UILabel {

    func set(text:String, leftIcon: UIImage? = nil, rightIcon: UIImage? = nil) {

        let leftAttachment = NSTextAttachment()
        leftAttachment.image = leftIcon
        leftAttachment.bounds = CGRect(x: 0, y: -2.5, width: 20, height: 20)
        if let leftIcon = leftIcon {
            leftAttachment.bounds = CGRect(x: 0, y: -2.5, width: leftIcon.size.width, height: leftIcon.size.height)
        }
        let leftAttachmentStr = NSAttributedString(attachment: leftAttachment)

        let myString = NSMutableAttributedString(string: "")

        let rightAttachment = NSTextAttachment()
        rightAttachment.image = rightIcon
        rightAttachment.bounds = CGRect(x: 0, y: -5, width: 20, height: 20)
        let rightAttachmentStr = NSAttributedString(attachment: rightAttachment)


        if semanticContentAttribute == .forceRightToLeft {
            if rightIcon != nil {
                myString.append(rightAttachmentStr)
                myString.append(NSAttributedString(string: " "))
            }
            myString.append(NSAttributedString(string: text))
            if leftIcon != nil {
                myString.append(NSAttributedString(string: " "))
                myString.append(leftAttachmentStr)
            }
        } else {
            if leftIcon != nil {
                myString.append(leftAttachmentStr)
                myString.append(NSAttributedString(string: " "))
            }
            myString.append(NSAttributedString(string: text))
            if rightIcon != nil {
                myString.append(NSAttributedString(string: " "))
                myString.append(rightAttachmentStr)
            }
        }
        attributedText = myString
    }
}
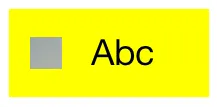
您的参考图像看起来像一个按钮。尝试以下步骤(也可在Interface Builder中完成):
UIButton* button = [UIButton buttonWithType:UIButtonTypeCustom];
[button setFrame:CGRectMake(50, 50, 100, 44)];
[button setImage:[UIImage imageNamed:@"img"] forState:UIControlStateNormal];
[button setImageEdgeInsets:UIEdgeInsetsMake(0, -30, 0, 0)];
[button setTitle:@"Abc" forState:UIControlStateNormal];
[button setTitleColor:[UIColor blackColor] forState:UIControlStateNormal];
[button setBackgroundColor:[UIColor yellowColor]];
[view addSubview:button];
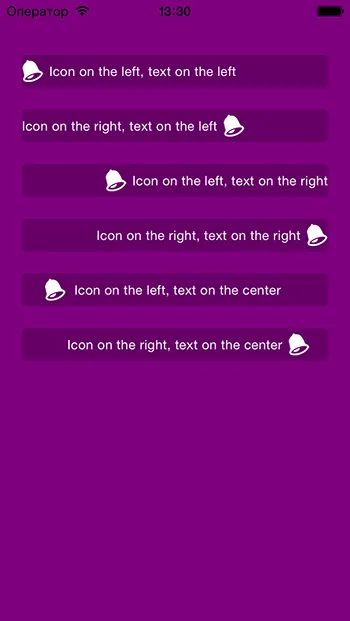
我已经在这里使用Swift实现了此功能:https://github.com/anatoliyv/SMIconLabel
代码尽可能简单:
var labelLeft = SMIconLabel(frame: CGRectMake(10, 10, view.frame.size.width - 20, 20))
labelLeft.text = "Icon on the left, text on the left"

// Here is the magic
labelLeft.icon = UIImage(named: "Bell") // Set icon image
labelLeft.iconPadding = 5               // Set padding between icon and label
labelLeft.numberOfLines = 0             // Required
labelLeft.iconPosition = SMIconLabelPosition.Left // Icon position
view.addSubview(labelLeft)
这是它的外观:
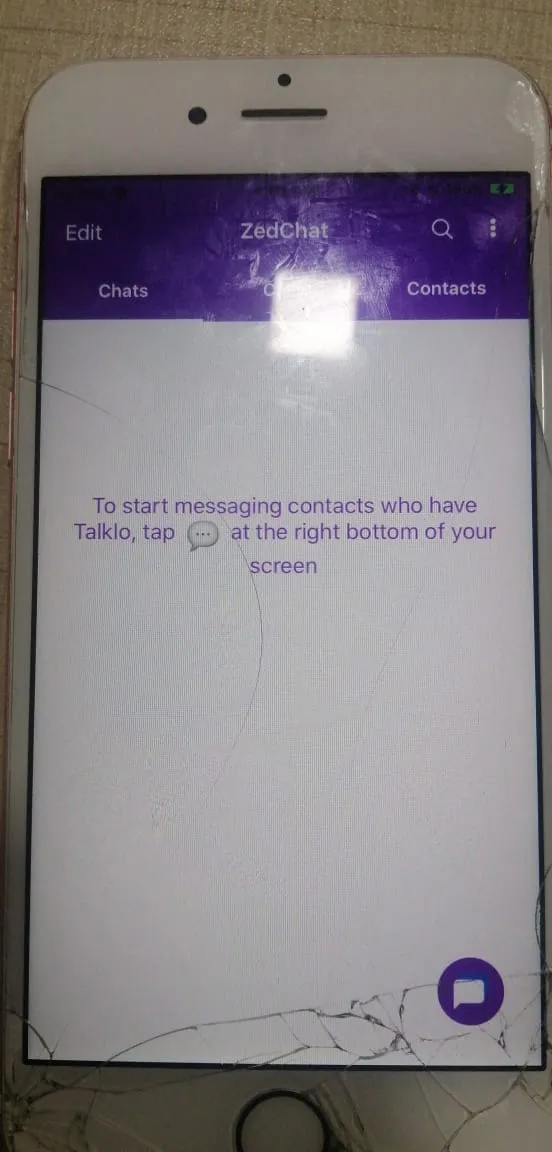
Swift 5 轻松入门:只需复制粘贴并更改您想要的内容
let fullString = NSMutableAttributedString(string:"To start messaging contacts who have Talklo, tap ")

 // create our NSTextAttachment
let image1Attachment = NSTextAttachment()
image1Attachment.image = UIImage(named: "chatEmoji")
image1Attachment.bounds = CGRect(x: 0, y: -8, width: 25, height: 25)

// wrap the attachment in its own attributed string so we can append it
let image1String = NSAttributedString(attachment: image1Attachment)

 // add the NSTextAttachment wrapper to our full string, then add some more text.

 fullString.append(image1String)
 fullString.append(NSAttributedString(string:" at the right bottom of your screen"))

 // draw the result in a label
 self.lblsearching.attributedText = fullString
Swift 4 UIlabel扩展,可以在标签中添加图像,参考上面的答案。
extension UILabel {
  func set(image: UIImage, with text: String) {
    let attachment = NSTextAttachment()
    attachment.image = image
    attachment.bounds = CGRect(x: 0, y: 0, width: 10, height: 10)
    let attachmentStr = NSAttributedString(attachment: attachment)

    let mutableAttributedString = NSMutableAttributedString()
    mutableAttributedString.append(attachmentStr)

    let textString = NSAttributedString(string: text, attributes: [.font: self.font])
    mutableAttributedString.append(textString)

    self.attributedText = mutableAttributedString
  }
}
NSAttributedString(string: " " + text, attributes: [.font: self.font]) - Farzadextension UILabel {
func addTrailing(image: UIImage, text:String) {
let attachment = NSTextAttachment()
attachment.image = image
let attachmentString = NSAttributedString(attachment: attachment)
let string = NSMutableAttributedString(string: text, attributes: [:])
string.append(attachmentString)
self.attributedText = string
}
func addLeading(image: UIImage, text:String) {
let attachment = NSTextAttachment()
attachment.image = image
let attachmentString = NSAttributedString(attachment: attachment)
let mutableAttributedString = NSMutableAttributedString()
mutableAttributedString.append(attachmentString)
let string = NSMutableAttributedString(string: text, attributes: [:])
mutableAttributedString.append(string)
self.attributedText = mutableAttributedString
}
}
要在所需的标签中使用上述代码,方法如下:
文本右侧的图像:-
statusLabel.addTrailing(image: UIImage(named: "rightTick") ?? UIImage(), text: " Verified ")
图像在文本左侧,然后:
statusLabel.addLeading(image: UIImage(named: "rightTick") ?? UIImage(), text: " Verified ")
输出:


试试这种方法...
  self.lbl.text=@"Drawble Left";
    UIImageView *img=[[UIImageView alloc]initWithFrame:CGRectMake(0, 0, 20, 20)];
    img.image=[UIImage imageNamed:@"Star.png"];
    [self.lbl addSubview:img];