Python Imaging Library (PIL)绘图--带有渐变的圆角矩形

9
我正试图使用PIL绘制带有圆角和渐变填充颜色的矩形。我发现了一个很棒的网站(http://web.archive.org/web/20130306020911/http://nadiana.com/pil-tutorial-basic-advanced-drawing#Drawing_Rounded_Corners_Rectangle),展示了如何绘制实心圆角矩形,我对此感到满意,但我想能够绘制从顶部开始浅红色到底部深红色的矩形。
我的最初想法是使用上述网站中的代码来绘制圆角矩形,然后使用alpha混合将第二个白到黑的矩形覆盖在圆角矩形上。但我尝试的所有方法都以失败告终。
我看到过一些几乎成功的解决方案使用numpy,但我不够熟练,无法将这些代码片段转化为成功的解决方案。如果有人能够展示如何修改上面链接中的代码,实现我的叠加想法或展示一个更好的Python中获取带有渐变填充的圆角矩形的解决方案,我将不胜感激。
致敬, Ferris

https://pillow.readthedocs.io/en/stable/reference/ImageDraw.html#PIL.ImageDraw.ImageDraw.rounded_rectangle - Spherical Cowboy
5个回答

14

这是一个非常粗暴的方法,但它可以完成任务。生成渐变的代码从这里借鉴而来。

from PIL import Image, ImageDraw

def channel(i, c, size, startFill, stopFill):
    """calculate the value of a single color channel for a single pixel"""
    return startFill[c] + int((i * 1.0 / size) * (stopFill[c] - startFill[c]))

def color(i, size, startFill, stopFill):
    """calculate the RGB value of a single pixel"""
    return tuple([channel(i, c, size, startFill, stopFill) for c in range(3)])

def round_corner(radius):
    """Draw a round corner"""
    corner = Image.new('RGBA', (radius, radius), (0, 0, 0, 0))
    draw = ImageDraw.Draw(corner)
    draw.pieslice((0, 0, radius * 2, radius * 2), 180, 270, fill="blue")
    return corner

def apply_grad_to_corner(corner, gradient, backwards = False, topBottom = False):
    width, height = corner.size
    widthIter = range(width)

    if backwards:
        widthIter.reverse()

    for i in xrange(height):
        gradPos = 0
    for j in widthIter:
                if topBottom:
                    pos = (i,j)
                else:
                    pos = (j,i)
        pix = corner.getpixel(pos)
            gradPos+=1
        if pix[3] != 0:
            corner.putpixel(pos,gradient[gradPos])

    return corner

def round_rectangle(size, radius, startFill, stopFill, runTopBottom = False):
    """Draw a rounded rectangle"""
    width, height = size
    rectangle = Image.new('RGBA', size)

    if runTopBottom:
      si = height
    else:
      si = width

    gradient = [ color(i, width, startFill, stopFill) for i in xrange(si) ]

    if runTopBottom:
        modGrad = []
        for i in xrange(height):
           modGrad += [gradient[i]] * width
        rectangle.putdata(modGrad)
    else:
        rectangle.putdata(gradient*height)

    origCorner = round_corner(radius)

    # upper left
    corner = origCorner
    apply_grad_to_corner(corner,gradient,False,runTopBottom)
    rectangle.paste(corner, (0, 0))

    # lower left
    if runTopBottom: 
        gradient.reverse()
        backwards = True
    else:
        backwards = False


    corner = origCorner.rotate(90)
    apply_grad_to_corner(corner,gradient,backwards,runTopBottom)
    rectangle.paste(corner, (0, height - radius))

    # lower right
    if not runTopBottom: 
        gradient.reverse()

    corner = origCorner.rotate(180)
    apply_grad_to_corner(corner,gradient,True,runTopBottom)
    rectangle.paste(corner, (width - radius, height - radius))

    # upper right
    if runTopBottom: 
        gradient.reverse()
        backwards = False
    else:
        backwards = True

    corner = origCorner.rotate(270)
    apply_grad_to_corner(corner,gradient,backwards,runTopBottom)
    rectangle.paste(corner, (width - radius, 0))

    return rectangle

img = round_rectangle((200, 200), 70, (255,0,0), (0,255,0), True)
img.save("test.png", 'PNG')

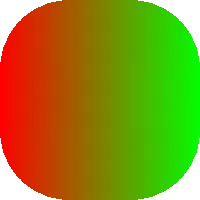
从左到右运行(runTopBottom = False):

enter image description here

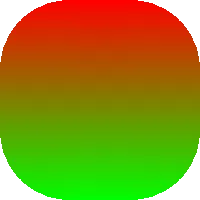
从上到下运行(runTopBottom = True):

enter image description here


暴力破解对于我的业余统计实验已经足够了。谢谢。 - ferris
我是用错了吗?当我将图像粘贴到另一个图像上时,透明的角落变成黑色,内部角落变成了startFill颜色。 - Jamie
@Jamie 当你粘贴时,请将掩码设置为要粘贴的图像。 paste(im,box = None,mask = None)<==将掩码设置为图像 https://pillow.readthedocs.io/en/stable/reference/Image.html#PIL.Image.Image.paste - Royendgel Silberie

11

如果将来有人在寻找一种稍微更加容易使用的解决方案,可以将其修补到ImageDraw上,我写了以下内容。

希望能有所帮助。

示例: enter image description here 代码:

from PIL.ImageDraw import ImageDraw


def rounded_rectangle(self: ImageDraw, xy, corner_radius, fill=None, outline=None):
    upper_left_point = xy[0]
    bottom_right_point = xy[1]
    self.rectangle(
        [
            (upper_left_point[0], upper_left_point[1] + corner_radius),
            (bottom_right_point[0], bottom_right_point[1] - corner_radius)
        ],
        fill=fill,
        outline=outline
    )
    self.rectangle(
        [
            (upper_left_point[0] + corner_radius, upper_left_point[1]),
            (bottom_right_point[0] - corner_radius, bottom_right_point[1])
        ],
        fill=fill,
        outline=outline
    )
    self.pieslice([upper_left_point, (upper_left_point[0] + corner_radius * 2, upper_left_point[1] + corner_radius * 2)],
        180,
        270,
        fill=fill,
        outline=outline
    )
    self.pieslice([(bottom_right_point[0] - corner_radius * 2, bottom_right_point[1] - corner_radius * 2), bottom_right_point],
        0,
        90,
        fill=fill,
        outline=outline
    )
    self.pieslice([(upper_left_point[0], bottom_right_point[1] - corner_radius * 2), (upper_left_point[0] + corner_radius * 2, bottom_right_point[1])],
        90,
        180,
        fill=fill,
        outline=outline
    )
    self.pieslice([(bottom_right_point[0] - corner_radius * 2, upper_left_point[1]), (bottom_right_point[0], upper_left_point[1] + corner_radius * 2)],
        270,
        360,
        fill=fill,
        outline=outline
    )


ImageDraw.rounded_rectangle = rounded_rectangle

嘿,那么我该如何使用它?这正是我所需要的。 - silverhash
1
# An example: from PIL import Image, ImageDraw, ImageFont new_image: Image = Image.new("RGBA", size, (255, 255, 255, 0)) d: ImageDraw = ImageDraw.Draw(new_image) d.rounded_rectangle(xy, corner_radius) - Whelchel

7

3

如果有人正在寻找更新的版本,这是 Whelchel 的答案的修改版,使用 Pillow 7.2.0 代替 PIL。(我之前使用的版本存在轮廓问题)

代码:

def rounded_rectangle(self: ImageDraw, xy, corner_radius, fill=None, outline=None):
    upper_left_point = xy[0]
    bottom_right_point = xy[1]


    self.pieslice([upper_left_point, (upper_left_point[0] + corner_radius * 2, upper_left_point[1] + corner_radius * 2)],
        180,
        270,
        fill=fill,
        outline=outline
    )
    self.pieslice([(bottom_right_point[0] - corner_radius * 2, bottom_right_point[1] - corner_radius * 2), bottom_right_point],
        0,
        90,
        fill=fill,
        outline=outline
    )
    self.pieslice([(upper_left_point[0], bottom_right_point[1] - corner_radius * 2), (upper_left_point[0] + corner_radius * 2, bottom_right_point[1])],
        90,
        180,
        fill=fill,
        outline=outline
    )
    self.pieslice([(bottom_right_point[0] - corner_radius * 2, upper_left_point[1]), (bottom_right_point[0], upper_left_point[1] + corner_radius * 2)],
        270,
        360,
        fill=fill,
        outline=outline
    )
    self.rectangle(
        [
            (upper_left_point[0], upper_left_point[1] + corner_radius),
            (bottom_right_point[0], bottom_right_point[1] - corner_radius)
        ],
        fill=fill,
        outline=fill
    )
    self.rectangle(
        [
            (upper_left_point[0] + corner_radius, upper_left_point[1]),
            (bottom_right_point[0] - corner_radius, bottom_right_point[1])
        ],
        fill=fill,
        outline=fill
    )
    self.line([(upper_left_point[0] + corner_radius, upper_left_point[1]), (bottom_right_point[0] - corner_radius, upper_left_point[1])], fill=outline)
    self.line([(upper_left_point[0] + corner_radius, bottom_right_point[1]), (bottom_right_point[0] - corner_radius, bottom_right_point[1])], fill=outline)
    self.line([(upper_left_point[0], upper_left_point[1] + corner_radius), (upper_left_point[0], bottom_right_point[1] - corner_radius)], fill=outline)
    self.line([(bottom_right_point[0], upper_left_point[1] + corner_radius), (bottom_right_point[0], bottom_right_point[1] - corner_radius)], fill=outline)

你如何使用这个? - David

1
# set offset equal to 0 to get circular image
def round_corner(image, offset, width, height, filled_pixel):

    im = Image.open(image).convert('RGBA').resize((width - offset, height - offset))
    im_base = Image.new('RGBA', (width, height), (255, 255, 255, 255))
    im_base.paste(im, (offset / 2, offset / 2))
    im = im_base

    im_new = Image.new('RGBA', (width, height))

    half_w, half_h = width / 2, height / 2

    for x in range(width):
        for y in range(height):
            if (x - half_w) * (x - half_w) + (y - half_h) * (y - half_h) <= half_w * half_h:
                pixel = im.getpixel((x, y))
            else:
                pixel = filled_pixel
            im_new.putpixel((x, y), pixel)

    return im_new

如何使用

round_corner(img, 0, 160, 160, (0, 0, 0, 0))

主要思路

这个想法很简单,就是在实际像素隐藏的地方放置填充像素,因此只有填充像素会被显示出来。如果背景是黑色,并且我们使用黑色像素作为填充像素,那么一切都会没问题。我知道这可能不是最聪明的方法,但它适用于某些场合。

我发现另一种实现方式:

def circle_pic(img):
    scale = 3
    w, h = img.size
    r = w * scale
    alpha_layer = Image.new('L', (r, r), 0)
    draw = ImageDraw.Draw(alpha_layer)
    draw.ellipse((0, 0, r, r), fill=255)
    alpha_layer = alpha_layer.resize((w, w), Image.ANTIALIAS)
    return img, alpha_layer

这是如何使用此函数的步骤。
icon_base = Image.new('RGBA', base.size, (255, 255, 255, 0))
iss = (28, 28)
icon, alpha_layer = circle_pic(icon)
icon = icon.resize(iss)
alpha_layer = alpha_layer.resize(iss)
icon_base.paste(icon, (ip[0], ip[1], ip[0] + iss[0], ip[1] + iss[1]), alpha_layer)

1
请简要描述一下你的代码是如何工作的。 - godidier
1
希望修改能够有所帮助。 - Hi computer

网页内容由stack overflow 提供, 点击上面的
可以查看英文原文,
原文链接