在 SwiftUI 的 VStack 中,您如何将内容与另一个视图的前沿和尾部对齐?
我目前拥有以下 SwiftUI 代码:
struct MyBlock: View {
    var body: some View {
        Rectangle().foregroundColor(.gray).frame(width: 80, height: 80)
    }
}

struct MyGridView: View {
    var body: some View {
        HStack(spacing: 16) {
            MyBlock()
            MyBlock()
            MyBlock()
        }
    }
}

struct PinPad: View {
    var body: some View {
        VStack {
            MyGridView()
            HStack {
                Button(action: {}, label: { Text("Left Align") })
                Spacer()
                Button(action: {}, label: { Text("Right Align") })
            }
        }
    }
}
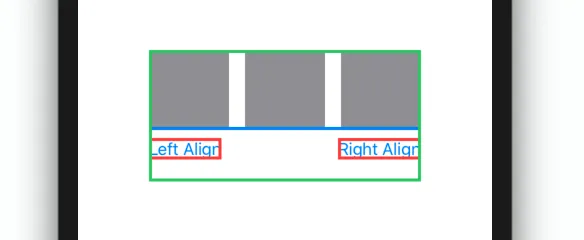
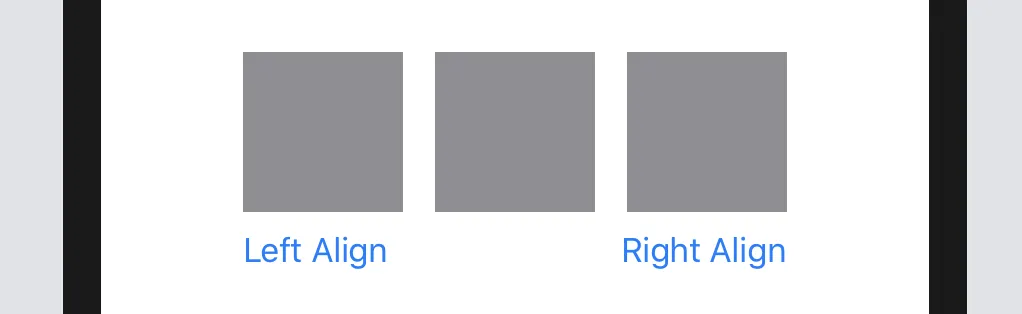
结果呈现如下:

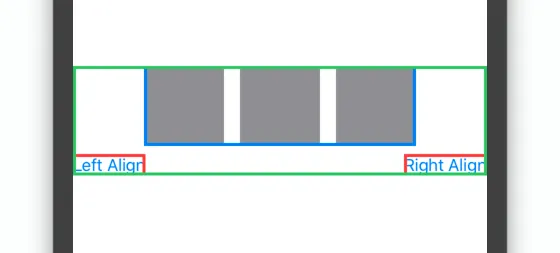
但我真正想要的是将“左对齐”按钮与 MyGridView 的左边缘/前沿对齐,将“右对齐”按钮与 MyGridView 的右边缘/后沿对齐。
例如,就像这样:
显然,我在这里漏掉了一些非常基本的东西,因为在UIKit中使用自动布局要容易得多。