请参见 EDIT,因为该问题的第一部分已解决。
我正在尝试使用自己的框架复制来自http://learnopengl.com/#!Advanced-Lighting/Shadows/Shadow-Mapping 的阴影映射演示,但有趣的是,我没有得到任何阴影。第一个重大问题是我的深度图不正确。我已经进行了调试并重复检查了每一行,但没有成功。也许另一对眼睛会更成功。
请参见(左上角,第5行 - 图像完全白色):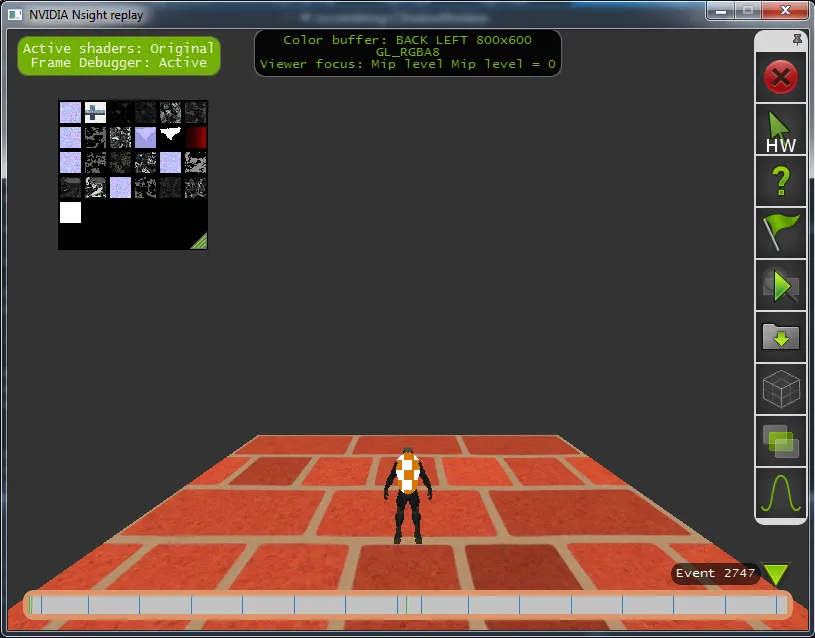 我将写关于第二个渲染通道,因为似乎第一个渲染通道不起作用。顺便说一下,对象居中于 0, 0, 0。以下代码用于第一个渲染通道:
片元着色器和顶点着色器的代码如下所示:
我正在尝试使用自己的框架复制来自http://learnopengl.com/#!Advanced-Lighting/Shadows/Shadow-Mapping 的阴影映射演示,但有趣的是,我没有得到任何阴影。第一个重大问题是我的深度图不正确。我已经进行了调试并重复检查了每一行,但没有成功。也许另一对眼睛会更成功。
请参见(左上角,第5行 - 图像完全白色):
我将写关于第二个渲染通道,因为似乎第一个渲染通道不起作用。顺便说一下,对象居中于 0, 0, 0。以下代码用于第一个渲染通道:/// 1. render target is the depth map
glViewport(0, 0, SHADOW_MAP_WIDTH_u32, SHADOW_MAP_HEIGHT_u32);
m_frameBufferObject.bind(); // set the depth map as render target
glClear(GL_COLOR_BUFFER_BIT | GL_DEPTH_BUFFER_BIT);
/// place the camera where the light is positioned and render the scene
math::Matrix4D l_lightViewMatrix = math::Matrix4D::lookAt(m_light_p->getPosition(), math::Vector3D(0, 0, 0), math::Vector3D(0, 1, 0));
const math::Matrix4D& l_orthographicLightMatrix_r = m_light_p->getShadowInformation().getProjectionMatrix();
math::Matrix4D lightSpaceMatrix = l_orthographicLightMatrix_r * l_lightViewMatrix;
m_depthMapShader_p->bind();
m_depthMapShader_p->setUniformMat4("lightSpaceMatrix", lightSpaceMatrix);
renderNodes();
m_depthMapShader_p->printShaderInfoLog();
m_depthMapShader_p->unbind();
m_frameBufferObject.unbind();
我已经测试过视图矩阵和投影矩阵生成,结果与OpenGL的数学库GLM完全相同。然而,我的正交矩阵是这样定义的:
left = -10.0f
right = 10.0f
bottom = -10.0f
top = 10.0f
near = -1.0f
far = 7.5f
帧缓冲对象和纹理的初始化如下:
// - Create depth texture
glGenTextures(1, &m_shadowTextureBuffer_u32);
glBindTexture(GL_TEXTURE_2D, m_shadowTextureBuffer_u32);

glTexImage2D(GL_TEXTURE_2D, 0, GL_DEPTH_COMPONENT, SHADOW_MAP_WIDTH_u32, SHADOW_MAP_HEIGHT_u32, 0, GL_DEPTH_COMPONENT, GL_FLOAT, NULL);
glTexParameteri(GL_TEXTURE_2D, GL_TEXTURE_MIN_FILTER, GL_NEAREST);
glTexParameteri(GL_TEXTURE_2D, GL_TEXTURE_MAG_FILTER, GL_NEAREST);
glTexParameteri(GL_TEXTURE_2D, GL_TEXTURE_WRAP_S, GL_REPEAT);
glTexParameteri(GL_TEXTURE_2D, GL_TEXTURE_WRAP_T, GL_REPEAT);

m_frameBufferObject.bind();
glFramebufferTexture2D(GL_FRAMEBUFFER, GL_DEPTH_ATTACHMENT, GL_TEXTURE_2D, m_shadowTextureBuffer_u32, 0);
glDrawBuffer(GL_NONE);
glReadBuffer(GL_NONE);

if (glCheckFramebufferStatus(GL_FRAMEBUFFER) != GL_FRAMEBUFFER_COMPLETE)
{
    fprintf(stderr, "Error on building shadow framebuffer\n");
    exit(EXIT_FAILURE);
}
m_frameBufferObject.unbind();
片元着色器和顶点着色器的代码如下所示:
#version 430
// Fragment shader for rendering the depth values to a texture.

out vec4 gl_FragColor;

void main()
{
   gl_FragColor = vec4 (gl_FragCoord.z);
}


#version 430

// Vertex shader for rendering the depth values to a texture.

in layout (location = 0) vec3 position;
in layout (location = 1) vec4 color;
in layout (location = 2) vec3 normal;
in layout (location = 3) vec2 uv;
in layout (location = 4) vec3 tangent;
in layout (location = 5) int materialId;

uniform mat4 pr_matrix;
uniform mat4 vw_matrix;
uniform mat4 ml_matrix;
uniform mat4 lightSpaceMatrix;

void main()
{
    gl_Position = lightSpaceMatrix * ml_matrix * vec4(position, 1.0);
}
编辑:
经过一些休息,我发现我的渲染器中有一个小错误,着色器绘制了一个“好看”的深度图像。
 但是,看起来纹理映射(深度比较)是在相同的坐标系中进行的。
但第二个渲染步骤仍然不正确:

第二个渲染通道的顶点和片元着色器如下:
#version 430

in layout (location = 0) vec3 position;
in layout (location = 1) vec4 color;
in layout (location = 2) vec3 normal;
in layout (location = 3) vec2 uv;
in layout (location = 4) vec3 tangent;
in layout (location = 5) int materialId;

uniform mat4 pr_matrix = mat4(1.0);
uniform mat4 vw_matrix = mat4(1.0);
uniform mat4 ml_matrix = mat4(1.0);
uniform mat4 lightSpaceMatrix = mat4(1.0);

out VS_OUT
{
    vec4 color;
    vec2 texture_coordinates;
    vec3 normal;
    vec3 tangent;
    vec3 binormal;
    vec3 worldPos;
    vec4 shadowProj;
    flat int materialIdOut;
} vs_out;

void main()
{
    vs_out.color = color;
    vs_out.texture_coordinates = uv;

    mat3 normalMatrix = transpose ( inverse ( mat3 ( ml_matrix )));
    vs_out.normal = normalize ( normalMatrix * normalize ( normal ));
    vs_out.tangent = normalize ( normalMatrix * normalize ( tangent ));
    vs_out.binormal = normalize ( normalMatrix * normalize ( cross (normal , tangent )));
    vs_out.worldPos = ( ml_matrix * vec4 ( position, 1)).xyz;
    vs_out.materialIdOut = materialId;
    vs_out.shadowProj = ( lightSpaceMatrix * ml_matrix * vec4 (position, 1.0) );

    gl_Position = ( pr_matrix * vw_matrix * ml_matrix ) * vec4 (position, 1.0);
}
并且
#version 430

#define MAX_NUM_TEXTURES 5
#define MAX_NUM_MATERIALS 12

struct SMaterial
{
    vec3 m_ambient_v3;
    vec3 m_diffuse_v3;
    vec3 m_specular_v3;
    float m_shininess_f32;
    int m_textureIds[MAX_NUM_TEXTURES];
};

in VS_OUT
{
    vec4 color;
    vec2 texture_coordinates;
    vec3 normal;
    vec3 tangent;
    vec3 binormal;
    vec3 worldPos;
    vec4 shadowProj;
    flat int materialIdOut;
} fs_in;

uniform vec3 cameraPos;
uniform mat4 ml_matrix;
uniform mat4 vw_matrix;
uniform sampler2D texSlots[32];

uniform SMaterial material[MAX_NUM_MATERIALS];
uniform SLight light;

out vec4 gl_FragColor;

float shadowCalculation(vec4 fragPosLightSpace)
{
    // perform perspective divide
    vec3 projCoords = fragPosLightSpace.xyz / fragPosLightSpace.w;
    // Transform to [0,1] range
    projCoords = projCoords * vec3(0.5) + vec3(0.5);
    // Get closest depth value from light's perspective (using [0,1] range fragPosLight as coords)
    float closestDepth = texture(texSlots[31], projCoords.xy).r;
    // Get depth of current fragment from light's perspective
    float currentDepth = projCoords.z;
    // Check whether current frag pos is in shadow
    float shadow = currentDepth > closestDepth  ? 1.0 : 0.0;

    return shadow;
}

void main()
{
    if ( (fs_in.materialIdOut >= 0) && (fs_in.materialIdOut < MAX_NUM_MATERIALS) )
    {
        int ambientTextureId = material[fs_in.materialIdOut].m_textureIds[0];
        int diffuseTextureId = material[fs_in.materialIdOut].m_textureIds[1];
        int specularTextureId = material[fs_in.materialIdOut].m_textureIds[2];
        int alphaTextureId = material[fs_in.materialIdOut].m_textureIds[3];
        int bumpTextureId = material[fs_in.materialIdOut].m_textureIds[4];

        vec3 diffTexColor = vec3(0.6,0.6,0.6);
        if ((diffuseTextureId >= 0) && (32 > diffuseTextureId))
        {
            diffTexColor = texture (texSlots[diffuseTextureId], fs_in.texture_coordinates).rgb;
        }

        // Calculate shadow
        float shadow = 1.0 - shadowCalculation(fs_in.shadowProj);
        gl_FragColor = vec4(diffTexColor, 1.0) * vec4(shadow, shadow, shadow, 1.0);
    }
    else
    {
        gl_FragColor = vec4(fs_in.normal,1.0);
    }
}