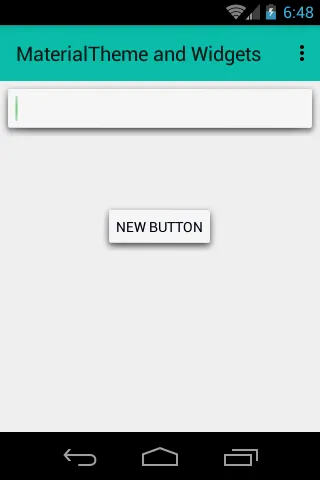
谷歌在Lollipop上展示了一些漂亮的高程效果,此处有相关内容。
android:elevation="2dp"
对于按钮,
android:stateListAnimator="@anim/button_state_list_animator"
如何在没有第三方库的情况下模拟早期版本上的海拔效果?
谷歌在Lollipop上展示了一些漂亮的高程效果,此处有相关内容。
android:elevation="2dp"
对于按钮,
android:stateListAnimator="@anim/button_state_list_animator"
如何在没有第三方库的情况下模拟早期版本上的海拔效果?
你可以使用一种官方方法来模拟Lollipop之前的高程效果。
我使用以下方法实现了相同的效果,
android:background="@android:drawable/dialog_holo_light_frame"
我的测试输出:
参考 - https://dev59.com/4GEi5IYBdhLWcg3whccg#25683148
感谢用户@Repo..
更新:如果您想更改此绘图的颜色,请尝试下面的@Irfan答案 ↓
使用官方方法无法模拟Lollipop以前的高程。
您可以在组件中使用一些可绘制对象来创建阴影。例如,Google在CardView中使用了这种方式。
ViewCompat.setElevation (View,int)目前仅在API 21+上创建阴影。如果您检查其背后的代码,该方法调用:
API 21+:
  @Override
    public void setElevation(View view, float elevation) {
        ViewCompatLollipop.setElevation(view, elevation);
    }
API小于21
@Override
public void setElevation(View view, float elevation) {

}
你可以使用卡片视图进行黑客攻击:
<android.support.v7.widget.CardView
    xmlns:card_view="http://schemas.android.com/apk/res-auto"
    android:id="@+id/btnGetStuff"
    android:layout_width="wrap_content"
    android:layout_height="wrap_content"
    card_view:cardCornerRadius="4dp"
    card_view:cardBackgroundColor="@color/accent"
    >
    <!-- you could also add image view here for icon etc. -->
    <TextView
        android:id="@+id/txtGetStuff"
        android:layout_width="wrap_content"
        android:layout_height="wrap_content"
        android:textSize="@dimen/textSize_small"
        android:textColor="@color/primary_light"
        android:freezesText="true"
        android:text="Get Stuff"
        android:maxWidth="120dp"
        android:singleLine="true"
        android:ellipsize="end"
        android:maxLines="1"
        /></android.support.v7.widget.CardView>
或者考虑使用这个第三方库:https://github.com/rey5137/Material(查看按钮的 wiki 文章:https://github.com/rey5137/Material/wiki/Button)
要在安卓Lollipop版本以下的设备上实现动态的、带有动画效果的阴影,需要进行以下步骤:
drawChild 方法。还需要重写setElevation 和 setTranslationZ,在布局中覆盖子视图绘制,关闭裁剪填充并实现状态动画。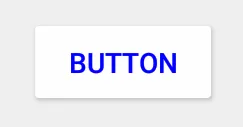
虽然这需要很多工作,但它可以实现看起来最好的动态阴影和响应动画。如果您愿意,您可以分析Carbon的源代码并移植其中的部分到您的应用程序中:
private static void blurRenderScript(Bitmap bitmap, float radius) {
    Allocation inAllocation = Allocation.createFromBitmap(renderScript, bitmap,
            Allocation.MipmapControl.MIPMAP_NONE, Allocation.USAGE_SCRIPT);
    Allocation outAllocation = Allocation.createTyped(renderScript, inAllocation.getType());

    blurShader.setRadius(radius);
    blurShader.setInput(inAllocation);
    blurShader.forEach(outAllocation);

    outAllocation.copyTo(bitmap);
}

public static Shadow generateShadow(View view, float elevation) {
    if (!software && renderScript == null) {
        try {
            renderScript = RenderScript.create(view.getContext());
            blurShader = ScriptIntrinsicBlur.create(renderScript, Element.U8_4(renderScript));
        } catch (RSRuntimeException ignore) {
            software = true;
        }
    }

    ShadowView shadowView = (ShadowView) view;
    CornerView cornerView = (CornerView) view;
    boolean isRect = shadowView.getShadowShape() == ShadowShape.RECT ||
            shadowView.getShadowShape() == ShadowShape.ROUND_RECT && cornerView.getCornerRadius() < view.getContext().getResources().getDimension(R.dimen.carbon_1dip) * 2.5;

    int e = (int) Math.ceil(elevation);
    Bitmap bitmap;
    if (isRect) {
        bitmap = Bitmap.createBitmap(e * 4 + 1, e * 4 + 1, Bitmap.Config.ARGB_8888);

        Canvas shadowCanvas = new Canvas(bitmap);
        paint.setStyle(Paint.Style.FILL);
        paint.setColor(0xff000000);

        shadowCanvas.drawRect(e, e, e * 3 + 1, e * 3 + 1, paint);

        blur(bitmap, elevation);

        return new NinePatchShadow(bitmap, elevation);
    } else {
        bitmap = Bitmap.createBitmap((int) (view.getWidth() / SHADOW_SCALE + e * 2), (int) (view.getHeight() / SHADOW_SCALE + e * 2), Bitmap.Config.ARGB_8888);

        Canvas shadowCanvas = new Canvas(bitmap);
        paint.setStyle(Paint.Style.FILL);
        paint.setColor(0xff000000);

        if (shadowView.getShadowShape() == ShadowShape.ROUND_RECT) {
            roundRect.set(e, e, (int) (view.getWidth() / SHADOW_SCALE - e), (int) (view.getHeight() / SHADOW_SCALE - e));
            shadowCanvas.drawRoundRect(roundRect, e, e, paint);
        } else {
            int r = (int) (view.getWidth() / 2 / SHADOW_SCALE);
            shadowCanvas.drawCircle(r + e, r + e, r, paint);
        }

        blur(bitmap, elevation);

        return new Shadow(bitmap, elevation);
    }
}
@Override
protected boolean drawChild(Canvas canvas, View child, long drawingTime) {
    if (!child.isShown())
        return super.drawChild(canvas, child, drawingTime);

    if (!isInEditMode() && child instanceof ShadowView && Build.VERSION.SDK_INT <= Build.VERSION_CODES.KITKAT_WATCH) {
        ShadowView shadowView = (ShadowView) child;
        Shadow shadow = shadowView.getShadow();
        if (shadow != null) {
            paint.setAlpha((int) (ShadowGenerator.ALPHA * ViewHelper.getAlpha(child)));

            float childElevation = shadowView.getElevation() + shadowView.getTranslationZ();

            float[] childLocation = new float[]{(child.getLeft() + child.getRight()) / 2, (child.getTop() + child.getBottom()) / 2};
            Matrix matrix = carbon.internal.ViewHelper.getMatrix(child);
            matrix.mapPoints(childLocation);

            int[] location = new int[2];
            getLocationOnScreen(location);
            float x = childLocation[0] + location[0];
            float y = childLocation[1] + location[1];
            x -= getRootView().getWidth() / 2;
            y += getRootView().getHeight() / 2;   // looks nice
            float length = (float) Math.sqrt(x * x + y * y);

            int saveCount = canvas.save(Canvas.MATRIX_SAVE_FLAG);
            canvas.translate(
                    x / length * childElevation / 2,
                    y / length * childElevation / 2);
            canvas.translate(
                    child.getLeft(),
                    child.getTop());

            canvas.concat(matrix);
            canvas.scale(ShadowGenerator.SHADOW_SCALE, ShadowGenerator.SHADOW_SCALE);
            shadow.draw(canvas, child, paint);
            canvas.restoreToCount(saveCount);
        }
    }

    if (child instanceof RippleView) {
        RippleView rippleView = (RippleView) child;
        RippleDrawable rippleDrawable = rippleView.getRippleDrawable();
        if (rippleDrawable != null && rippleDrawable.getStyle() == RippleDrawable.Style.Borderless) {
            int saveCount = canvas.save(Canvas.MATRIX_SAVE_FLAG);
            canvas.translate(
                    child.getLeft(),
                    child.getTop());
            rippleDrawable.draw(canvas);
            canvas.restoreToCount(saveCount);
        }
    }

    return super.drawChild(canvas, child, drawingTime);
}
private float elevation = 0;
private float translationZ = 0;
private Shadow shadow;

@Override
public float getElevation() {
    return elevation;
}

public synchronized void setElevation(float elevation) {
    if (elevation == this.elevation)
        return;
    if (Build.VERSION.SDK_INT >= Build.VERSION_CODES.LOLLIPOP)
        super.setElevation(elevation);
    this.elevation = elevation;
    if (getParent() != null)
        ((View) getParent()).postInvalidate();
}

@Override
public float getTranslationZ() {
    return translationZ;
}

public synchronized void setTranslationZ(float translationZ) {
    if (translationZ == this.translationZ)
        return;
    if (Build.VERSION.SDK_INT >= Build.VERSION_CODES.LOLLIPOP)
        super.setTranslationZ(translationZ);
    this.translationZ = translationZ;
    if (getParent() != null)
        ((View) getParent()).postInvalidate();
}

@Override
public ShadowShape getShadowShape() {
    if (cornerRadius == getWidth() / 2 && getWidth() == getHeight())
        return ShadowShape.CIRCLE;
    if (cornerRadius > 0)
        return ShadowShape.ROUND_RECT;
    return ShadowShape.RECT;
}

@Override
public void setEnabled(boolean enabled) {
    super.setEnabled(enabled);
    setTranslationZ(enabled ? 0 : -elevation);
}

@Override
public Shadow getShadow() {
    float elevation = getElevation() + getTranslationZ();
    if (elevation >= 0.01f && getWidth() > 0 && getHeight() > 0) {
        if (shadow == null || shadow.elevation != elevation)
            shadow = ShadowGenerator.generateShadow(this, elevation);
        return shadow;
    }
    return null;
}

@Override
public void invalidateShadow() {
    shadow = null;
    if (getParent() != null && getParent() instanceof View)
        ((View) getParent()).postInvalidate();
}
为了给可绘制对象添加背景颜色(例如按钮背景颜色),我们需要以编程方式获取可绘制对象。
首先获取可绘制对象。
Drawable drawable = getResources().getDrawable(android.R.drawable.dialog_holo_light_frame);
设置颜色
drawable.setColorFilter(new PorterDuffColorFilter(getResources().getColor(R.color.color_primary), PorterDuff.Mode.MULTIPLY));
view.setBackgroundDrawable(drawable);
如果有人在搜索相关内容。
shadow.xml
<?xml version="1.0" encoding="utf-8"?>
<shape
    xmlns:android="http://schemas.android.com/apk/res/android"

    >

    <gradient android:type="linear" android:angle="270" android:startColor="#b6b6b6" android:endColor="#ffffff"/>


</shape>
并在主XML文件中使用它,例如 -
android:background="@drawable/shadow"
