在两个圆圈之间画一个箭头?

5
我该如何在两个圆之间绘制带箭头的线条,已知以下信息:
  1. 圆心位置
  2. 圆的半径
我使用线标记svg对象。
如果我将箭头绘制到圆的“中心”处,则箭头将不可见。 如果我将箭头向后移动太远,则线条会显示并隐藏箭头的尖端(这里为了更好的可见性而夸张): Arrows moved waaaay back 
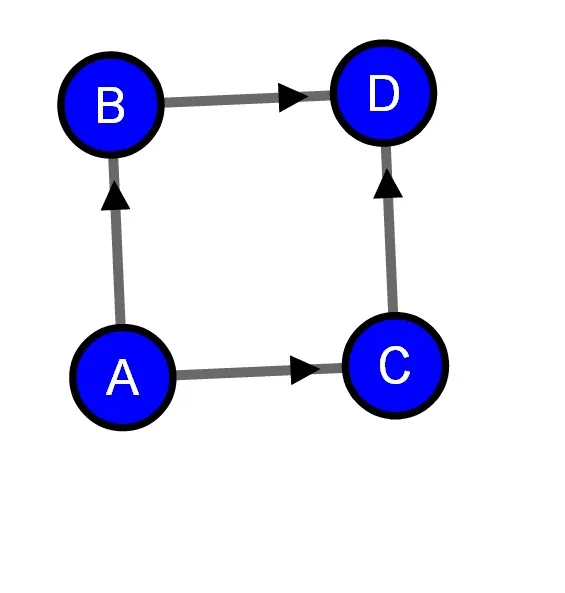
按照要求,这是我的代码的相关部分(使用LiveScript编写):
# Draw an arrow to use for lines
svg.append("svg:defs")
 .append("svg:marker")
  .attr("id", "arrow")
  .attr("viewBox", "0 0 10 10")
  .attr("refX", 27)
  .attr("refY", 5)
  .attr("markerUnits", "strokeWidth")
  .attr("markerWidth", 8)
  .attr("markerHeight", 6)
  .attr("orient", "auto")
  .append("svg:path")
  .attr("d", "M 0 0 L 10 5 L 0 10 z")

svg.append("line")
 .attr "x1" 5 
 .attr "x2" 50 
 .attr "y1" 5 
 .attr "y2" 50
 .style "stroke" "black"
 .attr "stroke-width" 2
 .attr "marker-end" "url(\#arrow)"

另外,这里是工作示例的JSFiddle(请注意箭头已经被“捏”成合适的样子):http://jsfiddle.net/yeQS2/


如果你正在寻找预打包的东西,D3已经可以做有向图了:http://bl.ocks.org/1153292 - mccannf
@mccannf 这不是预先打包的。事实上,那正是我用作参考的例子。那个例子之所以有效或看起来不错,仅仅是因为圆的半径和箭头的大小非常小。 - Andriy Drozdyuk
如果您同时更改圆的半径和markerWidth以及markerHeight,似乎不会出现问题。我已经在此示例中使用滚动条进行了尝试:http://jsfiddle.net/mccannf/ethh8/3/ - mccannf
4个回答

16

如果我理解正确,您需要找到2D向量,将其添加到源位置以到达目标圆的边界。

伪代码:

d = distance between A and B; // (sqrt((xB-xA)² + (yB-yA)²)).
d2 = d - radius;

ratio = d2 / d;

dx = (xB - xA) * ratio;
dy = (yB - yA) * ratio;

x = xA + dx;
y = yA + dy;

8

我曾经遇到过同样的问题,这里是我解决它的方法。对于原始代码所做的更改如下:

.attr("refX", 27)改为.attr("refX", 0)。这将使箭头绘制超出线条末端。

通过使用三角函数计算线的正确结束位置,同时考虑箭头,在“tick”中添加以下代码:

var arrowheadLength = 8, // from markerWidth
    nodeRadius = 10;
link.each(function(d) {
  var x1 = d.source.x,
      y1 = d.source.y,
      x2 = d.target.x,
      y2 = d.target.y,
      angle = Math.atan2(y2 - y1, x2 - x1);
  d.targetX = x2 - Math.cos(angle) * (nodeRadius + arrowheadLength);
  d.targetY = y2 - Math.sin(angle) * (nodeRadius + arrowheadLength);
});

使用计算后的目标X和目标Y链接属性:
.attr("x2", function(d){
  return d.targetX;
}).attr("y2", function(d){
  return d.targetY;
})

这里是更新后的代码示例


1
我喜欢你的解决方案,因为它使用了Math.atan2和Math.cos/sen,看起来很简洁。但是我在这里测试后发现,与Joan Charmant的答案中使用的Math.sqrt(Math.pow()+Math.pow())加上其他乘法相比,速度呈指数级下降。我的理解正确吗?谢谢 http://jsfiddle.net/gujqaf82/ - Henry

5

好的,我想尝试一下用向量数学来实现这个,它更美观,结果是可重复使用的。

一些澄清:

  • “向量”只是两个数字(x和y)
  • “坐标”在结构上与向量相同,但对我们来说意义不同。我们可以在它们上面运行相同的数学运算。
  • “定位向量”是两个向量(如源和目标)
  • 您可以通过从第一个向量中减去第二个向量来“释放”定位向量(您会得到一个不再固定在坐标系统中的新向量)
  • 向量的“长度”使用勾股定理(也称为范数)计算
  • 向量加法”只是将两个或多个向量的x和y相加,从而得到一个新向量。
  • 标量乘法”和除法是通过将x和y除以标量来完成的
  • 单位向量”是向量除以其长度

假设我们希望这个动态工作(“每个滴答声”),则初始链接调整如下(我使用coffeescript):

links.attr('x1', ({source,target}) -> source.x)
     .attr('y1', ({source,target}) -> source.y)
     .attr('x2', ({source,target}) -> target.x)
     .attr('y2', ({source,target}) -> target.y)

我们要做的是将源代码和目标代码的nodeRadius移开圆圈。为此,我们使用向量数学来:
  1. 释放定位向量(链接由两个坐标组成,我们需要一个未锚定的单一向量)
  2. 计算自由向量的单位向量
  3. 一旦有了这个,我们就可以将其乘以nodeRadius。这个新向量表示节点中心和其边界之间的距离,具有与链接相同的方向。
  4. 将向量加到源坐标上,这些新坐标将在圆的边缘。
好的,所以我们将使用以下函数来完成这个任务:
length = ({x,y}) -> Math.sqrt(x*x + y*y)
sum = ({x:x1,y:y1}, {x:x2,y:y2}) -> {x:x1+x2, y:y1+y2}
diff = ({x:x1,y:y1}, {x:x2,y:y2}) -> {x:x1-x2, y:y1-y2}
prod = ({x,y}, scalar) -> {x:x*scalar, y:y*scalar}
div = ({x,y}, scalar) -> {x:x/scalar, y:y/scalar}
unit = (vector) -> div(vector, length(vector))
scale = (vector, scalar) -> prod(unit(vector), scalar)

free = ([coord1, coord2]) -> diff(coord2, coord1)

这可能看起来有点吓人,因为Coffeescript允许我们直接在方法签名中解构事物,这很方便!正如您所看到的,还有另一个名为scale的函数。它只是一个方便的函数,用于组合步骤2和3。
现在让我们尝试设置链接源的新X坐标。记住:坐标应该移动nodeRadius,以使其从圆的边界开始而不是圆内部。
(d) ->
    # Step 1
    freed = free(d)
    # Step 2
    unit = unit(freed)
    # Step 3
    scaled = prod(unit, nodeRadius)
    # Step 2+3 would be scale(freed, nodeRadius)
    # Step 4, coords are pretty much just vectors,
    # so we just use the sum() function to move the source coords
    coords = sum(d.source, scaled)
    return coords.x

没有问题!把所有这些内容放入 tick() 函数中,我们得到:

links.attr('x1', ({source,target}) -> sum(source, scale(free([source,target]), nodeRadius)).x)
     .attr('y1', ({source,target}) -> sum(source, scale(free([source,target]), nodeRadius)).y)
     .attr('x2', ({source,target}) -> diff(target, scale(free([source,target]), nodeRadius)).x)
     .attr('y2', ({source,target}) -> diff(target, scale(free([source,target]), nodeRadius)).y)

哦,不要忘记从目标坐标中减去,否则你只会再次延长线条(即通过nodeRadius移动它)。


2
正文:
如@andsens所说,您正在进行简单的向量操作。
如果您将其包装在一个好的库中,可以使其更加清晰。例如,我使用不错的Sylvester矩阵和向量库。
您实际上正在计算的是:

V subscript edge equals open paren modulus V minus R close paren times unit vector V

其中,v是指向目标中心的向量,而vedge是指向半径为r的目标边缘的向量。
你可以轻松地完成这个任务:
// Assume source and target both have x and y properties
// Assume target has radius property
function path2TargetEdge(source, target){

  // V is the vector from the source to the target's center
  var V = $V([target.x-source.x, target.y-source.y]);

  // Vt is the vector from the source to the edge of the target
  var Vt = V.toUnitVector().multiply(V.modulus() - target.radius);

  return {x: Vt.e(1), y: Vt.e(2) }; // Vectors are 1-indexed
}

网页内容由stack overflow 提供, 点击上面的
可以查看英文原文,
原文链接