如何使用纯JavaScript创建这种工具提示

3
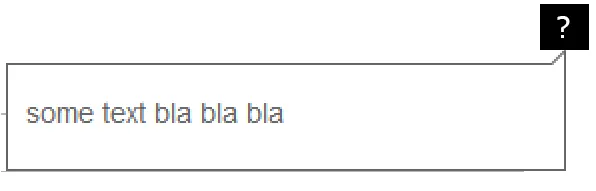
我需要使用JS而非JQuery插件来制作一个简单的提示框,就像下面图片中的那样。
点击?图标应该打开此提示框,再次点击同一图标可关闭它。 我认为对于有良好JS知识的人来说这很简单,但我无论如何都做不到:(
这是我尝试过的东西,我知道这不太多,但我被卡住了。 如何像图片上那样显示它,如何在打开时隐藏它,以及如何添加那个小三角形? myfiddle
<img id="info" src="http://www.craiglotter.co.za/wp-content/uploads/2009/12/craig_question_mark_icon1.png"/>
<div id="ttip">bla bla</div>

document.getElementById('info').addEventListener('click', function(){
    // how to check if it's visible so I can close tooltip
    document.getElementById('ttip').style.display="block";    
});

#info{margin-left:100px;margin-top:50px;}
#ttip
{
    width: 280px;
z-index: 15001;
top: 0px;
left: 0px;
display: none;
    border-color: #666;
background-color: #fff;
color: #666;
    position: relative;
border: 1px solid #666;
padding: 15px 9px 5px 9px;
text-align: left;
word-wrap: break-word;
overflow: hidden;
}

enter image description here


1
你需要解释你的知识基础,你知道如何做哪些部分,当你搜索时发现了什么,以及你特别需要帮助的问题的哪个部分。换句话说,你需要展示至少已经付出了一定水平的努力来开始工作,然后告诉我们你遇到了什么困难。 - jfriend00
我已经尝试了一些 JQuery 插件,但它们并不好,因为我需要纯 JavaScript。我尝试了一些东西,但实际上没有得到任何东西。我只知道如何在单击时显示 div,但不知道如何像这样显示箭头指向被单击的图像。所以我没有类似于这个的东西 :( - 1110
我感到惭愧。我更新了问题,虽然不是太多,但无法得到我想要的结果。我很少使用js。 - 1110
@1110 现在应该可以了:http://jsfiddle.net/u93a3/1/ - Matthew Graves
2个回答

3
清理CSS,基本上就可以做到这一点:
<script>
    function doTip(e){
          var elem = e.toElement;
          if(elem.getAttribute('data-tip-on')  === 'false') {

            elem.setAttribute('data-tip-on', 'true');
            var rect = elem.getBoundingClientRect();          
            var tipId = Math.random().toString(36).substring(7);
            elem.setAttribute('data-tip-id', tipId);
            var tip = document.createElement("div");
            tip.setAttribute('id', tipId);
            tip.innerHTML = elem.getAttribute('data-tip');
            tip.style.top = rect.bottom+ 10 + 'px';
            tip.style.left = (rect.left-200) + 'px';
            tip.setAttribute('class','tip-box');
            document.body.appendChild(tip);

          } else {

            elem.setAttribute('data-tip-on', 'false');
            var tip = document.getElementById(elem.getAttribute('data-tip-id'));
            tip.parentNode.removeChild(tip);


          }
    }
    function enableTips(){
        var elems = document.getElementsByClassName('quick-tip');
        for(var i = 0; i < elems.length; i++) { 
            elems[0].addEventListener("click", doTip, false);

        }
    }
    window.onload = function(){
        enableTips();
    }
</script>
<style>
    .quick-tip {
        background: black;
        color: #fff;
        padding: 5px;
        cursor: pointer;
        height: 15px;
        width: 15px;
        text-align: center;
        font-weight: 900;
        margin-left: 350px;

    }
    .tip-box {
    /* change dimensions to be whatever the background image is */
        height: 50px;
        width: 200px;
        background: grey;
        border: 1px solid black; 
        position: absolute;
    }
</style>


<div class="quick-tip" data-tip="THIS IS THE TIP! change elements 'data-tip' to change." data-tip-on="false">?</div>

<script>enableTips(); //might be required for jsfiddle, especially with reloads.</script>

编辑:修复格式和一个错误。jsfiddle:http://jsfiddle.net/u93a3/


window.onload在jsfiddle中不总是会触发。将以下代码添加到HTML底部以确保它会被触发:<script>enableTips();</script> - Matthew Graves
这是带有正确背景的提示的fiddle链接:http://jsfiddle.net/u93a3/1/ - Matthew Graves
啊,谢谢。我只是试图修改你的代码以添加那个三角形。谢谢。我会从这段代码中学到很多东西。再次感谢。 - 1110
我将尝试扩展此内容,不使用图像作为背景,而是通过CSS以某种方式添加右下角三角形。 - 1110
唯一的问题是这在IE中也不起作用,似乎IE不识别addEventListener... - 1110

2

概念验证:

在HTML中使用以下标记:创建一个类为tooltip的div,添加图像和一个带有所有文本的类为info的div(如果需要可以是多个段落,如果必要会显示滚动条):

<div class='tooltip'>
  <img src='craig_question_mark_icon1.png' alt='Help'/>
  <div class='info'>
    Some text to fill the box with.
  </div>
</div>

CSS中将div.info设置为display:none

当页面加载时,一个纯JavaScript会运行,在画布元素上绘制三角形图像,然后创建一个

元素,其中三角形被设置为背景。然后,对于每个div.tooltip

  1. 添加一个单击事件处理程序到图像
  2. div.info_container替换div.info
  3. div.info_container添加三角形
    的克隆
  4. 将原始的div.info添加到div.info_container

您可以使用此fiddle进行测试。已在FF25、Chrome31、IE10、Opera 12&18上成功测试。

<!doctype html>
<html>
  <head>
    <script>
      "use strict";
      function click(event) {
        var elem = this.parentNode.querySelector('div.info_container');
        if (elem) elem.style.display = elem.style.display === 'block' ? 'none' : 'block';
      }
      function toolify() {
        var idx,
            len,
            elem,
            info,
            text,
            elements = document.querySelectorAll('div.tooltip'),
            canvas,
            imgurl,
            pointer,
            tipHeight = 20,
            tipWidth = 20,
            width = 200,
            height = 100,
            ctx;

        // Create a canvas element where the triangle will be drawn
        canvas = document.createElement('canvas');
        canvas.width = tipHeight;
        canvas.height = tipWidth;
        ctx = canvas.getContext('2d');

        ctx.strokeStyle = '#000';   // Border color
        ctx.fillStyle = '#fff';     // background color
        ctx.lineWidth = 1;

        ctx.translate(-0.5,-0.5);   // Move half pixel to make sharp lines
        ctx.beginPath();
        ctx.moveTo(1,canvas.height);              // lower left corner
        ctx.lineTo(canvas.width, 1);              // upper right corner
        ctx.lineTo(canvas.width,canvas.height);   // lower right corner
        ctx.fill();                               // fill the background
        ctx.stroke();                             // stroke it with border
        //fix bottom row
        ctx.fillRect(0,canvas.height-0.5,canvas.width-1,canvas.height+2);

        // Create a div element where the triangel will be set as background
        pointer = document.createElement('div');
        pointer.style.width = canvas.width + 'px';
        pointer.style.height = canvas.height + 'px';
        pointer.innerHTML = '&nbsp;' // non breaking space
        pointer.style.backgroundImage = 'url(' + canvas.toDataURL() + ')';
        pointer.style.position = 'absolute';
        pointer.style.top = '2px';
        pointer.style.right = '1px';
        pointer.style.zIndex = '1'; // place it over the other elements

        for (idx=0, len=elements.length; idx < len; ++idx) {
          elem = elements[idx];
          elem.querySelector('img').addEventListener('click',click);
          text = elem.querySelector('div.info');
          // Create a new div element, and place the text and pointer in it
          info = document.createElement('div');
          text.parentNode.replaceChild(info,text);
          info.className = 'info_container';
          info.appendChild(pointer.cloneNode());
          info.appendChild(text);
          //info.addEventListener('click',click);
        }
      }
      window.addEventListener('load',toolify);
    </script>
    <style>
      div.tooltip
      {
        position:relative;
        display:inline-block;
        width:300px;
        text-align:right;
      }
      div.tooltip > div.info
      {
        display:none;
      }
      div.tooltip div.info_container
      {
        position:absolute;
        right:20px;
        width:200px;
        height:100px;
        display:none;
      }
      div.tooltip div.info
      {
        text-align:left;
        position:absolute;
        left:1px;
        right:1px;
        top:20px;
        bottom:1px;
        color:#000;
        padding:5px;
        overflow:auto;
        border:1px solid #000;
      }
    </style>
  </head>
  <body>
    <div class='tooltip'>
      <img src='craig_question_mark_icon1.png' alt='Help'/>
      <div class='info'>
        Some text to fill the box with.
      </div>
    </div>
    <div class='tooltip'>
      <img src='craig_question_mark_icon1.png' alt='Help'/>
      <div class='info'>
        Some text to fill the box with.
        Some text to fill the box with.
        Some text to fill the box with.
        Some text to fill the box with.
      </div>
    </div>
  </body>
</html>

唯一的问题是这在IE中不起作用,似乎IE无法识别addEventListener... - 1110
@1110 你正在使用哪个版本?它从IE9开始就得到了支持。旧版本使用attachEvent(在IE11中不受支持)。 - some

网页内容由stack overflow 提供, 点击上面的
可以查看英文原文,
原文链接