NSLayoutManager:如何仅在可渲染字符处填充背景颜色

6
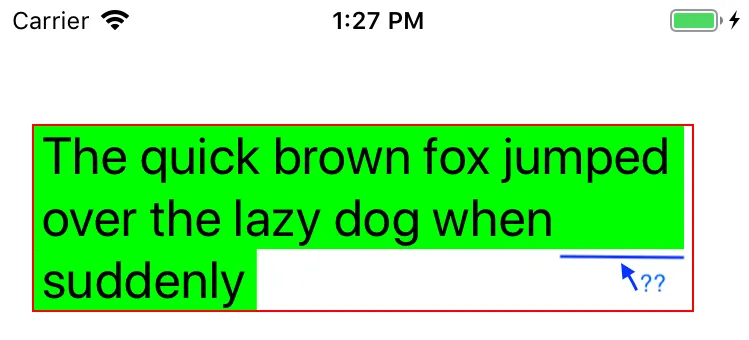
默认的布局管理器会在没有文本的地方填充背景颜色(由NSAttributedString.backgroundColor属性指定),除了最后一行。

enter image description here

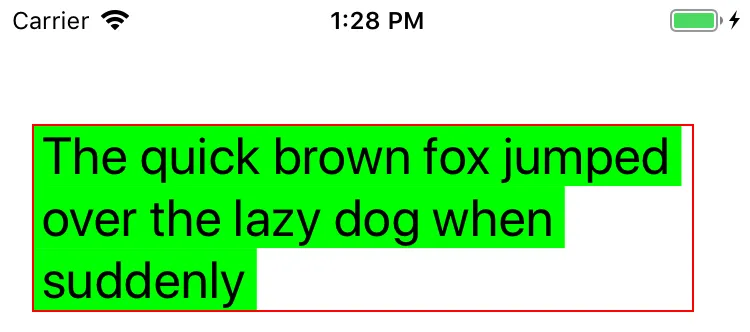
我通过子类化NSLayoutManager并覆盖func drawBackground(forGlyphRange glyphsToShow: NSRange, at origin: CGPoint)方法来实现我想要的效果,具体如下:

override func drawBackground(forGlyphRange glyphsToShow: NSRange, at origin: CGPoint) {
    guard let textContainer = textContainers.first, let textStorage = textStorage else { fatalError() }

    // This just takes the color of the first character assuming the entire container has the same background color.
    // To support ranges of different colours, you'll need to draw each glyph separately, querying the attributed string for the
    // background color attribute for the range of each character.
    guard textStorage.length > 0, let backgroundColor = textStorage.attribute(.backgroundColor, at: 0, effectiveRange: nil) as? UIColor else { return }

    var lineRects = [CGRect]()

    // create an array of line rects to be drawn.
    enumerateLineFragments(forGlyphRange: glyphsToShow) { (_, usedRect, _, range, _) in
        var usedRect = usedRect
        let locationOfLastGlyphInLine = NSMaxRange(range)-1
        // Remove the space at the end of each line (except last).
        if self.isThereAWhitespace(at: locationOfLastGlyphInLine) {
            let lastGlyphInLineWidth = self.boundingRect(forGlyphRange: NSRange(location: locationOfLastGlyphInLine, length: 1), in: textContainer).width
            usedRect.size.width -= lastGlyphInLineWidth
        }
        lineRects.append(usedRect)
    }

    lineRects = adjustRectsToContainerHeight(rects: lineRects, containerHeight: textContainer.size.height)

    for (lineNumber, lineRect) in lineRects.enumerated() {
        guard let context = UIGraphicsGetCurrentContext() else { return }
        context.saveGState()
        context.setFillColor(backgroundColor.cgColor)
        context.fill(lineRect)
        context.restoreGState()
    }
}

private func isThereAWhitespace(at location: Int) -> Bool {
    return propertyForGlyph(at: location) == NSLayoutManager.GlyphProperty.elastic
}

enter image description here

然而,这并不能处理在属性字符串中通过范围指定多个颜色的可能性。我该如何实现这一点?我已经尝试了fillBackgroundRectArray,但效果不佳。

看一下这个:https://github.com/kimikaza/TagFieldDemoPlayground/blob/master/TagFieldsDemoPlayground.playground/Contents.swift 这样你就可以为每种颜色设置不同的属性键。 - koen
Koen,谢谢你的回复,但是它在多行上并不完全有效。 - Aodh
1
最终,我放弃了使用属性,而是自己跟踪所选范围,并根据需要进行着色。但是,我没有像你展示的那样出现间隙(在单词“when”之后),因此在你的情况下也可能不起作用。 - koen
2个回答

4

我该如何实现这个?

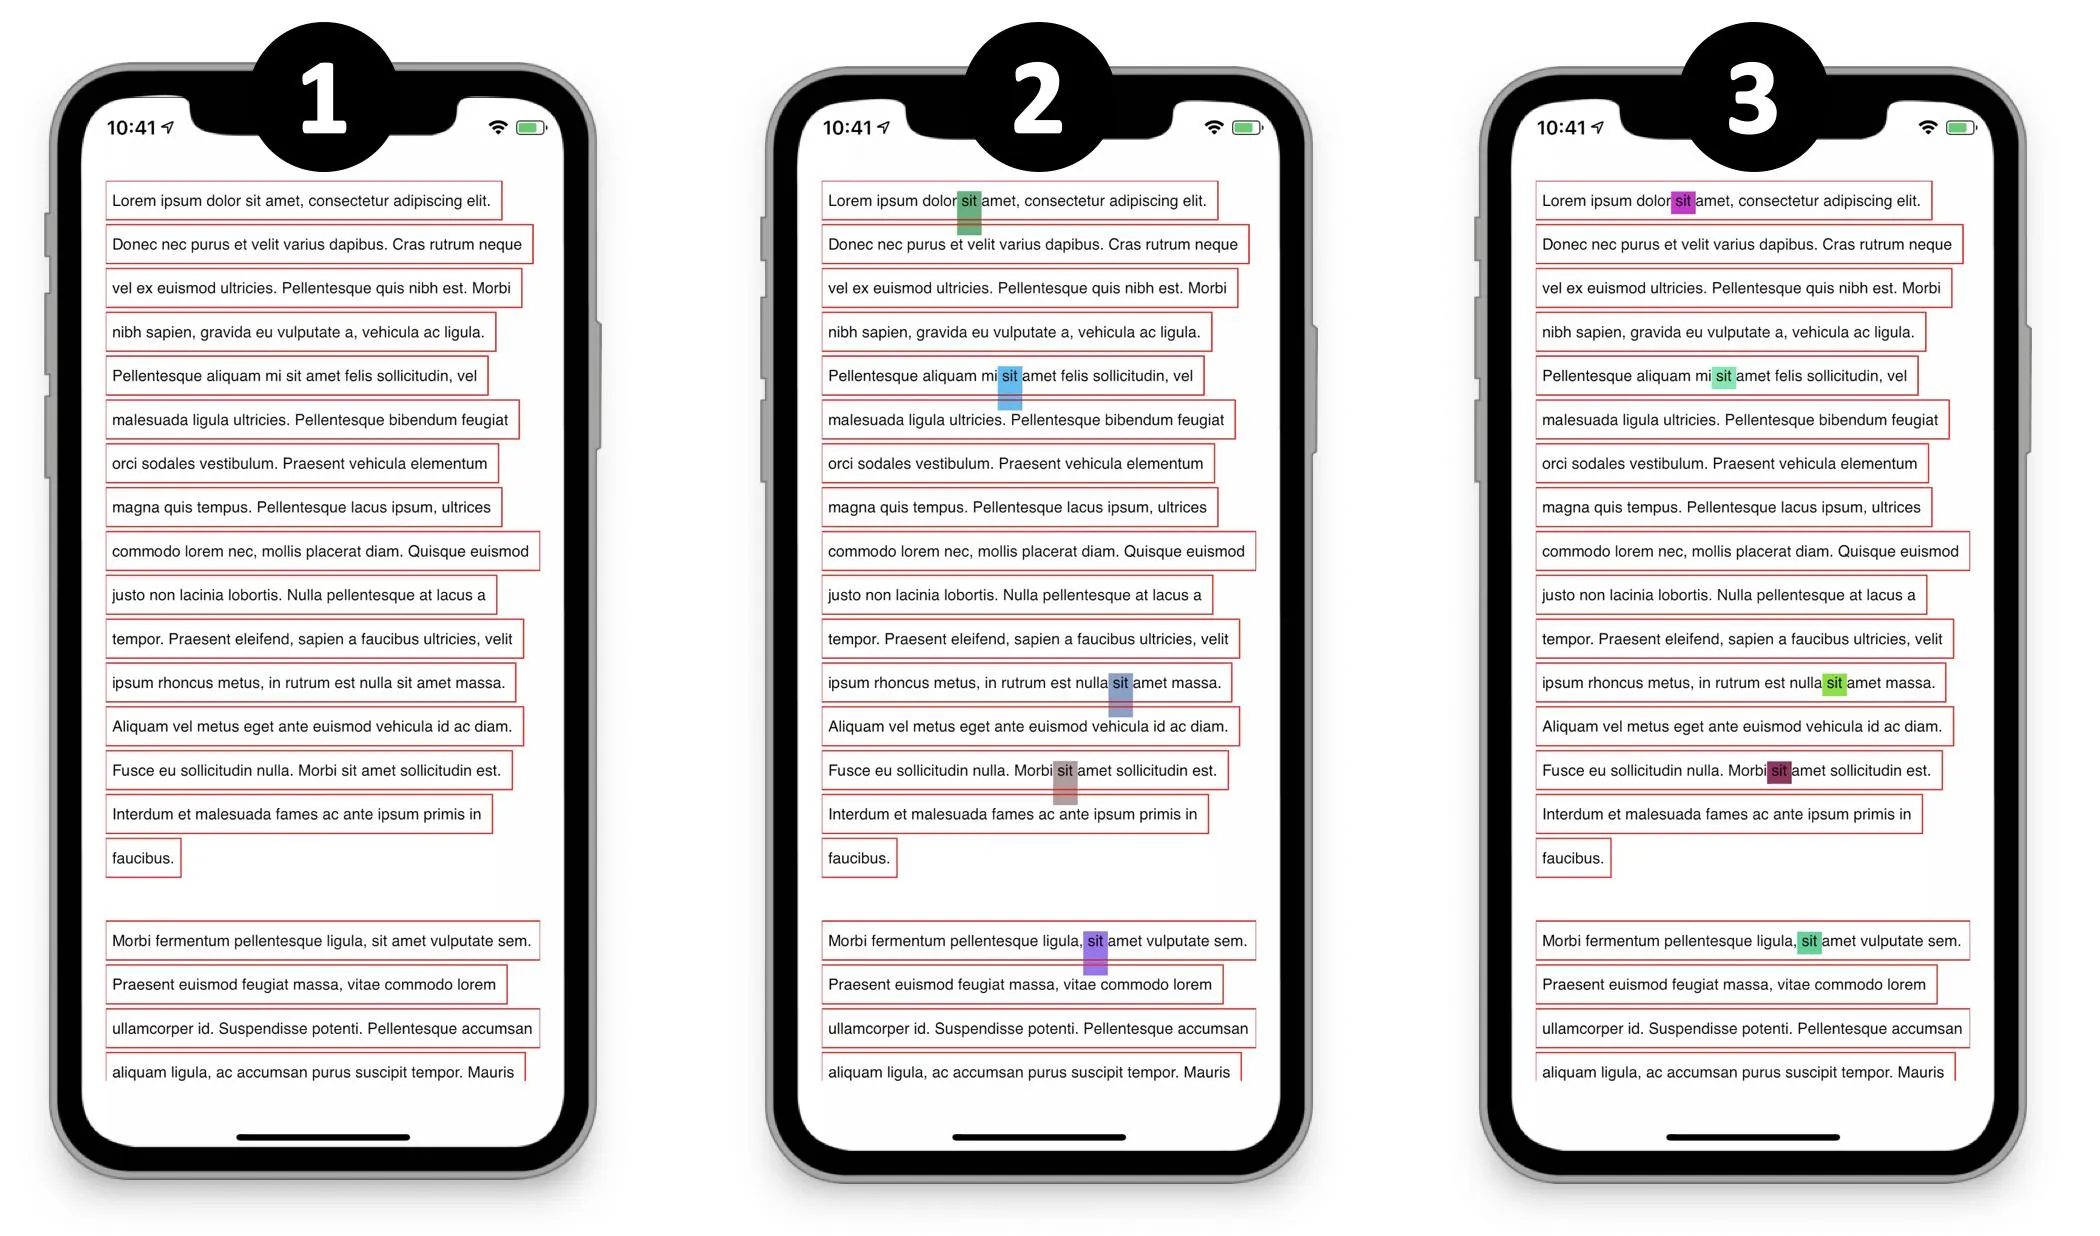
以下是我如何达到你的目标,在著名的 Lorem ipsum... 中以不同颜色突出显示“sit”一词,这段文字足够长,可以测试多行。

支持以下代码的所有基础知识 (Swift 5.1, iOS 13) 都在 this answer 中提供,出于清晰明了的原因,这里不会复制,而是得出以下结果:1

enter image description here

在你的情况下,你想要突出字符串中的某些特定部分,这意味着这些元素应该有专用的关键属性,因为它们的内容 ⟹ 在我看来,这取决于 textStorage 如何处理它。

MyTextStorage.swift

// Sent when a modification appears via the 'replaceCharacters' method.
    override func processEditing() {

        var regEx: NSRegularExpression

        do {
            regEx = try NSRegularExpression.init(pattern: " sit ", options: .caseInsensitive)
            let stringLength = backingStorage.string.distance(from: backingStorage.string.startIndex,
                                                              to: backingStorage.string.endIndex)
            regEx.enumerateMatches(in: backingStorage.string,
                                   options: .reportCompletion,
                                   range: NSRange(location: 1, length: stringLength-1)) { (result, flags, stop) in

                                guard let result = result else { return }
                                self.setAttributes([NSAttributedString.Key.foregroundColor : UIColor.black, //To be seen above every colors.
                                                    NSAttributedString.Key.backgroundColor : UIColor.random()],
                                                   range: result.range)
            }
        } catch let error as NSError {
            print(error.description)
        }

        super.processEditing()
    }
}

//A random color is provided for each " sit " element to highlight the possible different colors in a string.
extension UIColor {
    static func random () -> UIColor {
        return UIColor(red: CGFloat.random(in: 0...1),
                       green: CGFloat.random(in: 0...1),
                       blue: CGFloat.random(in: 0...1),
                       alpha: 1.0)
    }
}

如果您在此处构建和运行,则会得到结果2,显示文本中找到的“sit”的每个彩色背景存在问题 ⟹ lineFragment和彩色背景矩形之间存在偏移。我查看了您提到的fillBackgroundRectArray方法,苹果公司表示该方法“用颜色填充背景矩形”并且“是由drawBackground使用的基本方法”:似乎在这里完美地解决了布局问题。

MyLayoutManager.swift

override func fillBackgroundRectArray(_ rectArray: UnsafePointer<CGRect>,
                                      count rectCount: Int,
                                      forCharacterRange charRange: NSRange,
                                      color: UIColor) {

    self.enumerateLineFragments(forGlyphRange: charRange) { (rect, usedRect, textContainer, glyphRange, stop) in

        var newRect = rectArray[0]
        newRect.origin.y = usedRect.origin.y + (usedRect.size.height / 4.0)
        newRect.size.height = usedRect.size.height / 2.0

        let currentContext = UIGraphicsGetCurrentContext()
        currentContext?.saveGState()
        currentContext?.setFillColor(color.cgColor)
        currentContext?.fill(newRect)

        currentContext?.restoreGState()
    }
}

参数调整需要深入探讨,以获得通用公式,但对于示例而言,它的效果很好。
最终,我们得到了结果 3 ,这使得在属性字符串中通过范围指定多个颜色成为可能,一旦正则表达式的条件被适应。

1

或者,您可以完全绕过使用属性,像这样:

因此,首先我定义了这个结构体:

struct HighlightBackground {
    let range: NSRange
    let color: NSColor
}

然后在我的NSTextView子类中:
var highlightBackgrounds = [HighlightBackground]()

override func setSelectedRanges(_ ranges: [NSValue], affinity: NSSelectionAffinity, stillSelecting stillSelectingFlag: Bool) {
    if stillSelectingFlag == false {
        return
    }

 // remove old ranges first
    highlightBackgrounds = highlightBackgrounds.filter { $0.color != .green }

    for value in ranges {
        let range = value.rangeValue

        highlightBackgrounds.append(HighlightBackground(range: range, color: .green))
    }

    super.setSelectedRanges(ranges, affinity: affinity, stillSelecting: stillSelectingFlag)
}

然后从您的draw(_ rect: NSRect)方法中调用此方法:

func showBackgrounds() {
    guard
        let context = NSGraphicsContext.current?.cgContext,
        let lm = self.layoutManager
    else { return }

    context.saveGState()
    //        context.translateBy(x: origin.x, y: origin.y)

    for bg in highlightBackgrounds {
        bg.color.setFill()

        let glRange = lm.glyphRange(forCharacterRange: bg.range, actualCharacterRange: nil)    
        for rect in lm.rectsForGlyphRange(glRange) {    
            let path = NSBezierPath(roundedRect: rect, xRadius: selectedTextCornerRadius, yRadius: selectedTextCornerRadius)
            path.fill()
        }
    }

    context.restoreGState()
}

最后,在您的NSLayoutManager子类中需要这个,虽然您可能也可以将其放在NSTextView子类中。
func rectsForGlyphRange(_ glyphsToShow: NSRange) -> [NSRect] {

    var rects = [NSRect]()
    guard
        let tc = textContainer(forGlyphAt: glyphsToShow.location, effectiveRange: nil)
    else { return rects }

    enumerateLineFragments(forGlyphRange: glyphsToShow) { _, _, _, effectiveRange, _ in
        let rect = self.boundingRect(forGlyphRange: NSIntersectionRange(glyphsToShow, effectiveRange), in: tc)
        rects.append(rect)
    }

    return rects
}

希望这在你的情况下也能起作用。

网页内容由stack overflow 提供, 点击上面的
可以查看英文原文,
原文链接