文本应该有一个背景和自定义填充,以便文本与背景边缘之间留有一定空间。
我发现最好的方法是使用TextKit,虽然它可能有点繁琐,但完全模块化并且是为此目的而设计的。
在我看来,TextView本身不应该在其draw方法中绘制矩形,这是LayoutManager的工作。
下面提供了项目中使用的整个类,以便于复制粘贴(Swift 5.1 - iOS 13)。
AppDelegate.swift存储了在应用程序中任何位置获取文本的属性。
class AppDelegate: UIResponder, UIApplicationDelegate {

    lazy var TextToBeRead: NSAttributedString = {

        var text: String
        if let filepath = Bundle.main.path(forResource: "TextToBeRead", ofType: "txt") {
            do { text = try String(contentsOfFile: filepath) }
            catch { text = "E.R.R.O.R." }
        } else { text = "N.O.T.H.I.N.G." }

        return NSAttributedString(string: text)
    }()
}
ViewController.swift ⟹ 只有一个全屏幕的文本视图。
class ViewController: UIViewController, NSLayoutManagerDelegate {

    @IBOutlet weak var myTextView: UITextView!
    let textStorage = MyTextStorage()
    let layoutManager = MyLayoutManager()

    override func viewDidLoad() {
        super.viewDidLoad()

        self.layoutManager.delegate = self

        self.textStorage.addLayoutManager(self.layoutManager)
        self.layoutManager.addTextContainer(myTextView.textContainer)

        let appDelegate = UIApplication.shared.delegate as? AppDelegate
        self.textStorage.replaceCharacters(in: NSRange(location: 0, length: 0),
                                           with: (appDelegate?.TextToBeRead.string)!)
    }

    func layoutManager(_ layoutManager: NSLayoutManager,
                       lineSpacingAfterGlyphAt glyphIndex: Int,
                       withProposedLineFragmentRect rect: CGRect) -> CGFloat { return 20.0 }

    func layoutManager(_ layoutManager: NSLayoutManager,
                       paragraphSpacingAfterGlyphAt glyphIndex: Int,
                       withProposedLineFragmentRect rect: CGRect) -> CGFloat { return 30.0 }
}
MyTextStorage.swift
class MyTextStorage: NSTextStorage {
var backingStorage: NSMutableAttributedString
override init() {
backingStorage = NSMutableAttributedString()
super.init()
}
required init?(coder: NSCoder) {
backingStorage = NSMutableAttributedString()
super.init(coder: coder)
}
override var string: String {
get { return self.backingStorage.string }
}
override func attributes(at location: Int,
effectiveRange range: NSRangePointer?) -> [NSAttributedString.Key : Any] {
return backingStorage.attributes(at: location, effectiveRange: range)
}
override func replaceCharacters(in range: NSRange, with str: String) {
backingStorage.replaceCharacters(in: range, with: str)
self.edited(.editedCharacters,
range: range,
changeInLength: str.count - range.length)
}
override func setAttributes(_ attrs: [NSAttributedString.Key : Any]?, range: NSRange) {
backingStorage.setAttributes(attrs, range: range)
self.edited(.editedAttributes,
range: range,
changeInLength: 0)
}
}
MyLayoutManager.swift
import CoreGraphics
class MyLayoutManager: NSLayoutManager {
override init() { super.init() }
required init?(coder: NSCoder) { super.init(coder: coder) }
override func drawBackground(forGlyphRange glyphsToShow: NSRange, at origin: CGPoint) {
super.drawBackground(forGlyphRange: glyphsToShow, at: origin)
self.enumerateLineFragments(forGlyphRange: glyphsToShow) { (rect, usedRect, textContainer, glyphRange, stop) in
var lineRect = usedRect
lineRect.size.height = 30.0
let currentContext = UIGraphicsGetCurrentContext()
currentContext?.saveGState()
currentContext?.setStrokeColor(UIColor.red.cgColor)
currentContext?.setLineWidth(1.0)
currentContext?.stroke(lineRect)
currentContext?.restoreGState()
}
}
}
以下是最终的效果:
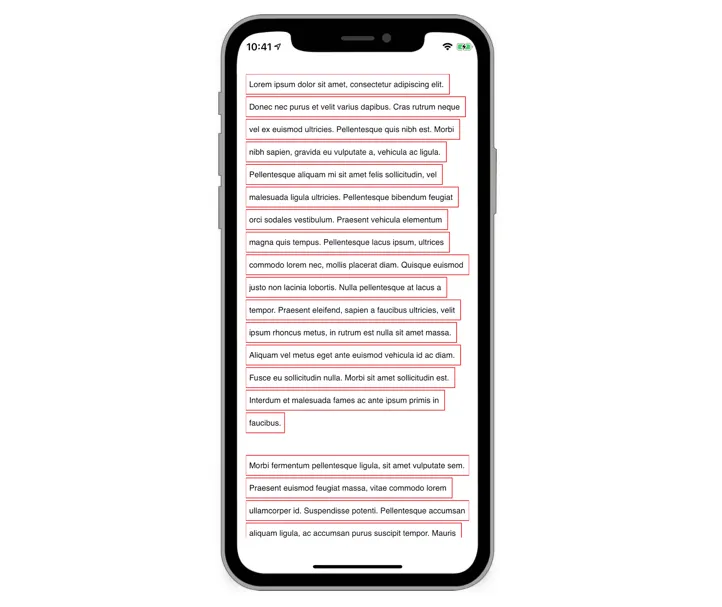
只需自定义颜色和调整一些参数,就可以适应您的项目,但这是显示带有文本前后填充和背景的NSAttributedString的基本原理…如果需要的话,可用于超过2行以上的文本。
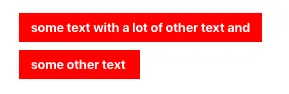 这不是我想要实现的效果(第二行的背景不是特定的单词/字符):
 这是我在Playground中尝试的代码: