在屏幕底部使用LinearLayout放置按钮?

164
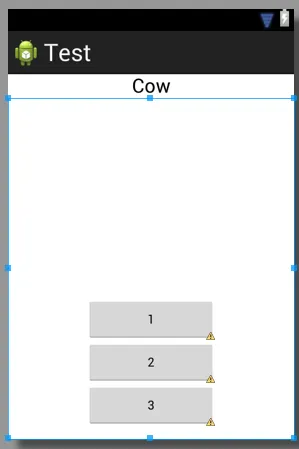
我有以下代码,如何使得这3个按钮在底部显示?
    <TextView
        android:id="@+id/textView1"
        android:layout_width="match_parent"
        android:layout_height="wrap_content"
        android:layout_marginTop="60dp"
        android:gravity="center"
        android:text="@string/observer"
        android:textAppearance="?android:attr/textAppearanceLarge"
        tools:context=".asdf"
        android:weight="1" />

    <LinearLayout
        android:layout_width="match_parent"
        android:layout_height="wrap_content"
        android:orientation="vertical" >

        <Button
            android:id="@+id/button1"
            style="?android:attr/buttonStyleSmall"
            android:layout_width="145dp"
            android:layout_height="wrap_content"
            android:layout_gravity="center_horizontal|center"
            android:text="1" />

        <Button
            android:id="@+id/button2"
            style="?android:attr/buttonStyleSmall"
            android:layout_width="145dp"
            android:layout_height="wrap_content"
            android:layout_gravity="center_horizontal|center"
            android:text="2" />

        <Button
            android:id="@+id/button3"
            style="?android:attr/buttonStyleSmall"
            android:layout_width="145dp"
            android:layout_height="wrap_content"
            android:layout_gravity="center_horizontal|center"
            android:text="3" />
    </LinearLayout>


这个视图是包含在什么里面的?帧布局?相对布局? - Nirvana Tikku
1
你的代码里有个打字错误。在 android:weight="1" 这段代码中,你可能想表达的是 android:layout_weight="1"。然而这并不是你目前遇到的问题。 - Brian Attwell
2
可能是重复的问题:如何将视图对齐到屏幕底部? - Krupa Patel
使用工具箱中找到的空间布局可能更容易。您可以将其放置在现有布局之上,调整其大小,它会将按钮推到底部。 - Alex
您可以在此帖子中找到许多不同的解决方案 https://dev59.com/im865IYBdhLWcg3wFqnY - Windgate
11个回答

309

您需要确保四件事情:

  • 您外部的 LinearLayout 具有 layout_height="match_parent"
  • 您内部的 LinearLayout 具有 layout_weight="1"layout_height="0dp"
  • 您的 TextView 具有 layout_weight="0"
  • 您已正确设置内部 LinearLayout 的重力: android:gravity="center|bottom"

请注意,fill_parent 并不意味着“占用所有可用空间”。 但是,如果您使用 layout_height="0dp"layout_weight="1",则视图将占用所有可用空间 (无法使用“fill_parent”获得正确的布局)。

以下是我快速编写的一些代码,以类似于您的代码的方式使用了两个 LinearLayouts。

<?xml version="1.0" encoding="utf-8"?>
<LinearLayout xmlns:android="http://schemas.android.com/apk/res/android"
    android:id="@+id/db1_root"
    android:layout_width="match_parent"
    android:layout_height="match_parent"
    android:orientation="vertical" >

    <TextView
        android:id="@+id/textView1"
        android:layout_width="fill_parent"
        android:layout_height="wrap_content"
        android:gravity="center"
        android:text="@string/cow"
        android:layout_weight="0"
        android:textAppearance="?android:attr/textAppearanceLarge" />

    <LinearLayout
        android:layout_width="match_parent"
        android:layout_height="0dip"
        android:layout_weight="1"
        android:gravity="center|bottom"
        android:orientation="vertical" >

        <Button
            android:id="@+id/button1"
            style="?android:attr/buttonStyleSmall"
            android:layout_width="145dp"
            android:layout_height="wrap_content"
            android:layout_gravity="center_horizontal|center"
            android:text="1" />

        <Button
            android:id="@+id/button2"
            style="?android:attr/buttonStyleSmall"
            android:layout_width="145dp"
            android:layout_height="wrap_content"
            android:layout_gravity="center_horizontal|center"
            android:text="2" />

        <Button
            android:id="@+id/button3"
            style="?android:attr/buttonStyleSmall"
            android:layout_width="145dp"
            android:layout_height="wrap_content"
            android:layout_gravity="center_horizontal|center"
            android:text="3" />
    </LinearLayout>

</LinearLayout>

结果看起来类似于这个样子:

enter image description here


1
仅因如何使视图填满所有可用空间的提示而投票支持!谢谢,好答案! - lisa
那些 Lint 警告...! - Yousha Aleayoub
这不是最好的解决方案,因为在那之后你无法将视图设置在剩余屏幕的中心.........................所以最佳解决方案奖项授予此答案-https://dev59.com/XW035IYBdhLWcg3wbPfc#26140793 - Sushant Gosavi
请问您能描述一下 layout_weight="0" 的意义或者它实际上是做什么的吗? - Rahat Zaman

35

您可以使用 RelativeLayout 并使用 android:layout_alignParentBottom="true" 将其对齐到底部。


1
使用线性布局不行吗? - thedeepfield
2
像@AND_DEV已经说的那样:使用layout_weight="1"。这样,您的LinearLayout将占用屏幕上剩余的高度;现在,您可以将按钮的重力设置为底部。 - Ahmad
1
相对布局很难阅读,几乎从不按照你的意愿进行操作,并且通常很难维护。我宁愿每天都使用30个线性布局而不是一个相对布局,因为这样可以节省数小时令人沮丧的调整时间。 - G_V
android:layout_alignParentBottom属性不可用,它已经被弃用了吗? - Windgate
@Windgate 请确保您的父布局也是一个RelativeLayout - Ahmad
显示剩余2条评论

14
创建相对布局,并在该布局内使用以下代码创建您的按钮。
android:layout_alignParentBottom="true"

3
此外,添加 android:layout_centerHorizontal="true" 以使其水平居中,这将成为一个很好的解决方案。 - Thomas Mondel
1
很棒的技巧。谢谢。 - zackygaurav
但是为什么我在大多数元素和布局中都没有那个属性可用呢? - Windgate
这是一个如此简单的解决方案,解决了许多问题。干杯! - Koen van der Marel

6
您可以通过将Frame布局作为父布局,然后在其中放置线性布局来实现此操作。以下是一个示例:
<FrameLayout xmlns:android="http://schemas.android.com/apk/res/android"
android:layout_width="match_parent"
android:layout_height="match_parent"
 >
<LinearLayout
android:layout_width="match_parent"
android:layout_height="wrap_content"
android:orientation="vertical">

<TextView
    android:layout_width="match_parent"
    android:layout_height="wrap_content"
    android:padding="5dp"
    android:textSize="16sp"/>


<TextView
    android:layout_width="match_parent"
    android:layout_height="wrap_content"
    android:padding="5dp"      
    android:textSize="16sp"
    />

<TextView
    android:layout_width="match_parent"
    android:layout_height="wrap_content"
    android:padding="5dp"
    android:textSize="16sp"/>

<TextView
    android:layout_width="match_parent"
    android:layout_height="wrap_content"
    android:padding="5dp"
     android:textSize="16sp"/>


</LinearLayout>

<Button
    android:id="@+id/button2"
    android:layout_width="match_parent"
    android:layout_height="wrap_content"
    android:layout_margin="10dp"
    android:layout_gravity="bottom"
    />
 </FrameLayout>

5

首先创建一个名为footer.xml的文件,并将以下代码放入其中。

<?xml version="1.0" encoding="utf-8"?>
<LinearLayout xmlns:android="http://schemas.android.com/apk/res/android"
    android:layout_width="fill_parent"
    android:layout_height="78dp"
    android:layout_gravity="bottom"
    android:gravity="bottom"
 android:layout_weight=".15"
    android:orientation="horizontal"
    android:background="@drawable/actionbar_dark_background_tile" >
    <ImageView
        android:id="@+id/lborder"
        android:layout_width="0dp"
        android:layout_height="wrap_content"
        android:layout_weight=".14"
        android:background="@drawable/action_bar_left_button"
        android:src="@drawable/overlay" />
    <ImageView
        android:id="@+id/unknown"
        android:layout_width="0dp"
        android:layout_height="wrap_content"
        android:layout_weight=".14"
        android:background="@drawable/action_bar_left_button"
        android:src="@drawable/notcolor" />
    <ImageView
        android:id="@+id/open"
        android:layout_width="0dp"
        android:layout_height="wrap_content"
        android:layout_weight=".14"
        android:background="@drawable/action_bar_left_button"
        android:src="@drawable/openit"
        />
    <ImageView
        android:id="@+id/color"
        android:layout_width="0dp"
        android:layout_height="wrap_content"
        android:layout_weight=".14"
        android:background="@drawable/action_bar_left_button"
        android:src="@drawable/colored" />
        <ImageView
        android:id="@+id/rborder"
        android:layout_width="0dp"
        android:layout_height="wrap_content"
        android:background="@drawable/action_bar_left_button"
        android:src="@drawable/frames"
        android:layout_weight=".14" />


</LinearLayout>  

然后创建 header.xml 文件,并将以下代码放置其中:

<?xml version="1.0" encoding="utf-8"?>
<LinearLayout xmlns:android="http://schemas.android.com/apk/res/android"
    android:layout_width="fill_parent"
    android:layout_height="@dimen/action_bar_height"
    android:layout_gravity="top"
    android:baselineAligned="true"
    android:orientation="horizontal"
    android:background="@drawable/actionbar_dark_background_tile" >
    <ImageView
        android:id="@+id/contact"
        android:layout_width="37dp"
        android:layout_height="wrap_content"
        android:layout_gravity="start"
        android:layout_weight=".18"
        android:scaleType="fitCenter"
        android:background="@drawable/action_bar_left_button"
        android:src="@drawable/logo"/>

    <ImageView
        android:id="@+id/share"
        android:layout_width="0dp"
        android:layout_height="wrap_content"
        android:layout_gravity="start"
        android:layout_weight=".14"
        android:background="@drawable/action_bar_left_button"
        android:src="@drawable/share" />

    <ImageView
        android:id="@+id/save"
        android:layout_width="0dp"
        android:layout_height="wrap_content"
        android:layout_weight=".14"
        android:background="@drawable/action_bar_left_button"
        android:src="@drawable/save" />

    <ImageView
        android:id="@+id/set"
        android:layout_width="0dp"
        android:layout_height="wrap_content"
        android:layout_weight=".14"
        android:background="@drawable/action_bar_left_button"
        android:src="@drawable/set" />

    <ImageView
        android:id="@+id/fix"
        android:layout_width="0dp"
        android:layout_height="wrap_content"
        android:layout_weight=".14"
        android:background="@drawable/action_bar_left_button"
        android:src="@drawable/light" />

    <ImageView
        android:id="@+id/rotate"
        android:layout_width="0dp"
        android:layout_height="wrap_content"
        android:layout_weight=".14"
        android:background="@drawable/action_bar_left_button"
        android:src="@drawable/ic_menu_rotate" />

    <ImageView
        android:id="@+id/stock"
        android:layout_width="0dp"
        android:layout_height="wrap_content"
        android:layout_weight=".14"
        android:background="@drawable/action_bar_left_button"
        android:src="@drawable/stock" />

</LinearLayout>

然后在你的 main_activity.xml 文件中添加以下代码:

<RelativeLayout xmlns:android="http://schemas.android.com/apk/res/android"
xmlns:tools="http://schemas.android.com/tools"
android:layout_width="match_parent"
android:layout_height="fill_parent"
tools:context=".MainActivity"
android:id="@+id/relt"
android:background="@drawable/background" >

<LinearLayout
    android:layout_width="fill_parent"
    android:layout_height="78dp"
    android:id="@+id/down"
    android:layout_alignParentBottom="true" >

    <include
        android:layout_width="fill_parent"
        android:layout_height="78dp"
        layout="@layout/footer" >
    </include>
</LinearLayout>
<ImageView
    android:id="@+id/view"
    android:layout_width="match_parent"
    android:layout_height="match_parent"
    android:layout_above="@+id/down"
    android:layout_alignParentLeft="true"
    android:layout_alignParentRight="true"
    android:layout_below="@+id/inc"
   >  
    </ImageView> 
    <include layout="@layout/header"
        android:id="@+id/inc"
        android:layout_width="fill_parent"
        android:layout_height="50dp"></include> 

愉快地编码 :)


顺序重要吗?我注意到您把页脚放在第一个元素,而页眉放在最后。 - Martin Konecny
@MartinKonecny 不用担心,因为RelativeLayout有自己的属性,所以您可以控制其他布局在其中适合的位置,例如:layout_below等。 - Kosh

3
<LinearLayout
 android:id="@+id/LinearLayouts02"
 android:layout_width="match_parent"
 android:layout_height="match_parent"
 android:orientation="vertical"
 android:gravity="bottom|end">

<TextView
android:id="@+id/texts1"
android:layout_height="match_parent"
android:layout_width="match_parent"
android:layout_weight="2"
android:text="@string/forgotpass"
android:padding="7dp"
android:gravity="bottom|center_horizontal"
android:paddingLeft="10dp"
android:layout_marginBottom="30dp"
android:bottomLeftRadius="10dp"
android:bottomRightRadius="50dp"
android:fontFamily="sans-serif-condensed"
android:textColor="@color/colorAccent"
android:textStyle="bold"
android:textSize="16sp"
android:topLeftRadius="10dp"
android:topRightRadius="10dp"/>

</LinearLayout>

1
你可以在父布局为线性布局的情况下将按钮(Button)包含在RelativeLayout中。确保最外层父布局的android:layout_height属性设置为match_parent。 在该

1
您可以使用layout_weight=1Space小部件来填补小部件与底部按钮之间的空间。参见示例:
<LinearLayout xmlns:android="http://schemas.android.com/apk/res/android"
    android:layout_width="match_parent"
    android:layout_height="match_parent"
    android:layout_margin="16dp"
    android:orientation="vertical">

    <LinearLayout
        android:layout_width="match_parent"
        android:layout_height="wrap_content"
        android:orientation="horizontal">

        <com.google.android.material.textfield.TextInputLayout
            android:id="@+id/date_layout"
            android:layout_width="0dp"
            android:layout_height="wrap_content"
            android:layout_marginEnd="8dp"
            android:layout_weight="1"
            android:hint="@string/date_hint">

            <com.google.android.material.textfield.TextInputEditText
                android:id="@+id/date_input"
                android:layout_width="match_parent"
                android:layout_height="wrap_content"
                android:focusable="false" />

        </com.google.android.material.textfield.TextInputLayout>

        <com.google.android.material.textfield.TextInputLayout
            android:id="@+id/time_layout"
            android:layout_width="0dp"
            android:layout_height="wrap_content"
            android:layout_marginStart="8dp"
            android:layout_weight="1"
            android:hint="@string/time_hint">

            <com.google.android.material.textfield.TextInputEditText
                android:id="@+id/time_input"
                android:layout_width="match_parent"
                android:layout_height="wrap_content"
                android:focusable="false"
                android:inputType="datetime" />

        </com.google.android.material.textfield.TextInputLayout>

    </LinearLayout>

    <com.google.android.material.textfield.TextInputLayout
        android:id="@+id/food_layout"
        android:layout_width="match_parent"
        android:layout_height="wrap_content"
        android:layout_marginTop="8dp"
        android:hint="@string/food_hint">

        <com.google.android.material.textfield.TextInputEditText
            android:id="@+id/food_input"
            android:layout_width="match_parent"
            android:layout_height="wrap_content"
            android:inputType="text" />

    </com.google.android.material.textfield.TextInputLayout>

    <com.google.android.material.textfield.TextInputLayout
        android:id="@+id/calories_layout"
        android:layout_width="match_parent"
        android:layout_height="wrap_content"
        android:layout_marginTop="8dp"
        android:hint="@string/calories_hint">

        <com.google.android.material.textfield.TextInputEditText
            android:id="@+id/calories_input"
            android:layout_width="match_parent"
            android:layout_height="wrap_content"
            android:inputType="number" />

    </com.google.android.material.textfield.TextInputLayout>

    <Space
        android:layout_width="match_parent"
        android:layout_height="0dp"
        android:layout_weight="1" />

    <Button
        android:id="@+id/add_button"
        android:layout_width="match_parent"
        android:layout_height="wrap_content"
        android:text="@string/add_button" />

</LinearLayout>

1

只需在包含按钮的LinearLayout中添加layout_weight="1"即可。

编辑:-让我简单解释一下

按照以下方式进行操作,标签名称可能不正确,这只是一个想法

<LL>// Top Parrent LinearLayout
   <LL1 height="fill_parent" weight="1" "other tags as requirement"> <TV /><Butons /></LL1> // this layout will fill your screen.
   <LL2 height="wrap_content" weight="1"  orientation="Horizontal" "other tags as requirement"> <BT1 /><BT2/ ></LL2> // this layout gonna take lower part of button height of your screen

<LL/> TOP PARENT CLOSED

添加android:layout_weight="1"并不会将线性布局(和按钮)移动到底部... - thedeepfield
@AND_DEV,你忘记设置android:gravity了。现在,尽管包含按钮的LinearLayout填充了整个底部区域,但按钮仍将位于顶部。 - Brian Attwell
不,按钮将在LL2中,并且将位于底部区域。如果OP希望将按钮设置在确切的底行,则可以设置重力(Gravity)。我只是提供了一个大致的想法,这样他就可以根据自己的要求进行操作。 - AAnkit
我理解的没错的话,你是在使用 LL1 元素作为空格,这样下面的所有内容都会在底部?非常巧妙的技巧。 - greenoldman

0
在清单文件中为对应的活动添加android:windowSoftInputMode="adjustPan"
  <activity android:name="MyActivity"
    ...
    android:windowSoftInputMode="adjustPan"
    ...
  </activity>

网页内容由stack overflow 提供, 点击上面的
可以查看英文原文,
原文链接