在运行时向滚动视图添加多个元素时,您可能会发现使用UIStackView更加容易...当正确设置后,它将自动随每个添加的对象增长高度。
作为一个简单的例子...
1)首先添加一个UIScrollView(我给它一个蓝色背景以使它更容易看到)。将其约束为四个方向上的零:
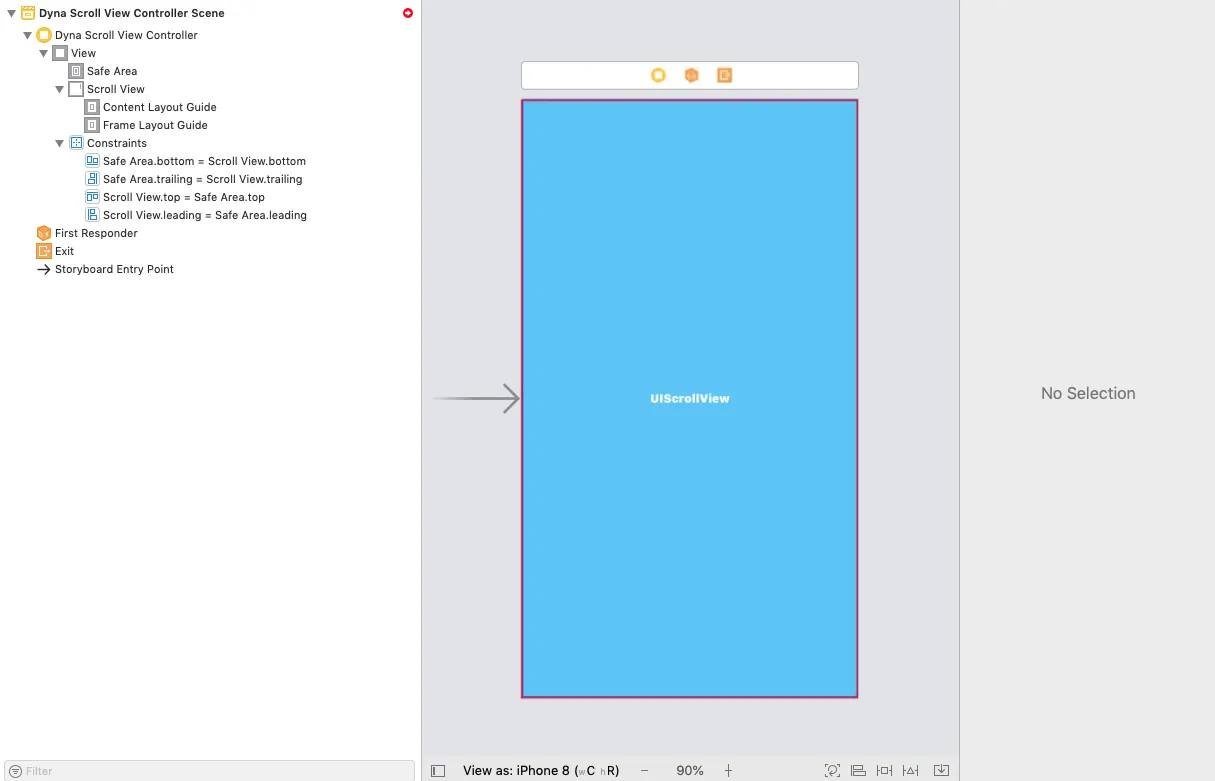
请注意,我们看到“红色圆圈”表示缺少/冲突的约束。暂时忽略它。
2)将UIView添加为滚动视图的“内容视图”(我给它一个系统黄色的背景以使它更容易看到)。将其限制为四个方向上的零 到内容布局指南 - 这将(最终)定义滚动视图的内容大小。还要将其限制为等宽和等高 到框架布局指南:
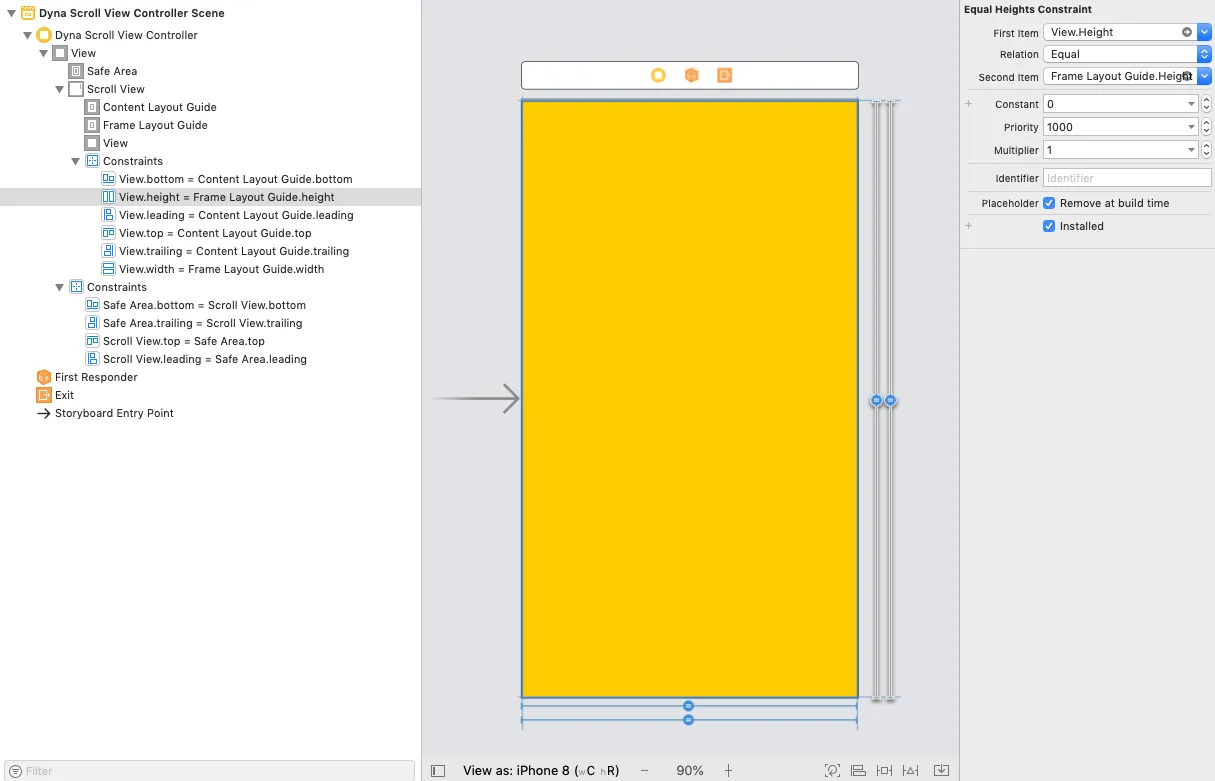
重要步骤:选择高度约束,在Size Inspector窗格中选择Placeholder - Remove at build time复选框。这将在设计时满足IB中的自动布局,但允许该视图的高度根据需要收缩/增长。
3)向“内容视图”添加垂直UIStackView。将其限制为四个方向上的零。将其属性配置为Fill / Fill / 8(如下所示):
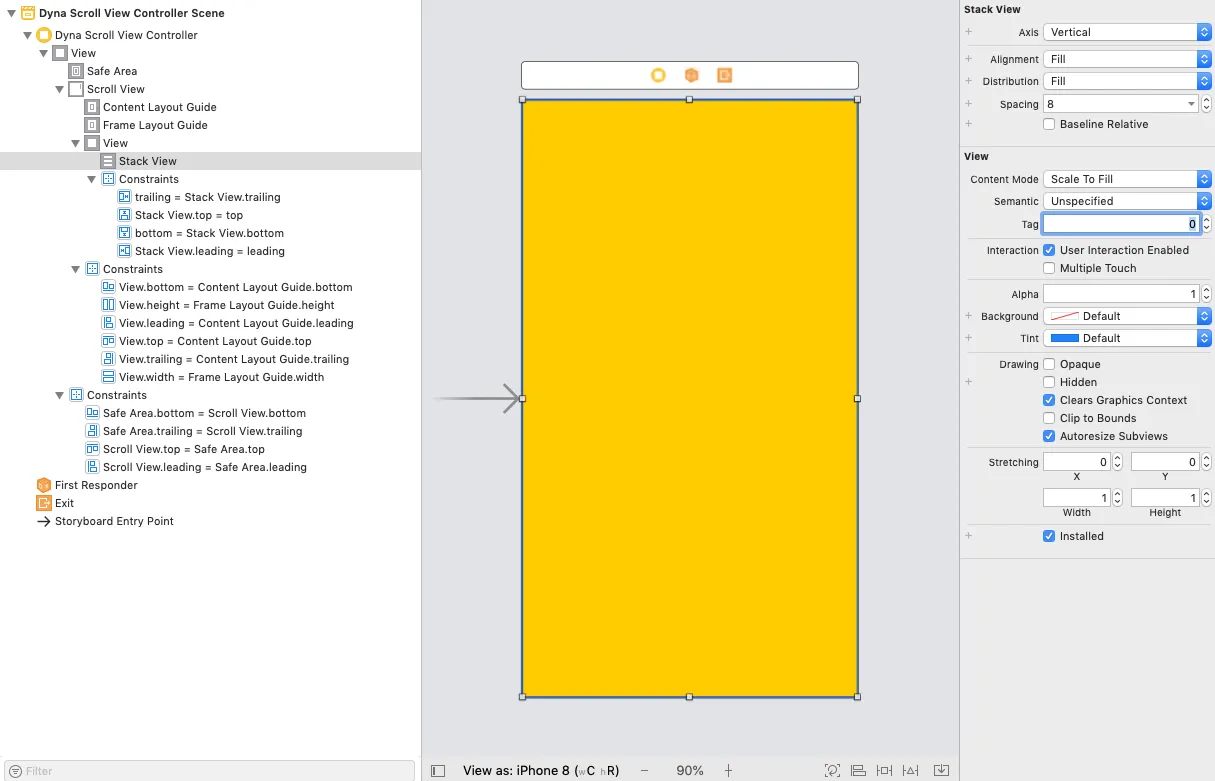
4)在您的视图控制器类中添加@IBOutlet连接到堆栈视图。现在,在运行时,当您向堆栈视图添加UI元素时,所有“可滚动性”都将由自动布局处理。
这是一个示例类:
class DynaScrollViewController: UIViewController {
@IBOutlet var theStackView: UIStackView!
override func viewDidLoad() {
super.viewDidLoad()
var theLabel = UILabel()
var theImageView = UIImageView()
theLabel = UILabel()
theLabel.translatesAutoresizingMaskIntoConstraints = false
theLabel.numberOfLines = 0
theLabel.backgroundColor = .cyan
theLabel.text = (1...9).map({ "Line \($0)" }).joined(separator: "\n")
theStackView.addArrangedSubview(theLabel)
theLabel = UILabel()
theLabel.numberOfLines = 0
theLabel.backgroundColor = .yellow
theLabel.text = (1...5).map({ "Line \($0)" }).joined(separator: "\n")
theStackView.addArrangedSubview(theLabel)
theImageView = UIImageView()
theImageView.translatesAutoresizingMaskIntoConstraints = false
if let img = UIImage(named: "background") {
theImageView.image = img
}
theImageView.widthAnchor.constraint(equalTo: theImageView.heightAnchor, multiplier: 4.0/3.0).isActive = true
theStackView.addArrangedSubview(theImageView)
theLabel = UILabel()
theLabel.numberOfLines = 0
theLabel.backgroundColor = .green
theLabel.text = (1...2).map({ "Line \($0)" }).joined(separator: "\n")
theStackView.addArrangedSubview(theLabel)
theImageView = UIImageView()
theImageView.translatesAutoresizingMaskIntoConstraints = false
if let img = UIImage(named: "AquariumBG") {
theImageView.image = img
}
theImageView.heightAnchor.constraint(equalTo: theImageView.widthAnchor, multiplier: 1.0).isActive = true
theStackView.addArrangedSubview(theImageView)
}
}
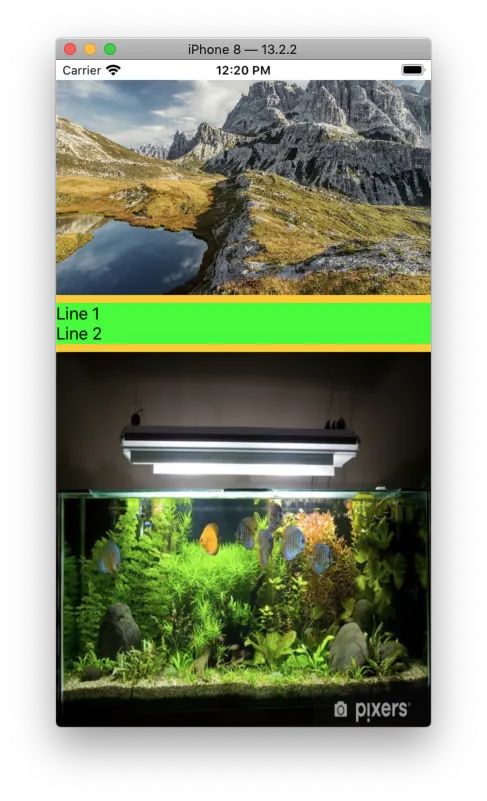
如果按照步骤操作,应该会得到以下输出:
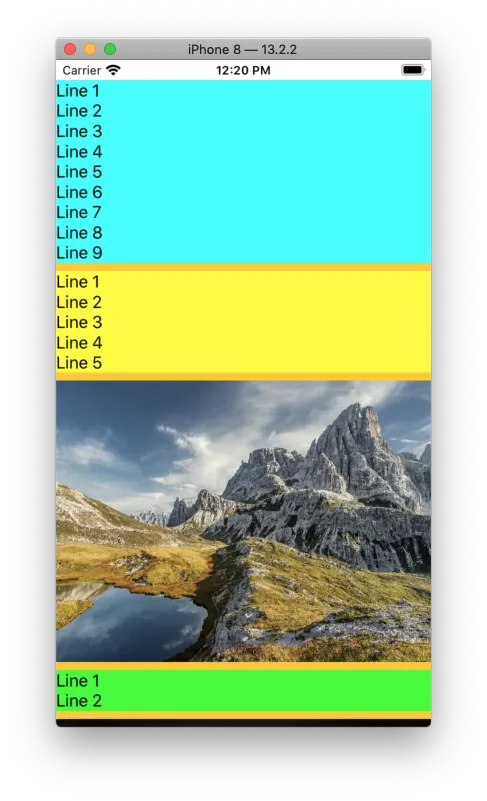
然后向下滚动: