我是一名有用的助手,会翻译文本。
我遇到了一个问题,按钮在
我的情况如下: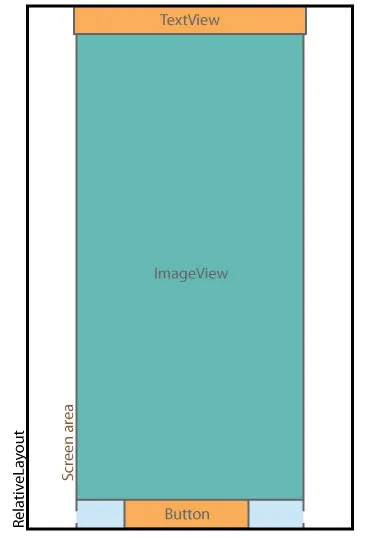 预期结果是什么:
我遇到了一个问题,按钮在
RelativeLayout中显示在屏幕外。 ImageView没有缩放图片以使按钮有可见位置。我的情况如下:
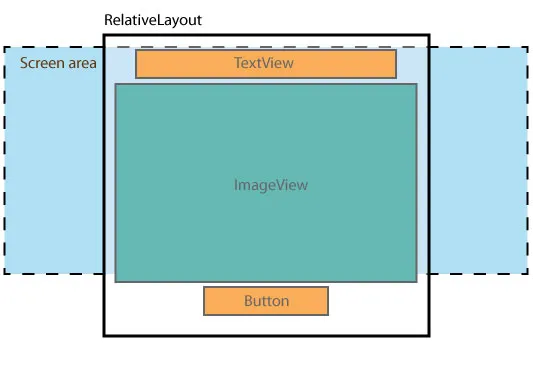
我想要什么:
代码:
<RelativeLayout xmlns:android="http://schemas.android.com/apk/res/android"
          android:layout_width="match_parent"
          android:layout_height="match_parent"
          android:gravity="center_vertical"  >

<TextView
        android:id="@+id/textView"
        android:layout_width="wrap_content"
        android:layout_height="wrap_content"
        android:text="@string/str"
        android:textAppearance="@android:style/TextAppearance.Small"
        android:textColor="?android:attr/textColorTertiary"
        android:layout_centerHorizontal="true"
        />

<ru.mw.widget.DrawableImageView
        android:id="@+id/imageView"
        android:layout_width="wrap_content"
        android:layout_height="wrap_content"
        android:layout_below="@+id/textView"
        android:adjustViewBounds="true"
        android:layout_centerHorizontal="true"
        android:scaleType="centerCrop"
        />

<Button
        android:id="@+id/processButton"
        android:layout_width="wrap_content"
        android:layout_height="wrap_content"
        android:text="@string/str"
        android:layout_below="@+id/imageView"
        android:layout_centerHorizontal="true"
        />
