对于黑白文本
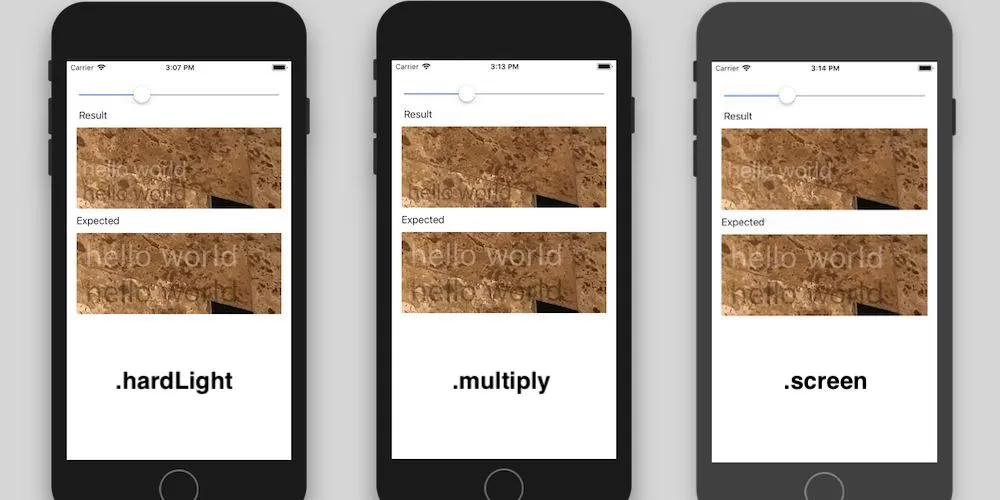
如果您使用的是.normal合成操作,那么您肯定会得到与使用.hardLight不同的结果。您的图片显示了.hardLight操作的结果。
.normal操作是经典的OVER操作,其公式为:(Image1 * A1) + (Image2 * (1 – A1))。
这里有一个预乘的文本(RGB*A),因此在这种特殊情况下,RGB模式取决于A的不透明度。文本图像的RGB可以包含任何颜色,包括黑色。如果A=0(黑色alpha)且RGB=0(黑色)并且您的图像是预乘的,则整个图像完全透明;如果A=1(白色alpha)且RGB=0(黑色)-图像是不透明的黑色。
如果您的文本没有alpha,则使用.normal操作时,我将得到ADD操作:Image1 + Image2。
要获得所需的结果,您需要将合成操作设置为.hardLight。
.hardLight合成操作作为.multiply工作
如果文本图像的alpha小于50%(A <0.5,图像几乎透明)
.multiply的公式:Image1 * Image2
.hardLight合成操作作为.screen工作
如果文本图像的alpha大于或等于50%(A≥0.5,图像是半透明的)
.screen的公式1:(Image1 + Image2) - (Image1 * Image2)
.screen的公式2:1 - (1 - Image1) * (1 - Image2)
.screen操作的结果比.plus更柔和,并且允许保持不大于1的alpha(plus操作会添加Image1和Image2的alpha,因此如果您有两个alpha,则可能会得到alpha = 2)。.screen合成操作非常适合制作反射。
func editImage() {
print("Drawing image with \(selectedOpacity) alpha")
let text = "hello world"
let backgroundCGImage = #imageLiteral(resourceName: "background").cgImage!
let backgroundImage = CIImage(cgImage: backgroundCGImage)
let imageRect = backgroundImage.extent
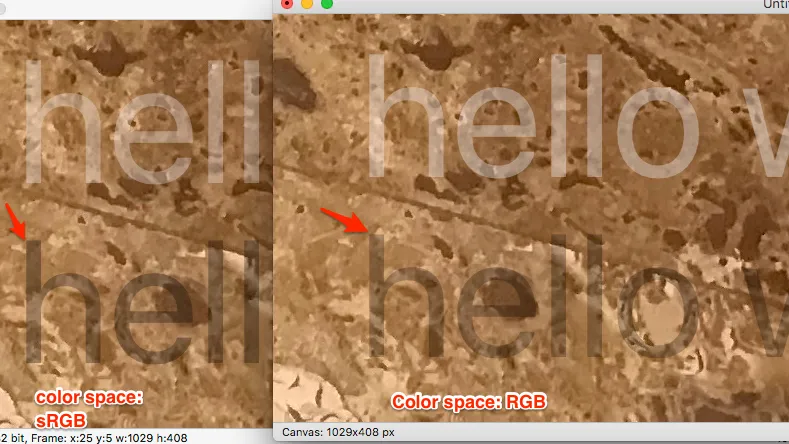
let colorSpace = CGColorSpaceCreateDeviceRGB()
let alphaInfo = CGImageAlphaInfo.premultipliedLast.rawValue
let bitmapContext = CGContext(data: nil, width: Int(imageRect.width), height: Int(imageRect.height), bitsPerComponent: 8, bytesPerRow: 0, space: colorSpace, bitmapInfo: alphaInfo)!
bitmapContext.draw(backgroundCGImage, in: imageRect)
bitmapContext.setAlpha(CGFloat(selectedOpacity))
bitmapContext.setTextDrawingMode(.fill)
bitmapContext.setBlendMode(.hardLight)
bitmapContext.textPosition = CGPoint(x: 15 * UIScreen.main.scale, y: (20 + 60) * UIScreen.main.scale)
let displayLineTextWhite = CTLineCreateWithAttributedString(NSAttributedString(string: text, attributes: [.foregroundColor: UIColor.white, .font: UIFont.systemFont(ofSize: 58 * UIScreen.main.scale)]))
CTLineDraw(displayLineTextWhite, bitmapContext)
bitmapContext.textPosition = CGPoint(x: 15 * UIScreen.main.scale, y: 20 * UIScreen.main.scale)
let displayLineTextBlack = CTLineCreateWithAttributedString(NSAttributedString(string: text, attributes: [.foregroundColor: UIColor.black, .font: UIFont.systemFont(ofSize: 58 * UIScreen.main.scale)]))
CTLineDraw(displayLineTextBlack, bitmapContext)
let outputImage = bitmapContext.makeImage()!
topImageView.image = UIImage(cgImage: outputImage)
}
所以,要重新创建这个合成操作,你需要以下逻辑:
//rgb1 – text image
//rgb2 - background
//a1   - alpha of text image

if a1 >= 0.5 {
    //use this formula for compositing: 1–(1–rgb1)*(1–rgb2)
} else {
    //use this formula for compositing: rgb1*rgb2
}
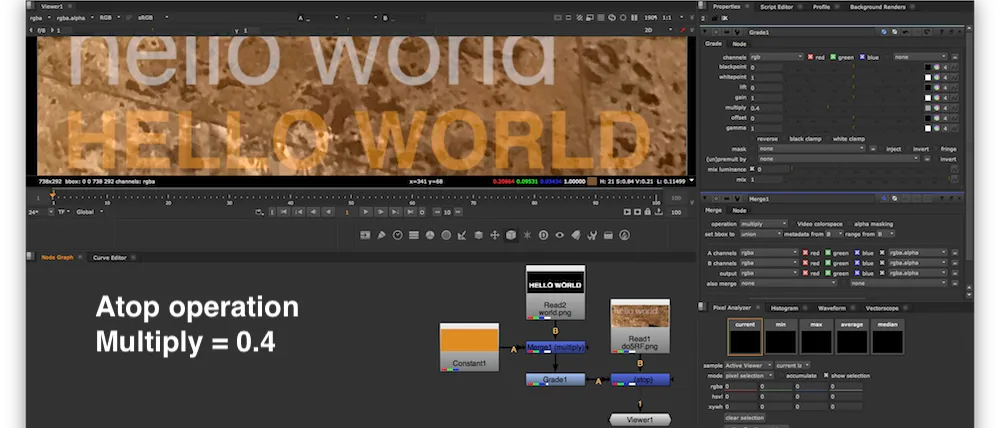
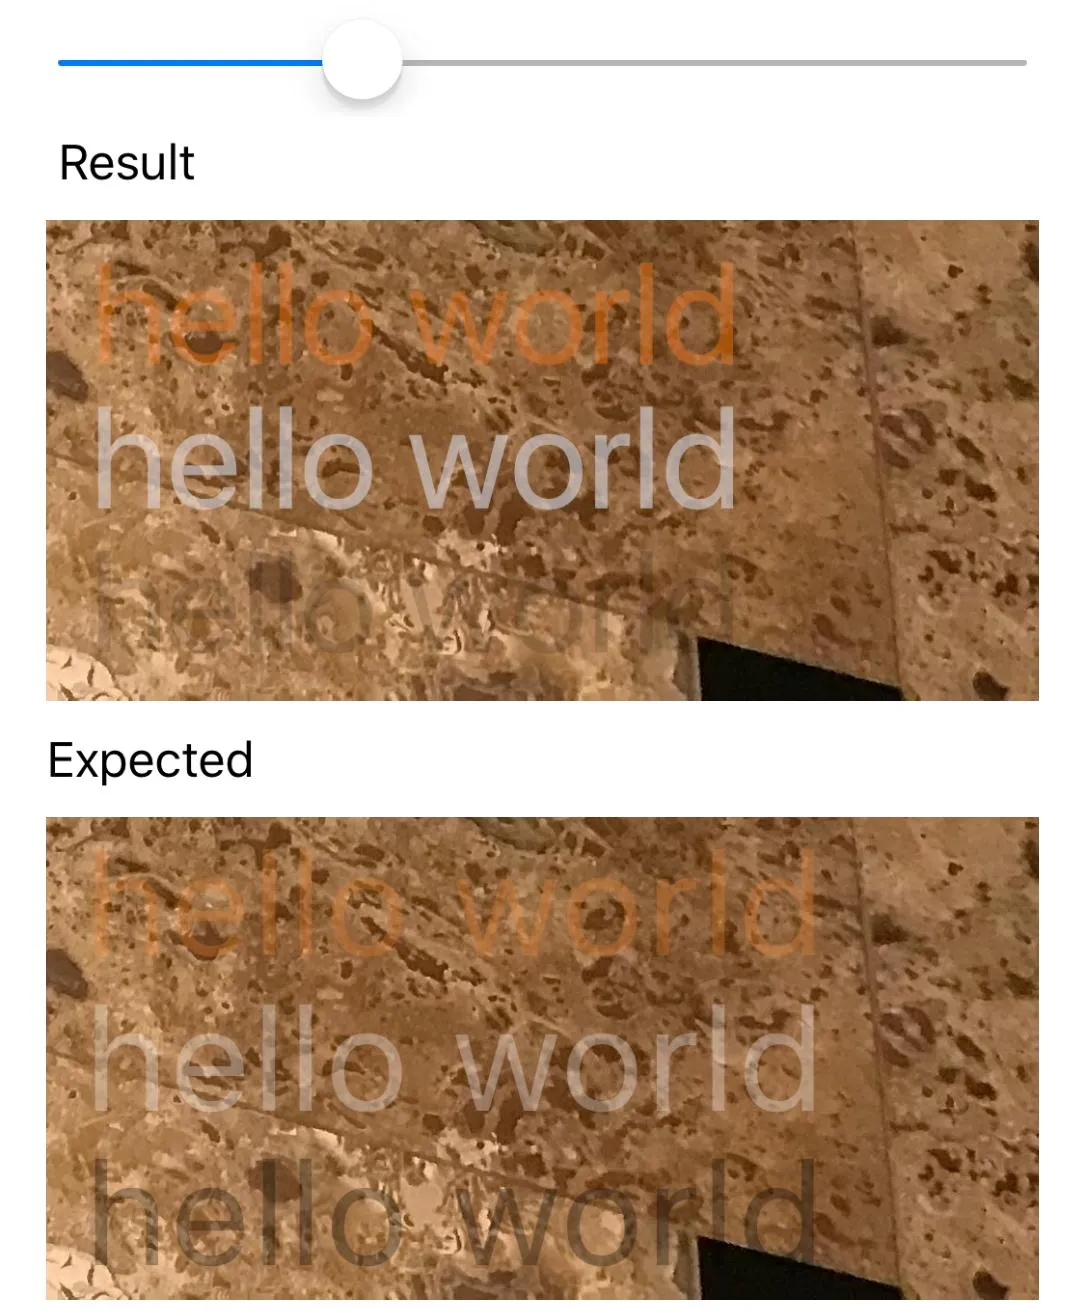
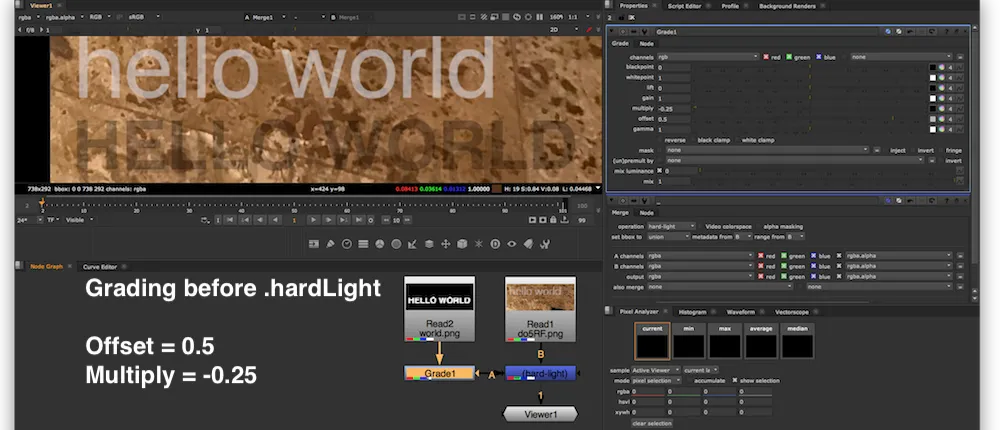
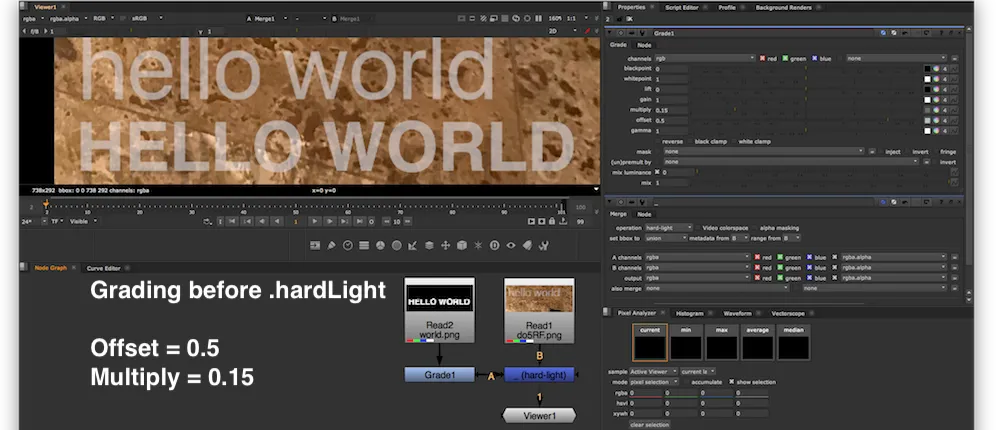
我使用合成软件The Foundry NUKE 11重新创建了一张图片。这里的偏移量是0.5,添加值为0.5。
我使用属性Offset=0.5,因为transparency=0.5是.hardLight合成操作的pivot point(枢轴点)。
对于彩色文本
如果你除了黑白文本还有橙色(或其他颜色)文本,你需要使用.sourceAtop合成操作。通过应用.setBlendMode方法中的.sourceAtop情况,你可以让Swift使用背景图像的亮度来确定要显示的内容。或者,你可以使用CISourceAtopCompositing核心图像过滤器来代替CISourceOverCompositing。
bitmapContext.setBlendMode(.sourceAtop)
或者
let compositingFilter = CIFilter(name: "CISourceAtopCompositing")
.sourceAtop 操作的公式如下:(Image1 * A2) + (Image2 * (1 – A1))。可以看到,您需要两个阿尔法通道:A1 是文本的阿尔法值,A2 是背景图像的阿尔法值。
bitmapContext.textPosition = CGPoint(x: 15 * UIScreen.main.scale, y: (20 + 60) * UIScreen.main.scale)
let displayLineTextOrange = CTLineCreateWithAttributedString(NSAttributedString(string: text, attributes: [.foregroundColor: UIColor.orange, .font: UIFont.systemFont(ofSize: 58 * UIScreen.main.scale)]))
CTLineDraw(displayLineTextOrange, bitmapContext)