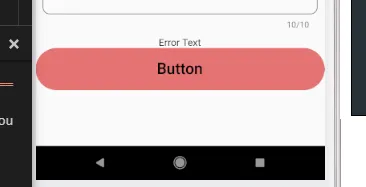
如何使按钮宽度与父容器相匹配?

213

我想知道如何设置宽度以匹配父布局的宽度。

new Container(
  width: 200.0,
  padding: const EdgeInsets.only(top: 16.0),
  child: new RaisedButton(
    child: new Text(
      "Submit",
      style: new TextStyle(
        color: Colors.white,
      )
    ),
    colorBrightness: Brightness.dark,
    onPressed: () {
      _loginAttempt(context);
    },
    color: Colors.blue,
  ),
),

我了解一点Expanded小部件,但是Expanded会将视图向两个方向扩展,我不知道该怎么做。


1
也许应该使用列(Column)? - Günter Zöchbauer
是的,我附加了列而不是容器,但按钮的宽度是Wrap Content,如何将宽度拉伸到父级? - Mohit Suthar
您可以简单地使用FlatButton并将其包装在一个容器内,通过使用MediaQuery查找我的答案,将容器的宽度添加到屏幕宽度中。 - Mahesh Jamdade
25个回答

441

更新:

在 Flutter 2.0 中,RaisedButton 已被弃用并替换为 ElevatedButton。您可以像这样使用 minimumSize

ElevatedButton(
  style: ElevatedButton.styleFrom(
    minimumSize: Size.fromHeight(40), // fromHeight use double.infinity as width and 40 is the height
  ),
  onPressed: () {},
  child: Text('Text Of Button'),
)

Flutter 2.0以下版本的旧答案:

正确的解决方案是使用SizedBox.expand小部件,它强制其child与其父级大小匹配。

SizedBox.expand(
  child: RaisedButton(...),
)

有许多选择,可以更多或更少地进行自定义:

SizedBox(
  width: double.infinity,
  // height: double.infinity,
  child: RaisedButton(...),
)

或者使用ConstrainedBox

ConstrainedBox(
  constraints: const BoxConstraints(minWidth: double.infinity),
  child: RaisedButton(...),
)

55
SizedBox.expand将使按钮占据整个宽度和高度,但这不是问题所在。问题在于按钮仅覆盖整个宽度而不是高度。 - Vinoth Kumar
3
@RémiRousselet Vinoth的评论是正确的。由于现在这个答案已被接受,您能否添加适用于SizedBox仅扩展宽度的正确构造函数? - user823447
4
为什么我们不能像这样改变容器的宽度: Container(width: double.infinity),而不是用另一个小部件 SizedBox 包装它呢?这样更容易阅读,并且可以带来相同的结果。 - Sameen
那么,如果我想要了解Size.fromHeight的确切作用,有哪些好的学习资源呢? - Harsha
在Flutter版本3.13.3上,SizedBox仍然有效。 - undefined
显示剩余2条评论

52
Container(
  width: double.infinity,
  child: RaisedButton(...),
),

46

经过一些研究,我找到了一些解决方法,并感谢@Günter Zöchbauer的帮助。

我使用了列(column)而不是容器(Container),并将属性设置为列的CrossAxisAlignment.stretch以填充按钮的父级元素。

    new Column(
              crossAxisAlignment: CrossAxisAlignment.stretch,
              children: <Widget>[
                new RaisedButton(
                  child: new Text(
                      "Submit",
                      style: new TextStyle(
                        color: Colors.white,
                      )
                  ),
                  colorBrightness: Brightness.dark,
                  onPressed: () {
                    _loginAttempt(context);
                  },
                  color: Colors.blue,
                ),
              ],
            ),

11
不应将Column/Row用于单个子元素的布局。请使用单个子元素的替代方案,如AlignSizedBox等。 - Rémi Rousselet

42

使用ButtonThememinWidth: double.infinity可以设置按钮的大小属性。

ButtonTheme(
  minWidth: double.infinity,
  child: MaterialButton(
    onPressed: () {},
    child: Text('Raised Button'),
  ),
),

或在https://github.com/flutter/flutter/pull/19416合并后

MaterialButton(
  onPressed: () {},
  child: SizedBox.expand(
    width: double.infinity, 
    child: Text('Raised Button'),
  ),
),

32

最简单的方法是在Container中包装一个FlatButton,默认情况下按钮将采用其父级的大小,因此将所需宽度分配给Container

            Container(
                  color: Colors.transparent,
                  width: MediaQuery.of(context).size.width,
                  height: 60,
                  child: FlatButton(
                    shape: new RoundedRectangleBorder(
                      borderRadius: new BorderRadius.circular(30.0),
                    ),
                    onPressed: () {},
                    color: Colors.red[300],
                    child: Text(
                      "Button",
                      style: TextStyle(
                        color: Colors.black,
                        fontFamily: 'Raleway',
                        fontSize: 22.0,
                      ),
                    ),
                  ),
                )

输出:

在此输入图片描述


13
你可以通过以下方式将小部件设置为match parent:

1)将宽度设置为double.infinity:

new Container(
          width: double.infinity,
          padding: const EdgeInsets.only(top: 16.0),
          child: new RaisedButton(
            child: new Text(
                "Submit",
                style: new TextStyle(
                  color: Colors.white,
                )
            ),
            colorBrightness: Brightness.dark,
            onPressed: () {
              _loginAttempt(context);
            },
            color: Colors.blue,
          ),
        ),

2) 使用 MediaQuery:

new Container(
          width: MediaQuery.of(context).size.width,
          padding: const EdgeInsets.only(top: 16.0),
          child: new RaisedButton(
            child: new Text(
                "Submit",
                style: new TextStyle(
                  color: Colors.white,
                )
            ),
            colorBrightness: Brightness.dark,
            onPressed: () {
              _loginAttempt(context);
            },
            color: Colors.blue,
          ),
        ),

1
你在 "MediaLQuery" 中打错了一个字母,我无法编辑单个字符 ;) - MappaM

7

@Mohit Suthar,

我找到了一个最好的解决方案,可以将match parentwidthheight匹配,如下所示:

new Expanded(
          child: new Container(
              padding: EdgeInsets.all(16.0),
              margin: EdgeInsets.all(16.0),
              decoration: new BoxDecoration(
                  color: Colors.white,
                  borderRadius:
                      const BorderRadius.all(const Radius.circular(8.0)),
                  border: new Border.all(color: Colors.black, width: 1.0)),
              child: new Text("TejaDroid")),
        ), 

在这里,您可以检查Expanded控件获取整个的宽度和高度仍然保持不变。

7

如果需要使用match_parent,您可以使用

SizedBox(
  width: double.infinity, // match_parent
  child: RaisedButton(...)
)

对于任何特定的值,您可以使用

SizedBox(
  width: 100, // specific value
  child: RaisedButton(...)
)

6
在给定的代码中,最简单的方法是使用match-parent来设置宽度或高度。
...
width: double.infinity,
height: double.infinity,
...

5
有很多方法可以制作全宽度按钮。但我认为你应该了解在不同场景下制作全宽度小部件的概念:
当你使用嵌套小部件时,很难确定父小部件的宽度。在嵌套小部件中无法指定宽度。因此,您应该使用 Expanded 或 Column 与 CrossAxisAlignment 设置为 Stretch。
在其他情况下,可以使用媒体查询宽度或 double.infinity。
以下是一些嵌套小部件和单个小部件的示例:
第一个示例:
Expanded(   // This will work for nested widgets and will take width of first parent widget.
  child: MaterialButton(
    onPressed: () {},
    child: const Text("Button Text"),
    color: Colors.indigo,
    textColor: Colors.white,
  )
)

第二点:

Column( // This will not work if parent widget Row.
  crossAxisAlignment: CrossAxisAlignment.stretch,
  children: <Widget>[
    MaterialButton(
      onPressed: () {},
      child: const Text("Button Text"),
      color: Colors.indigo,
      textColor: Colors.white,
    )
  ]
)

第三步:

ButtonTheme( // if use media query, then will not work for nested widgets.
  minWidth: double.infinity,  //Or use 'width: MediaQuery.of(context).size.width'
  child: MaterialButton(
    onPressed: () {},
    child: const Text("Button Text"),
    color: Colors.indigo,
    textColor: Colors.white,
  )
)

Forth:

SizedBox( // if use media query, then will not work for nested widgets.
  width: double.infinity, //Or use 'width: MediaQuery.of(context).size.width'
  child: MaterialButton(
    onPressed: () {},
    child: const Text("Button Text"),
    color: Colors.indigo,
    textColor: Colors.white,
  )
)

第五点:

Container( // if use media query, then will not work for nested widgets.
  width: double.infinity, //Or use 'width: MediaQuery.of(context).size.width'
  child: MaterialButton(
    onPressed: () {},
    child: const Text("Button Text"),
    color: Colors.indigo,
    textColor: Colors.white,
  )
)

在我看来,推荐使用第一种。您也可以将MaterialButton更改为ElevatedButtonTextButtonRaisedButton (已弃用)或任何其他小部件。

加油!


网页内容由stack overflow 提供, 点击上面的
可以查看英文原文,
原文链接