使用CoreImage对照片进行滤镜处理时,保存为JPG文件会导致图片具有微妙但明显的蓝色色调。在这个例子中,使用一张黑白图片,直方图显示了颜色在保存后发生了偏移。
---输入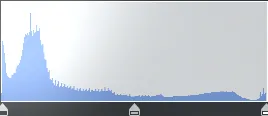 输出 [
输出 [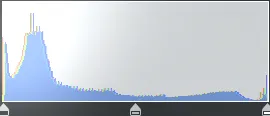 ] 直方图显示颜色层偏移
-- 问题在MacOS“预览”应用程序中得到证明
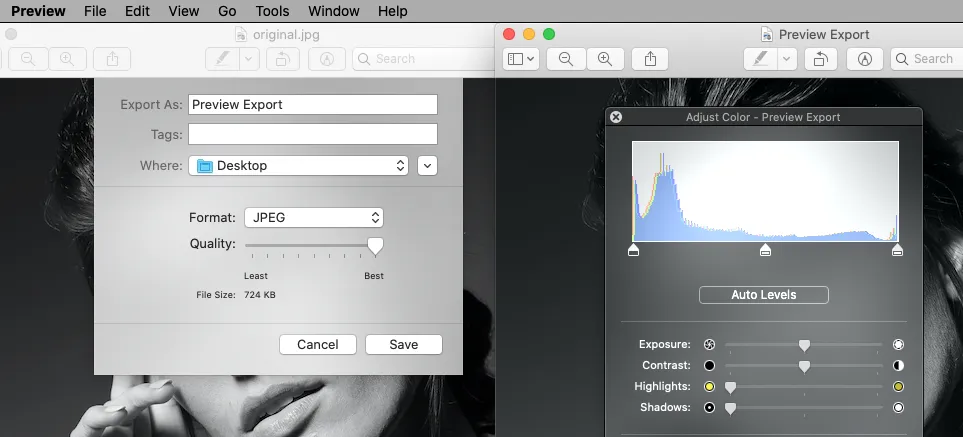
我可以使用“预览”应用程序展示类似的结果。
---输入
输出 [] 直方图显示颜色层偏移-- 问题在MacOS“预览”应用程序中得到证明
我可以使用“预览”应用程序展示类似的结果。
- 测试图片在此处:https://istack.dev59.com/Y3f03.webp
- 使用预览打开JPG图像。
- 以除默认值(85%?)以外的任何“质量”导出为JPEG。
- 打开导出的文件并查看直方图,可以看到与我在应用程序中遇到的相同的颜色偏移。
-- 在自定义的MacOS应用程序中展示的问题
这里的代码尽可能地简化,从照片创建一个CIImage,并立即保存它而不执行任何过滤。在这个例子中,我选择了0.61的压缩比,因为它的文件大小与原始大小相似。如果使用更高的压缩比,扭曲似乎会更广泛,但我找不到任何可以消除它的值。
if let img = CIImage(contentsOf: url) {
   let dest = procFolder.url(named: "InOut.jpg")
   img.jpgWrite(url: dest)
}

extension CIImage {
    func jpgWrite(url: URL) {

        let prop: [NSBitmapImageRep.PropertyKey: Any] = [
            .compressionFactor: 0.61
        ]

        let bitmap = NSBitmapImageRep(ciImage: self)
        let data = bitmap.representation(using: NSBitmapImageRep.FileType.jpeg, properties: prop)

        do {
            try data?.write(to: url, options: .atomic)
        } catch {
            log.error(error)
        }
    }
}
更新1:使用@Frank Schlegel的答案保存JPG文件
JPG现在带有颜色同步配置文件,我可以(不科学地)追踪肖像图像的约10%性能提升(对于横向图像来说则更少),这是一个很好的改进。但是,不幸的是,生成的文件仍然会以与上述直方图演示相同的方式偏斜颜色。
extension CIImage {
   static let writeContext = CIContext(mtlDevice: MTLCreateSystemDefaultDevice()!, options: [
        // using an extended working color space allows you to retain wide gamut information, e.g., if the input is in DisplayP3
        .workingColorSpace: CGColorSpace(name: CGColorSpace.extendedSRGB)!,
        .workingFormat: CIFormat.RGBAh // 16 bit color depth, needed in extended space
    ])

    func jpgWrite(url: URL) {
       // write the output in the same color space as the input; fallback to sRGB if it can't be determined
        let outputColorSpace = colorSpace ?? CGColorSpace(name: CGColorSpace.sRGB)!
        do {
            try CIImage.writeContext.writeJPEGRepresentation(of: self, to: url, colorSpace: outputColorSpace, options: [:])
        } catch {
        }
    }
}
问题:
如何将黑白JPG文件作为CIImage打开,并重新保存JPG文件以避免任何颜色偏移?