将C源代码中的图像转换为原始图像。

3

我使用GIMP创建了一个类似下面的C源代码图像转储:

/* GIMP RGBA C-Source image dump (example.c) */

static const struct {
  guint      width;
  guint      height;
  guint      bytes_per_pixel; /* 2:RGB16, 3:RGB, 4:RGBA */ 
  guint8     pixel_data[304 * 98 * 2 + 1];
} example= {
  304, 98, 2,
  "\206\061\206\061..... }

有没有一种方法可以在GIMP中重新读取这个文件以恢复原始图像?因为它似乎不可能。 或者存在一种可以进行反向转换的工具吗?

编辑

根据一些建议,我尝试编写了一个简单的C程序来进行反向转换,但最终与在Internet上找到的另一个代码非常相似,但两者都无法正常运行:

#include <stdlib.h>
#include <stdio.h>
#include <sys/types.h>
#include <sys/stat.h>
#include <fcntl.h>
#include "imgs_press.h"
#include <stdio.h>
#include <unistd.h>
#include <fcntl.h>

using namespace std;

int main(int argc, char** argv) {
    int fd;
    char *name = "orignal_img.pnm";
    fd = open(name, O_WRONLY | O_CREAT, 0644);
    if (fd == -1) {
        perror("open failed");
        exit(1);
    }

    if (dup2(fd, 1) == -1) {
        perror("dup2 failed"); 
        exit(1);
    }

    // file descriptor 1, i.e. stdout, now points to the file
    // "helloworld" which is open for writing
    // You can now use printf which writes specifically to stdout

  printf("P2\n");
  printf("%d %d\n", press_high.width, press_high.height);
  for(int x=0; x<press_high.width * press_high.height * 2; x++) {
    printf("%d ", press_high.pixel_data[x]);
  }
}

如n-1-8e9-wheres-my-share-m所建议,也许我需要使用正确的解码来操作像素,但是我不知道如何做到这一点,请问是否有其他建议?
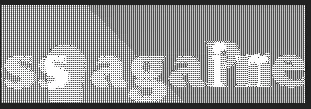
我得到的图像确实失真了: enter image description here

评论不适合进行长时间的讨论;此对话已被移至聊天室 - Samuel Liew
1个回答

4

更新答案

如果你想解码RGB565并且不使用ImageMagick来编写NetPBM格式的PNM文件,那么可以这样做:

#include <stdint.h>   /* for uint8_t */
#include <stdio.h>    /* for printf */

/* tell compiler what those GIMP types are */
typedef int guint;
typedef uint8_t guint8;

#include <YOURGIMPIMAGE>

int main(){

   int w = gimp_image.width;
   int h = gimp_image.height;
   int i;
   uint16_t*  RGB565p = (uint16_t*)&(gimp_image.pixel_data);

   /* Print P3 PNM header on stdout */
   printf("P3\n%d %d\n255\n",w, h);

   /* Print RGB pixels, ASCII, one RGB pixel per line */
   for(i=0;i<w*h;i++){
      uint16_t RGB565 = *RGB565p++;
      uint8_t r = (RGB565 & 0xf800) >> 8;
      uint8_t g = (RGB565 & 0x07e0) >> 3;
      uint8_t b = (RGB565 & 0x001f) << 3;
      printf("%d %d %d\n", r, g ,b);
   }
}

编译命令:

clang example.c

并使用以下命令运行:

./a.out > result.pnm

除了你提供的样例图像,我没有进行过太多的测试,所以建议你使用一些红色、绿色、蓝色和不同灰度的测试图像来确保我的位运算正确。

原回答

ImageMagick 来做是获取你的图像最简单的方法。

因此,将你的 C 文件添加一个 main() 函数,该函数只需将从 &(example.pixel_data) 开始的 304x98x2 字节写入 stdout:

使用以下类似命令进行编译:

clang example.c -o program    # or with GCC
gcc example.c -o program

然后运行它,将结果写入文件中以供ImageMagick使用:

./program > image.bin

并告诉 ImageMagick 图片的尺寸、类型、位置和所需结果:

magick -size 304x98 RGB565:image.bin result.png

我快速测试了以下代码,虽然不是非常彻底,但对于使用GIMP生成的图像可以正常工作。请注意,它无法处理alpha /透明度,但如果需要,可以添加。将其保存为program.c

#include <unistd.h>   /* for write() */
#include <stdint.h>   /* for uint8_t */

/* tell compiler what those GIMP types are */
typedef int guint;
typedef uint8_t guint8;

<PASTE YOUR GIMP FILE HERE>

int main(){

   /* Work out how many bytes to write */
   int nbytes = example.width * example.height * 2;

   /* Write on stdout for redirection to a file - may need to reopen in binary mode if on Windows */
   write(1, &(example.pixel_data), nbytes);
}

如果我使用你提供的通过Google Drive共享的文件运行这个程序,我会得到下面的结果:

输入图像描述


1
不需要手动粘贴GIMP文件。只需使用#include "example.c"即可。 - the busybee
1
@thebusybee,我建议扩展OP已经拥有的example.c,这是我建议的clanggcc命令中的文件名...但我确实明白你的观点。 - Mark Setchell
我的代码与Github上的代码不相等,因为a)我的代码可以工作,b)我的代码处理RGB565数据,c)我的代码不会写入PNM文件。如果你按照我的指示创建了PNG文件,那么你也不可能有PGM文件。我不知道为什么你发布了一些无法工作的代码,而我已经给了你可以工作的代码。 - Mark Setchell
请分享您的实际GIMP文件,以便我们了解我们正在处理的内容。如果文件太大无法上传到Stack Overflow,请使用Google Drive或Dropbox。谢谢。 - Mark Setchell
抱歉回复晚了,我一直很忙...刚刚测试了你的代码,确实你是对的,它像魔法一样运行。我已经接受了你的回复!谢谢。请问: 1)我该如何管理透明度,2)我在哪里可以学习如何进行像素操作?我的意思是,你是怎么知道必须使用&和>>运算符来获取RGB值的?非常感谢!非常感激! - navy1978
显示剩余4条评论

网页内容由stack overflow 提供, 点击上面的
可以查看英文原文,
原文链接