如何解决在Windows 10上安装LightGBM GPU的问题?

3
我正在尝试在Windows 10 Pro x64上安装lightgbm gpu。我的GPU是NVIDIA Geforce GTX 950。 我首先尝试遵循这个指南:https://lightgbm.readthedocs.io/en/latest/GPU-Windows.html,并使用Mingw进行编译。结果是我成功地在python中导入了LightGBM,但是当我尝试使用参数device='gpu'来拟合模型时,出现了错误:
LightGBMError: GPU Tree Learner was not enabled in this build.
Please recompile with CMake option -DUSE_GPU=1

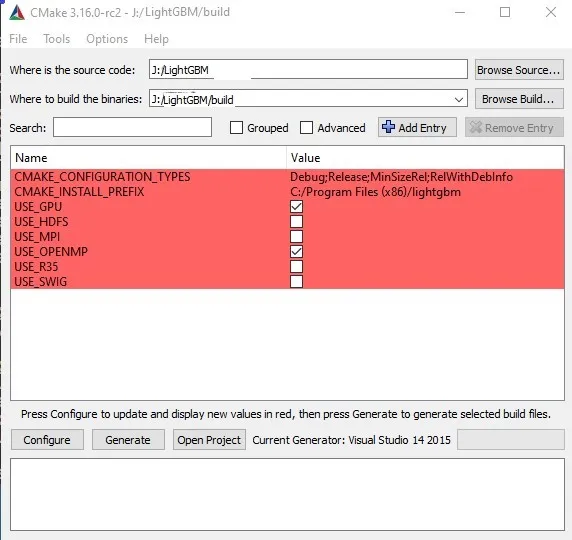
我按照以下指南进行操作: https://github.com/Microsoft/LightGBM/blob/master/docs/Installation-Guide.rst#build-gpu-version 在使用Visual Studio 2019成功编译后,我无法安装lightgbm的gpu版本。我一直遇到和这里完全相同的错误: https://github.com/Microsoft/LightGBM/issues/1121
pip install lightgbm --install-option=--gpu

或者告诉我关于boost和cuda的路径。
pip install lightgbm --install-option=--gpu --install-option="--opencl- 
include-dir=C:/Program Files/NVIDIA GPU Computing 
Toolkit/CUDA/v10.1/include" --install-option="--opencl-library=C:/Program 
Files/NVIDIA GPU Computing Toolkit/CUDA/v10.1/lib/x64/OpenCL.lib" -- 
install-option="--boost-librarydir= C:/local/boost_1_69_0/lib64-msvc-14.1" 
--install-option="--boost-root= C:/local/boost_1_69_0"

我也尝试了各种版本的boost,但总是遇到相同的错误。如果有人能够解释问题,我将不胜感激。


这是我的错误截图[链接](https://sun9-12.userapi.com/c856120/v856120487/b60f5/3-aKKPGmMj0.jpg) - Антон Гульдинский
2个回答

5

在 Python/Anaconda/Windows 8.1/10 x64 上安装支持 GPU 的 Lightgbm 的终极指南。

要安装支持 GPU 的 Lightgbm,您需要从源代码重新构建,没有其他方法。

需要准备的东西:

1) Visual Studio 20xx (xx>=15, 建议使用 Community 版本.)

在 Windows 8.1 上: 需要额外安装Windows SDK版本8.1它没有包含在标准安装中,因此您可以进行自定义安装,或者如果已经安装了,则通过添加 Windows SDK 版本8.1 来修改安装程序。

2) 下载并安装Booster文件(版本1_56_0或更高版本)到默认文件夹C:/local。 您需要在某些命令中更改这些数字以匹配您自己的版本的 BoosterVisual Studio,请注意。

3) Cmake

4) Git

如果在Anaconda上安装,请在继续之前激活正确的环境

现在进入命令行:

git clone --recursive https://github.com/microsoft/LightGBM   
cd LightGBM
mkdir build
cd build
cmake -A x64 -DUSE_GPU=1 -DBOOST_ROOT= -DBOOST_LIBRARYDIR=C:/local/boost_1_71_0/lib64-msvc-14.0 .. 

-- Building for: Visual Studio 14 2015
-- Selecting Windows SDK version  to target Windows 10.0.18362.
-- The C compiler identification is MSVC 19.0.24215.1
   ...................
   ...................
-- Build files have been written to: J:/LightGBM/build

现在你打开 CMake GUI 并填写 源代码目录二进制文件生成目录 后,应该会看到像这样的界面:

enter image description here

如果USE_GPUUSE_OPENMP 没有被勾选上,请勾选它们后再继续。
点击 CONFIGURE 然后再点击 GENERATE
关闭 CMake。
现在你可以输入:
cmake --build . --target ALL_BUILD --config Release

此时,您会发现在 LightGBM 文件夹中有一个 Release 文件夹。很好。

然后,最后

cd ..\python-package
python setup.py install --gpu

running install
INFO:LightGBM:Starting to compile the library.
INFO:LightGBM:Starting to compile with Visual Studio 16 2019.
INFO:LightGBM:Starting to compile with Visual Studio 15 2017.
INFO:LightGBM:Starting to compile with Visual Studio 14 2015.
running build
running build_py
creating build
creating build\lib
creating build\lib\lightgbm
.......

就这样,伙计们。


2
作为一个相对新手,我觉得上面的“终极指南”还不错,但有些难以理解。重要的是,在下载boost时忘记提及需要哪个版本与您的Visual Studio版本匹配。这在LightGBM网站中是这样解释的:
注意:匹配您的Visual C++版本:
Visual Studio 2015 -> msvc-14.0-64.exe,
Visual Studio 2017 -> msvc-14.1-64.exe,
Visual Studio 2019 -> msvc-14.2-64.exe。
LightGBM网站还建议安装OpenCL文件,但我不确定是否必要。

网页内容由stack overflow 提供, 点击上面的
可以查看英文原文,
原文链接