自定义边框类
class TechBorder extends StatelessWidget {
final Widget child;
final Color borderColor;
final double borderWidth, leftBorderLength, rightBorderLength;
TechBorder(
{Key k,
@required this.child,
@required this.borderColor,
@required this.borderWidth,
@required this.leftBorderLength,
@required this.rightBorderLength,})
: super(key: k);
@override
Widget build(BuildContext context) {
return Stack(
children: [
Container(
decoration: BoxDecoration(
border: Border(
left: BorderSide(color: borderColor, width: borderWidth),
right:
BorderSide(color: borderColor, width: borderWidth)),
color: Colors.transparent),
),
Container(
color: Colors.transparent,
child: Stack(children: [
Positioned(
top: 0,
left: 0,
child: Container(
color: borderColor,
width: leftBorderLength,
height: borderWidth)),
Positioned(
bottom: 0,
left: 0,
child: Container(
color: borderColor,
width: leftBorderLength,
height: borderWidth)),
Positioned(
right: 0,
child: Container(
color: borderColor,
width: rightBorderLength,
height: borderWidth)),
Positioned(
bottom: 0,
right: 0,
child: Container(
color: borderColor,
width: rightBorderLength,
height: borderWidth)),
])),
Padding(
padding: const EdgeInsets.all(10.0),
child: child,
)
],
);
}
}
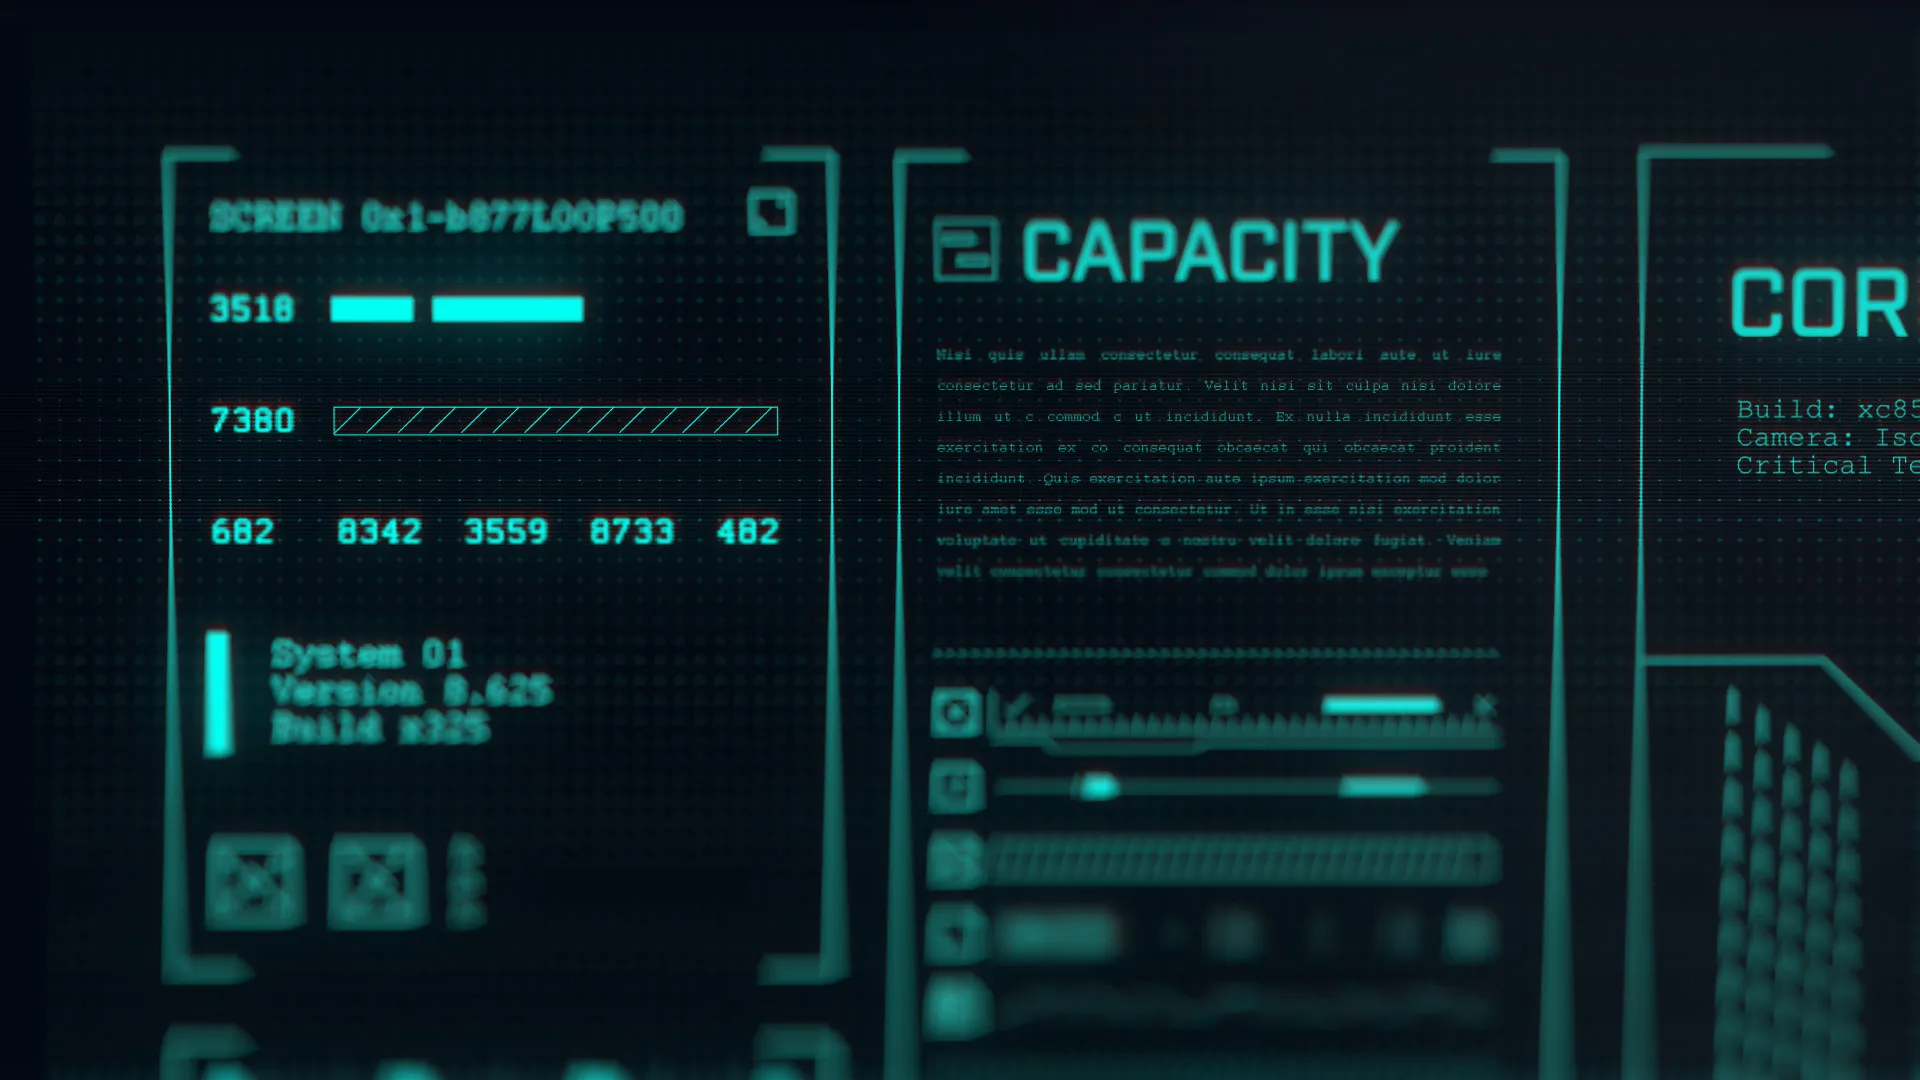
使用方法
Container(
            decoration: BoxDecoration(
                image: DecorationImage(
                    image: NetworkImage(
                      'https://d2gg9evh47fn9z.cloudfront.net/800px_COLOURBOX18042265.jpg',
                    ),
                    fit: BoxFit.fill)),
            padding: EdgeInsets.fromLTRB(5, 10, 5, 10),
            child: TechBorder(
              borderWidth:3.0,
              leftBorderLength:25,
              rightBorderLength:25,
                borderColor: Colors.blueAccent,
                child: Column(
                    mainAxisSize: MainAxisSize.min,
                    crossAxisAlignment: CrossAxisAlignment.start,
                    children: [
                      Padding(
                          padding: EdgeInsets.only(top: 5, bottom: 5),
                          child: Text('SCREEN:  Ox1b o1197hgk500',
                              style: TextStyle(
                                  color: Colors.blueAccent, fontSize: 17))),
                      Padding(
                          padding: EdgeInsets.only(top: 5, bottom: 5),
                          child: Row(
                            children: <Widget>[
                              Text('3518',
                                  style: TextStyle(
                                      color: Colors.blueAccent, fontSize: 17)),
                              Container(
                                  margin: EdgeInsets.only(left: 15),
                                  color: Colors.blueAccent,
                                  height: 12,
                                  width: 80),
                              SizedBox(width: 8),
                              Container(
                                  color: Colors.blueAccent,
                                  height: 12,
                                  width: 100)
                            ],
                          )),
                      Padding(
                          padding: EdgeInsets.only(top: 5, bottom: 5),
                          child: Text('Other fields gos here...',
                              style: TextStyle(
                                  color: Colors.blueAccent, fontSize: 17))),
                    ])))

CustomPaint,但是对于这样一个简单的任务来说,它是非常复杂的代码,并且它并没有达到我想要的效果。 - Jamie Lindsey