如何在SwiftUI中显示AirPlay菜单

7
感谢AirPlay音频系统,我做了一个漂亮的图标。
Button(action: {
        showAirplay()
}, label: {
    Image(systemName: "airplayaudio")
        .imageScale(.large)
})

func showAirplay() {
       ???
}

但我不知道如何显示这个著名的菜单:


尝试使用UIViewControllerRepresentable将其嵌入到https://dev59.com/9aPia4cB1Zd3GeqPtBeu中,但在我的端上似乎**无法**工作... - LetsGoBrandon
4个回答

14

将AirPlay UIView包装成SwiftUI似乎是最好且最简单的解决方案。

struct AirPlayView: UIViewRepresentable {

    func makeUIView(context: Context) -> UIView {

        let routePickerView = AVRoutePickerView()
        routePickerView.backgroundColor = UIColor.clear
        routePickerView.activeTintColor = UIColor.red
        routePickerView.tintColor = UIColor.white

        return routePickerView
    }

    func updateUIView(_ uiView: UIView, context: Context) {
    }
}

使用方法:

VStack {
  AirPlayView()
}

苹果在文档中详细介绍了一个稍微不同的观点。 - undefined

6
最终我自己解决了它:D 就像评论中所说,我必须“嵌入”到UIKit中并在SwiftUI中使用它
首先:
struct AirPlayButton: UIViewControllerRepresentable {
    func makeUIViewController(context: UIViewControllerRepresentableContext<AirPlayButton>) -> UIViewController {
        return AirPLayViewController()
    }

    func updateUIViewController(_ uiViewController: UIViewController, context: UIViewControllerRepresentableContext<AirPlayButton>) {

    }
}

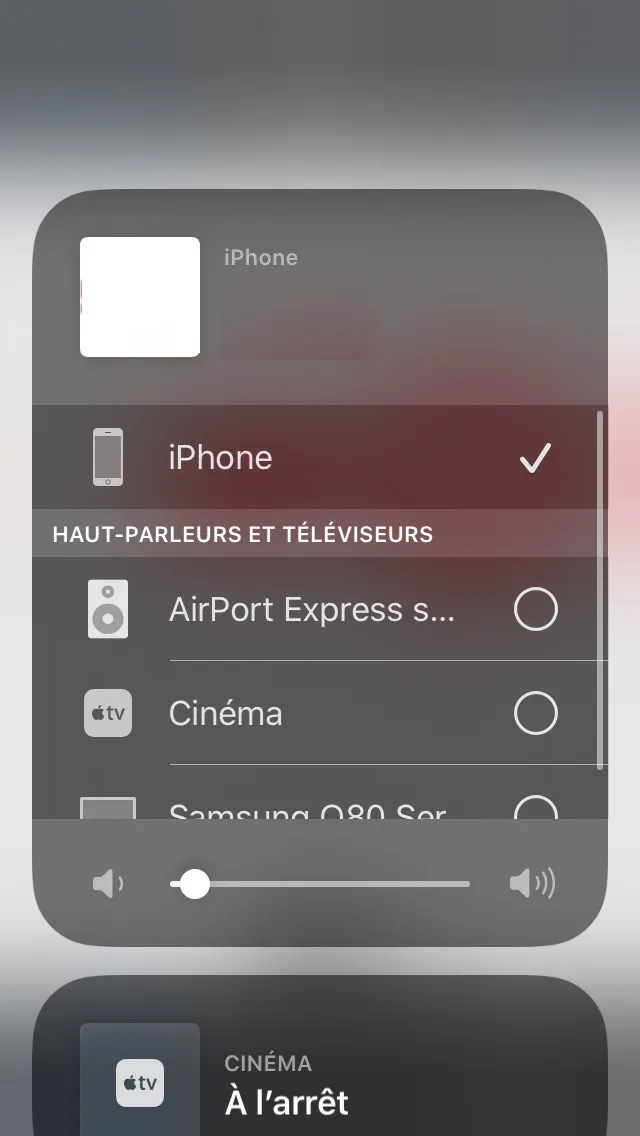
然后是经典的ViewController,我们从很久以前就知道如何显示这个著名的AirPlay菜单弹出窗口:

class AirPLayViewController: UIViewController {

    override func viewDidLoad() {
        super.viewDidLoad()
        let isDarkMode = self.traitCollection.userInterfaceStyle == .dark

        let button = UIButton()
        let boldConfig = UIImage.SymbolConfiguration(scale: .large)
        let boldSearch = UIImage(systemName: "airplayaudio", withConfiguration: boldConfig)

        button.setImage(boldSearch, for: .normal)
        button.frame = CGRect(x: 0, y: 0, width: 40, height: 40)
        button.backgroundColor = .red
        button.tintColor = isDarkMode ? .white : .black

        button.addTarget(self, action: #selector(self.showAirPlayMenu(_:)), for: .touchUpInside)
        self.view.addSubview(button)
    }

    @objc func showAirPlayMenu(_ sender: UIButton){ // copied from https://dev59.com/9aPia4cB1Zd3GeqPtBeu#44909445
        let rect = CGRect(x: 0, y: 0, width: 0, height: 0)
        let airplayVolume = MPVolumeView(frame: rect)
        airplayVolume.showsVolumeSlider = false
        self.view.addSubview(airplayVolume)
        for view: UIView in airplayVolume.subviews {
            if let button = view as? UIButton {
                button.sendActions(for: .touchUpInside)
                break
            }
        }
        airplayVolume.removeFromSuperview()
    }
}

最后,在SwiftUI中只需调用:

struct ContentView: View {
    var body: some View {
        VStack {
            Text("Hello World")
            AirPlayButton().frame(width: 40, height: 40) // (important to be consistent with this frame, like that it is nicely centered... see button.frame in AirPlayViewController)

        }
    }
}

1

我已经根据我的需求修改了Max的答案,并认为分享出来可能会有用。它适应自动布局的superview,并具有调用其操作的方法。

import SwiftUI
import AVKit

struct AirPlayView: UIViewRepresentable {
    
    private let routePickerView = AVRoutePickerView()

    func makeUIView(context: UIViewRepresentableContext<AirPlayView>) -> UIView {
        UIView()
    }

    func updateUIView(_ uiView: UIView, context: UIViewRepresentableContext<AirPlayView>) {
        routePickerView.tintColor = .white
        routePickerView.activeTintColor = .systemPink
        routePickerView.backgroundColor = .clear
        
        routePickerView.translatesAutoresizingMaskIntoConstraints = false
        uiView.addSubview(routePickerView)

        NSLayoutConstraint.activate([
            routePickerView.topAnchor.constraint(equalTo: uiView.topAnchor),
            routePickerView.leadingAnchor.constraint(equalTo: uiView.leadingAnchor),
            routePickerView.bottomAnchor.constraint(equalTo: uiView.bottomAnchor),
            routePickerView.trailingAnchor.constraint(equalTo: uiView.trailingAnchor)
        ])
    }
    
    func showAirPlayMenu() {
        for view: UIView in routePickerView.subviews {
            if let button = view as? UIButton {
                button.sendActions(for: .touchUpInside)
                break
            }
        }
    }
}

你仍然可以像Max的回答一样直接将其用作视图,但也可以将其嵌入到另一个视图中,例如按钮,并手动触发菜单,就像我需要的那样:

@State private var airPlayView = AirPlayView()

var body: some View {
    VStack {
        // other views

        Button(action: {
            // other actions
            airPlayView.showAirPlayMenu()
        }) {
            HStack {
                Text("Show AirPlay menu")
                
                Spacer()
                
                airPlayView
                    .frame(width: 32, height: 32)
            }
        }
        .buttonStyle(PlainButtonStyle())
    }
}

0
func showAirplay() {
    let rect = CGRect(x: 0, y: 0, width: 0, height: 0)
    let airplayVolume = MPVolumeView(frame: rect)
    airplayVolume.showsVolumeSlider = false
    UIApplication.shared.windows.first?.addSubview(airplayVolume)
    for view: UIView in airplayVolume.subviews {
      if let button = view as? UIButton {
        button.sendActions(for: .touchUpInside)
        break
      }
    }
    airplayVolume.removeFromSuperview()
  }

网页内容由stack overflow 提供, 点击上面的
可以查看英文原文,
原文链接