如何在半屏上显示一个ViewController

44

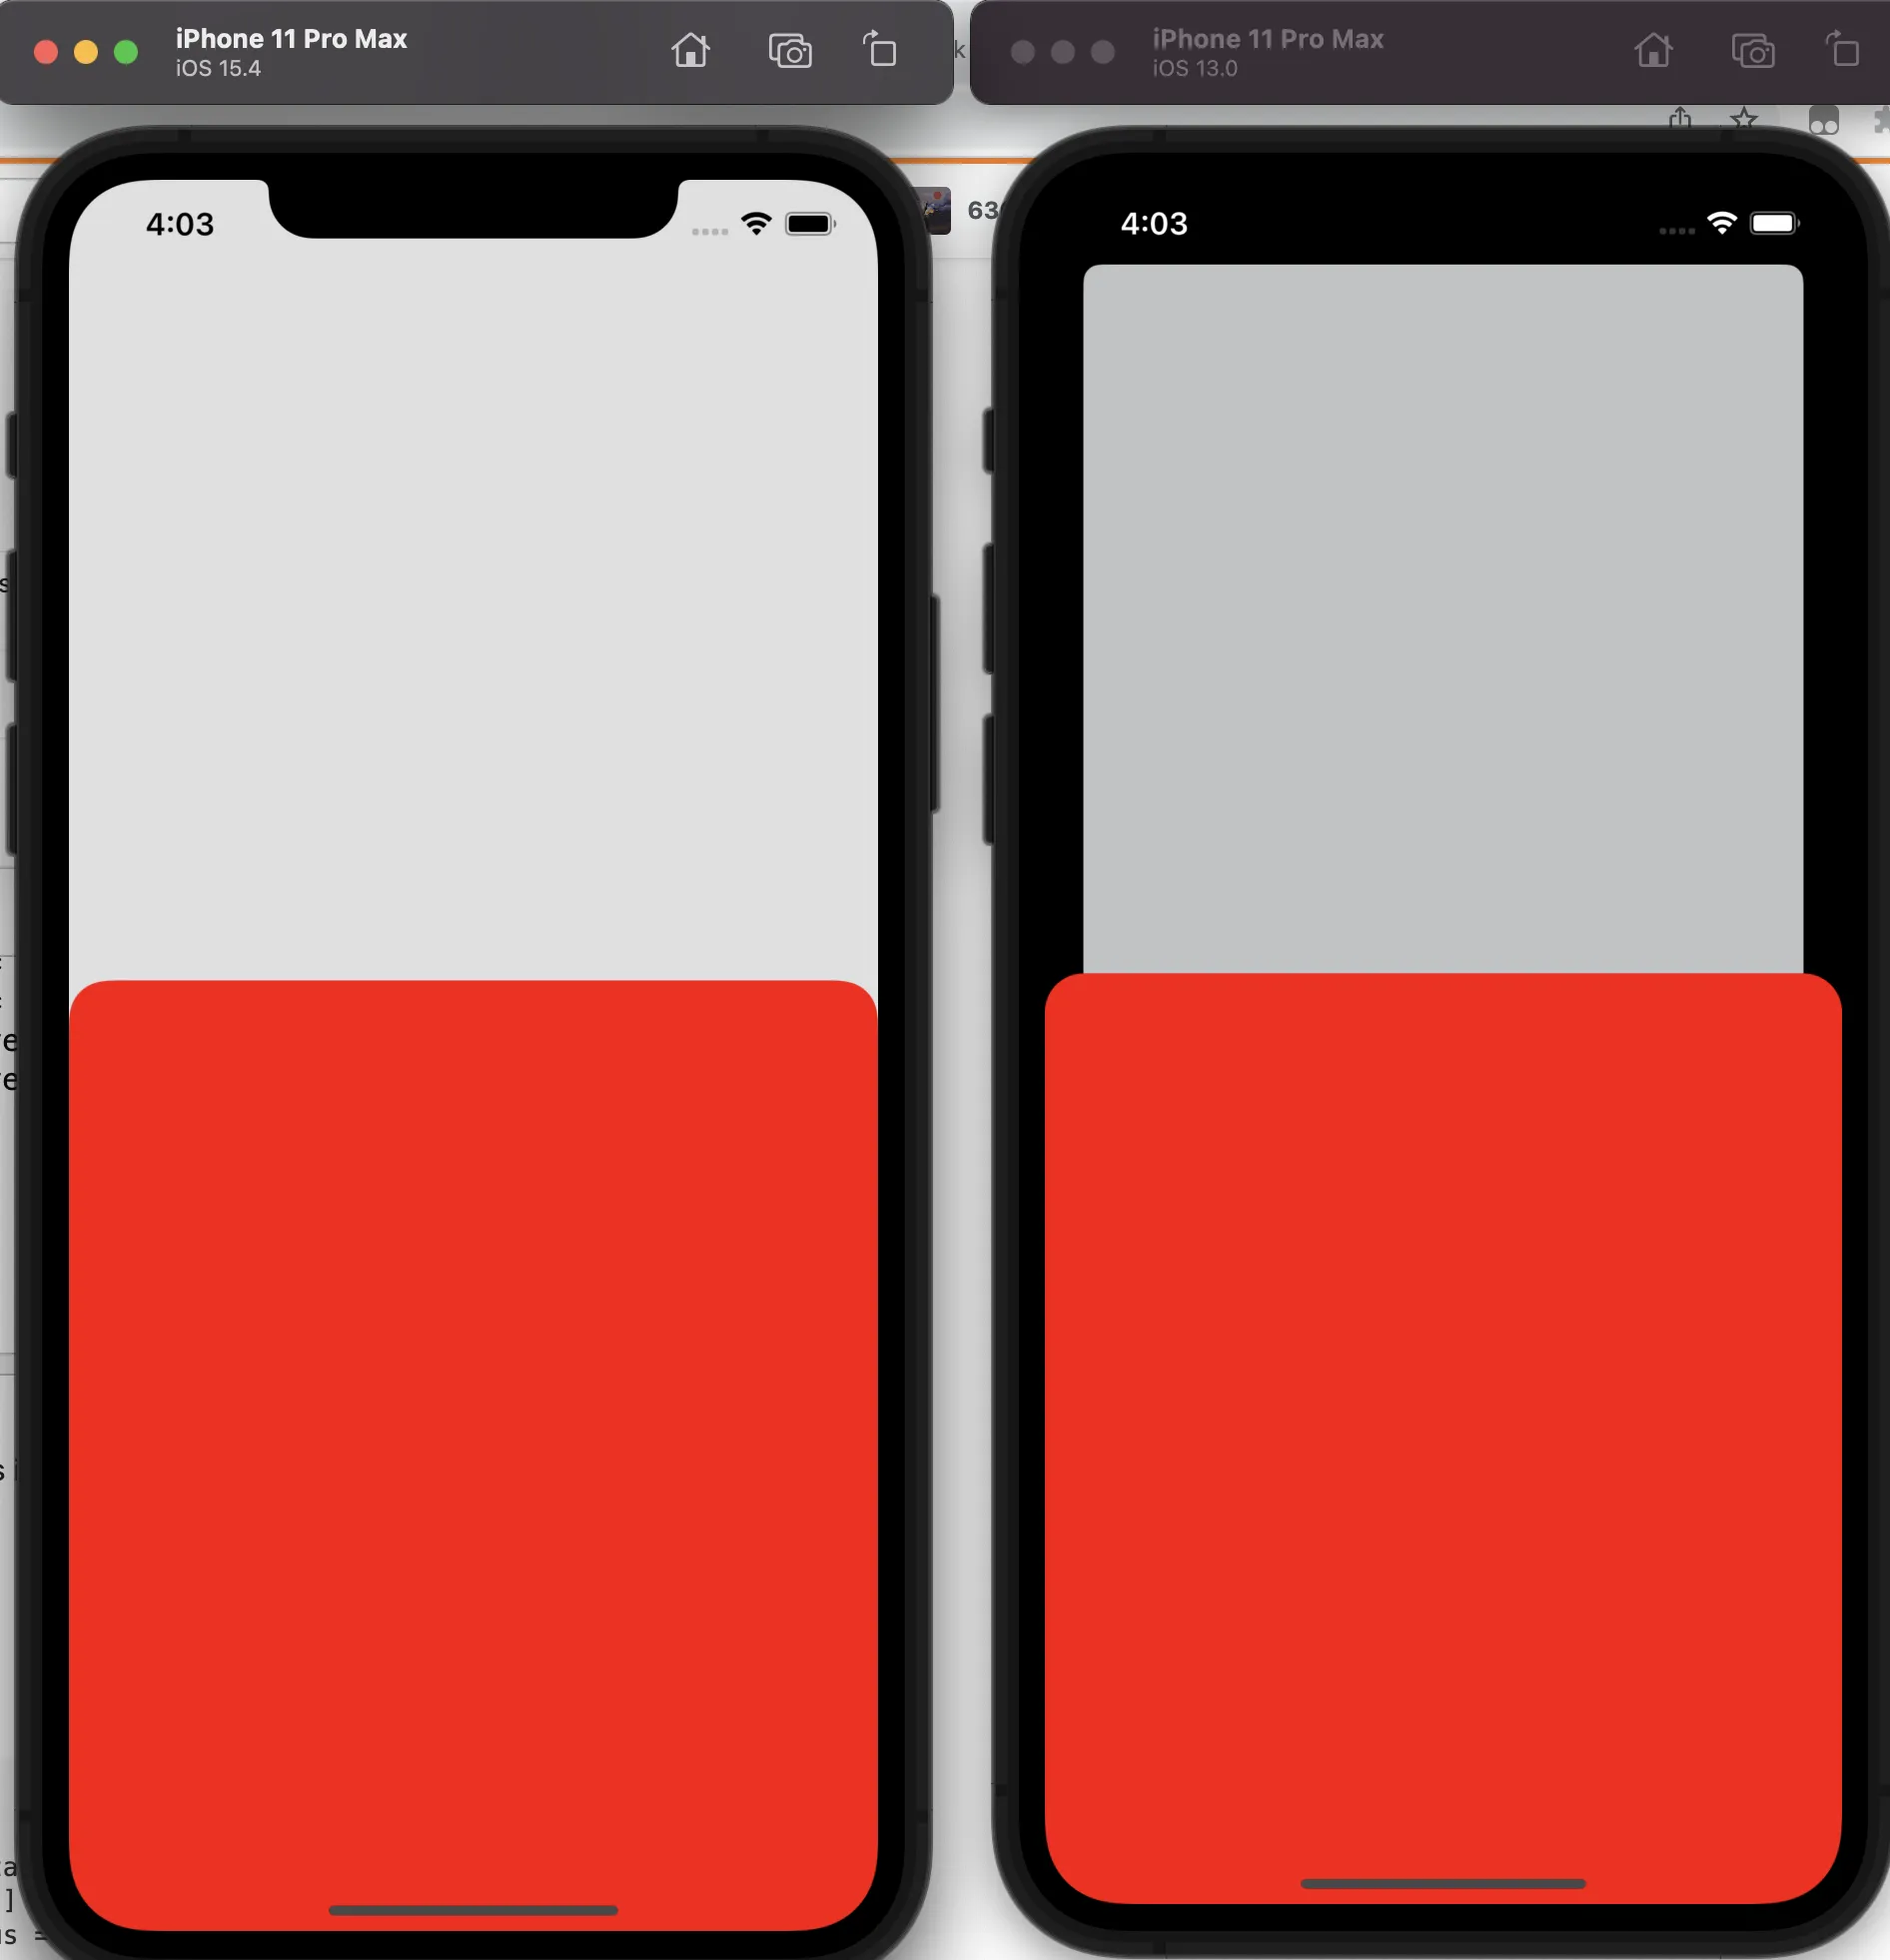
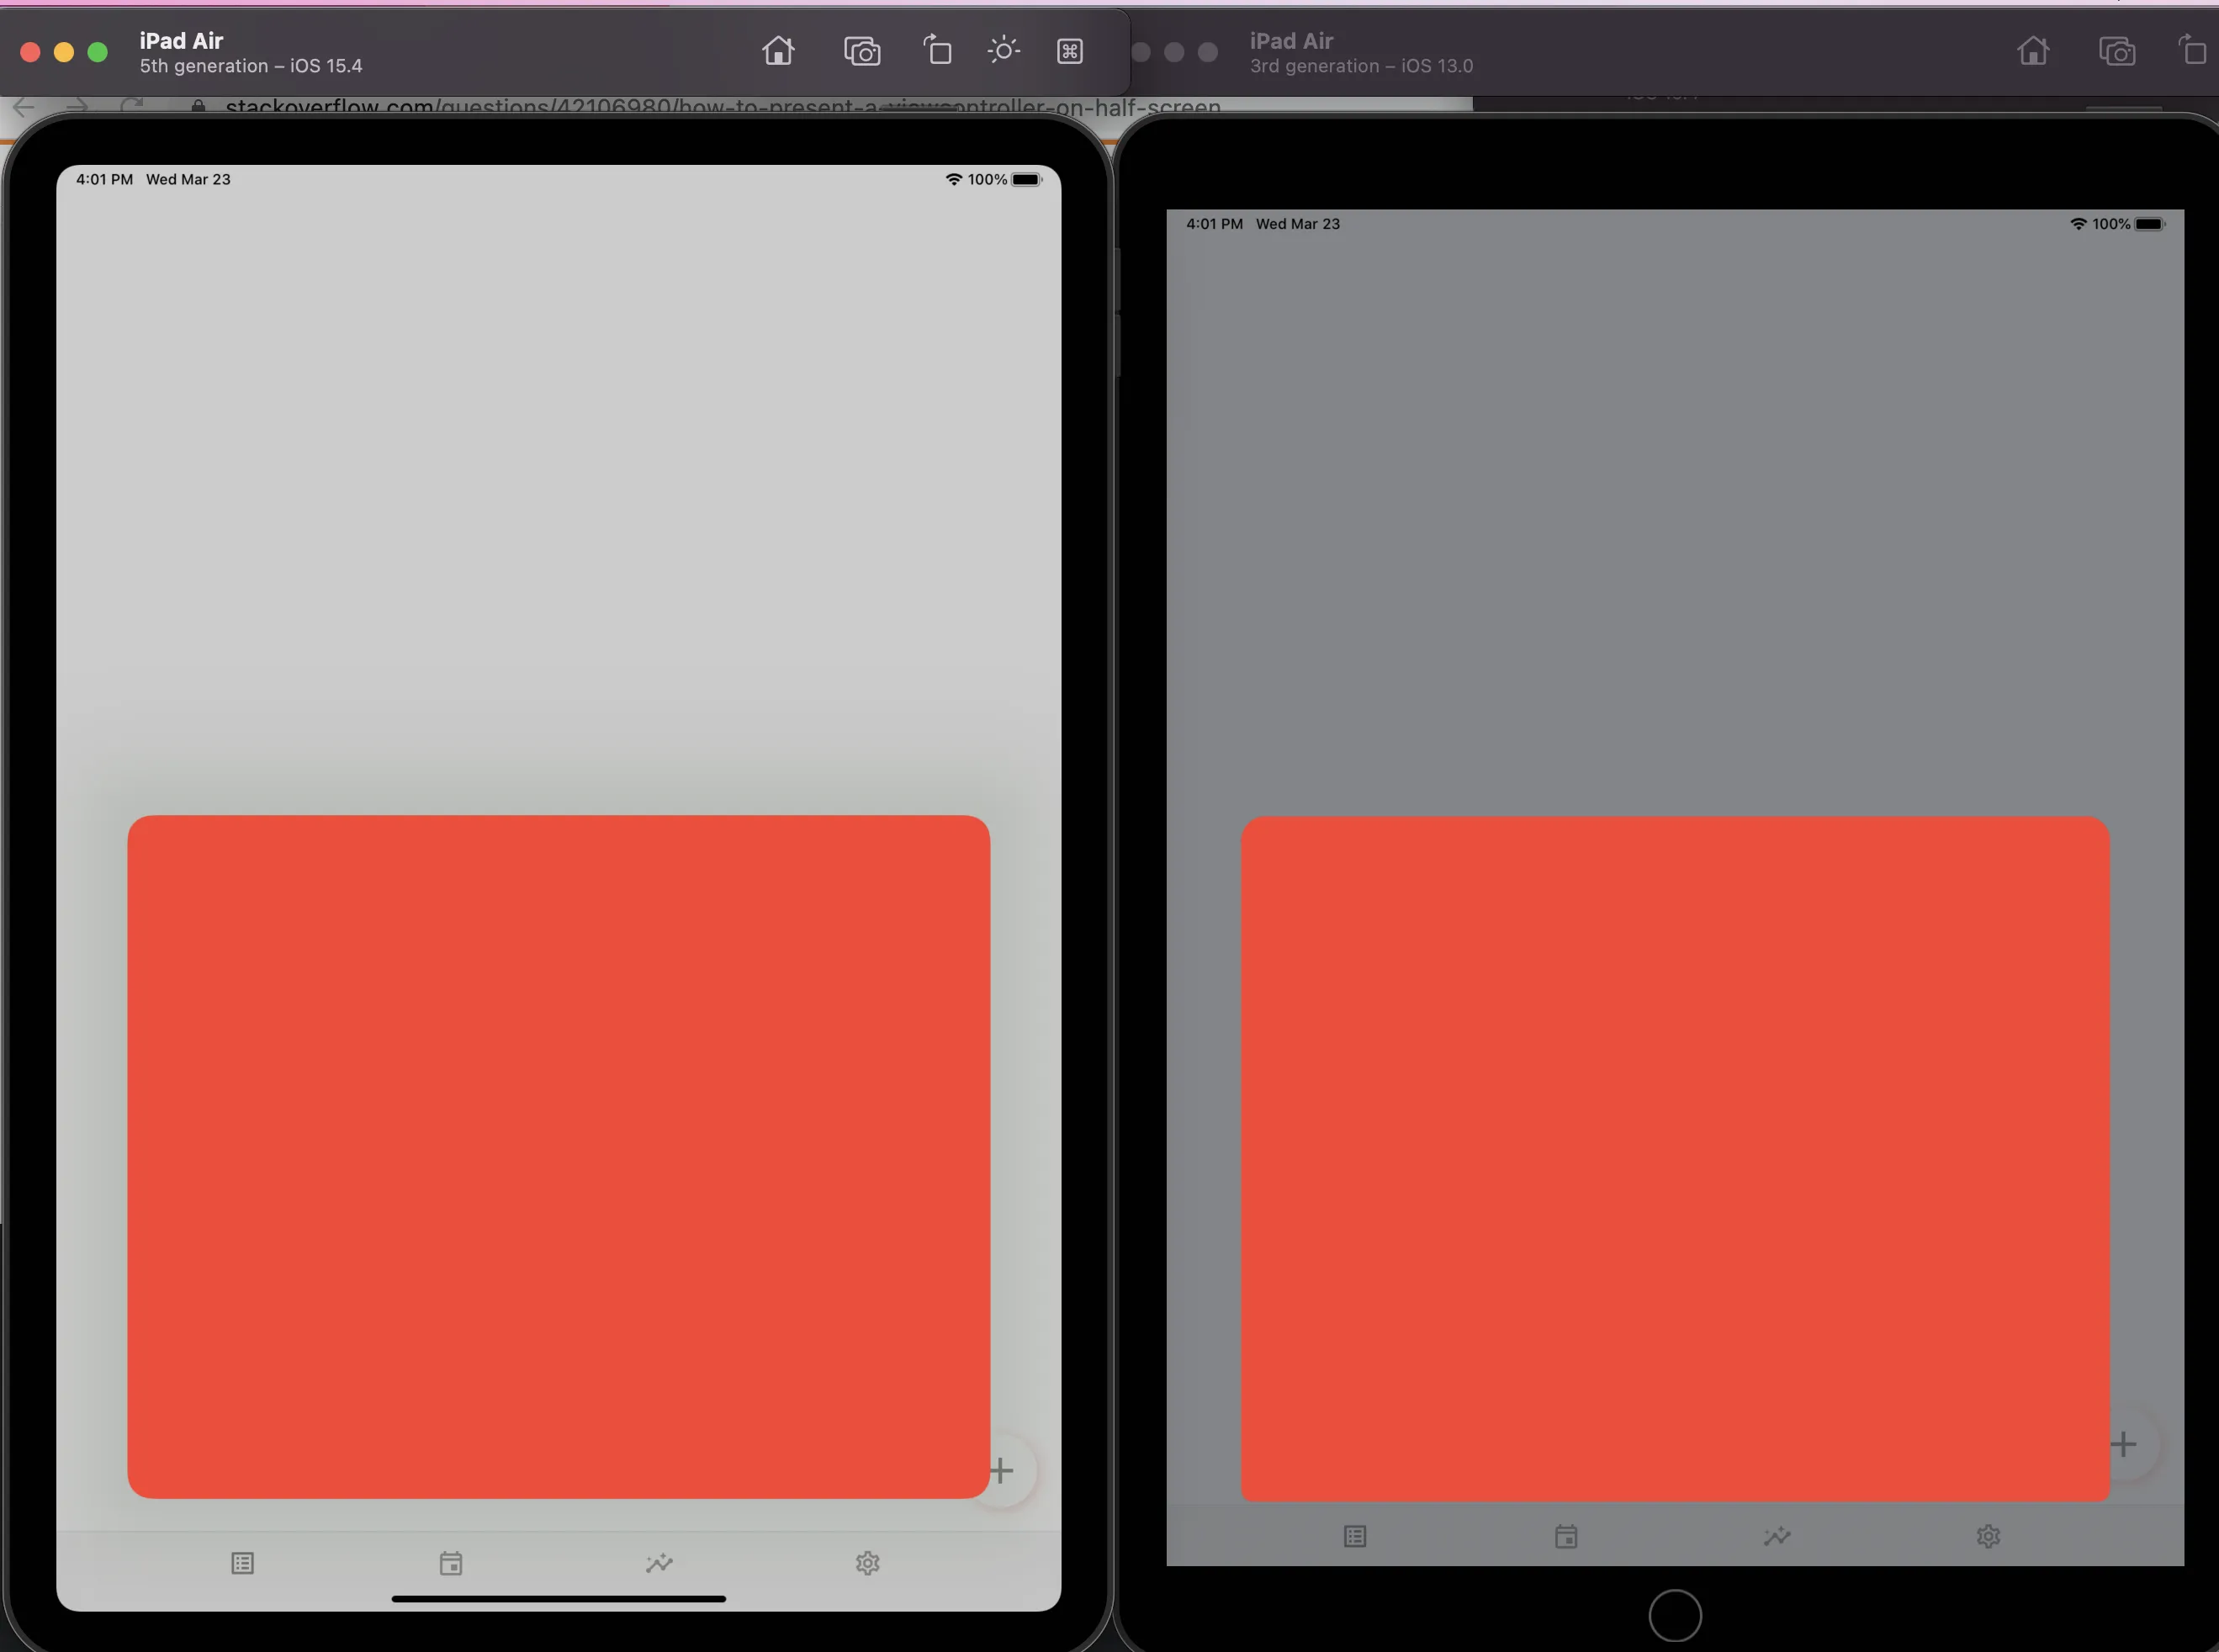
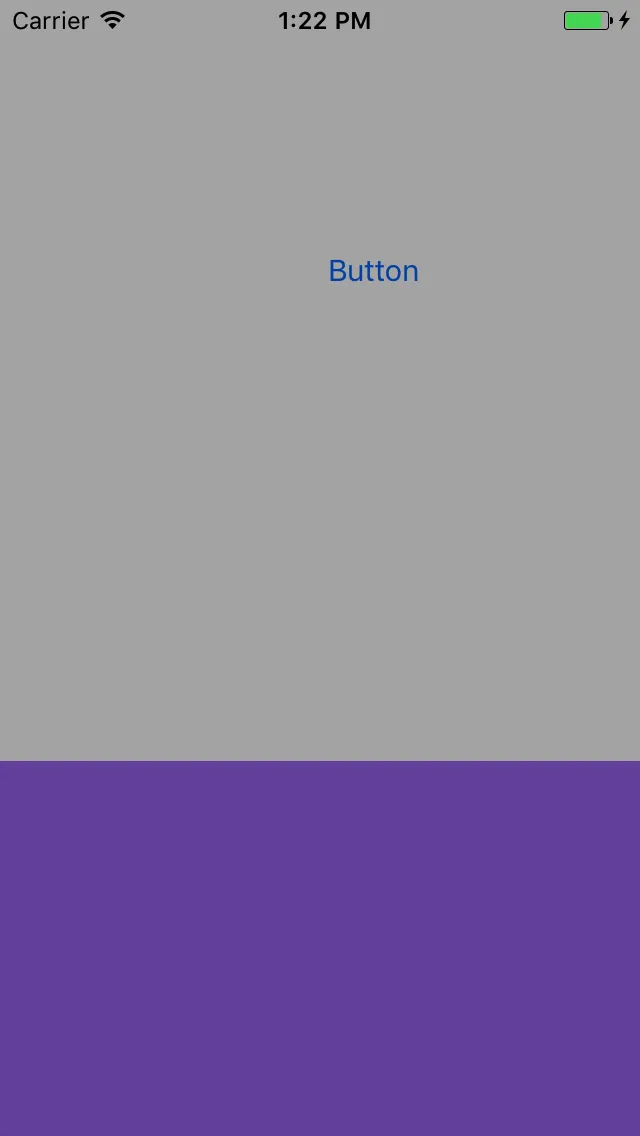
我有一个UIViewController,里面只有一个UIView,从底部覆盖了viewController的三分之一。像这样:

输入图像描述

我想在另一个视图控制器上展示这个视图控制器。它应该从底部有动画地出现,并且应该以动画方式向底部消失。

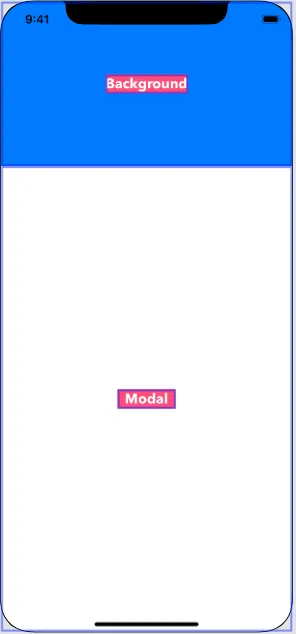
但是我不希望它覆盖整个屏幕。 它所在的视图控制器应该在后面可见。

这似乎是一个基本问题,但我无法完成它。 请问有人可以指点我方向吗?

编辑:

这是到目前为止我尝试过的。 我已经创建了这些类。

// MARK: -

class MyFadeInFadeOutTransitioning: NSObject, UIViewControllerTransitioningDelegate {
var backgroundColorAlpha: CGFloat = 0.5
var shoulDismiss = false

func animationController(forPresented presented: UIViewController, presenting: UIViewController, source: UIViewController) -> UIViewControllerAnimatedTransitioning? {

    let fadeInPresentAnimationController = MyFadeInPresentAnimationController()
        fadeInPresentAnimationController.backgroundColorAlpha = backgroundColorAlpha

    return fadeInPresentAnimationController
}

func animationController(forDismissed dismissed: UIViewController) -> UIViewControllerAnimatedTransitioning? {

    let fadeOutDismissAnimationController = MyFadeOutDismissAnimationController()

    return fadeOutDismissAnimationController
}

}

// MARK: -

class MYFadeInPresentAnimationController: NSObject, UIViewControllerAnimatedTransitioning {

let kPresentationDuration = 0.5
var backgroundColorAlpha: CGFloat?

func transitionDuration(using transitionContext: UIViewControllerContextTransitioning?) -> TimeInterval {
    return kPresentationDuration
}

func animateTransition(using transitionContext: UIViewControllerContextTransitioning) {
    let toViewController = transitionContext.viewController(forKey: UITransitionContextViewControllerKey.to)!

    toViewController.view.backgroundColor = UIColor.clear

    let toViewFrame = transitionContext.finalFrame(for: toViewController)
    let containerView = transitionContext.containerView

    if let pickerContainerView = toViewController.view.viewWithTag(kContainerViewTag) {
        let transform = CGAffineTransform(translationX: 0.0, y: pickerContainerView.frame.size.height)
        pickerContainerView.transform = transform
    }

    toViewController.view.frame = toViewFrame
    containerView.addSubview(toViewController.view)

    UIView.animate(withDuration: 0.3, delay: 0.0, options: .curveLinear , animations: {
        toViewController.view.backgroundColor = UIColor(white: 0.0, alpha: self.backgroundColorAlpha!)

        if let pickerContainerView = toViewController.view.viewWithTag(kContainerViewTag) {
            pickerContainerView.transform = CGAffineTransform.identity
        }

    }) { (finished) in
        transitionContext.completeTransition(true)
    }
}

}

// MARK: -

class MYFadeOutDismissAnimationController: NSObject, UIViewControllerAnimatedTransitioning {
let kDismissalDuration = 0.15

func transitionDuration(using transitionContext: UIViewControllerContextTransitioning?) -> TimeInterval {
    return kDismissalDuration
}

func animateTransition(using transitionContext: UIViewControllerContextTransitioning) {
    let fromViewController = transitionContext.viewController(forKey: UITransitionContextViewControllerKey.from)!
    let toViewController = transitionContext.viewController(forKey: UITransitionContextViewControllerKey.to)!
    let containerView = transitionContext.containerView

    containerView.addSubview(toViewController.view)
    containerView.sendSubview(toBack: toViewController.view)

    UIView.animate(withDuration: kDismissalDuration, delay: 0.0, options: .curveLinear, animations: {
        //            fromViewController.view.backgroundColor = UIColor.clearColor()
        //            if let pickerContainerView = toViewController.view.viewWithTag(kContainerViewTag) {
        //                let transform = CGAffineTransformMakeTranslation(0.0, pickerContainerView.frame.size.height)
        //                pickerContainerView.transform = transform
        //            }
        fromViewController.view.alpha = 0.0

    }) { (finished) in
        let canceled: Bool = transitionContext.transitionWasCancelled
        transitionContext.completeTransition(true)

        if !canceled {
            UIApplication.shared.keyWindow?.addSubview(toViewController.view)
        }
    }
}

}

在被呈现的视图控制器中,我正在执行以下操作

var customTransitioningDelegate: MYFadeInFadeOutTransitioning? = MYFadeInFadeOutTransitioning()

    init() {
    super.init(nibName: "SomeNibName", bundle: Bundle.main)
    transitioningDelegate = customTransitioningDelegate
    modalPresentationStyle = .custom

    customTransitioningDelegate?.backgroundColorAlpha = 0.0
} 

它确实呈现了viewController,我也能看到背景的viewController。但是我希望它从底部带有动画地呈现,并且带有动画地关闭到底部。我该怎么做?


你能展示一下你尝试过的代码吗? - Anbu.Karthik
你可以将视图控制器作为子控制器添加。 - Harshal Valanda
@Anbu.Karthik 请现在检查。 - Umair Afzal
尝试这个...http://stackoverflow.com/questions/40339314/make-uiviewcontroller-appear-from-bottom-then-hide-it - Ravi
@UmairAfzal,您想与呈现半个视图控制器的父视图控制器进行交互吗? - Abdul Rehman
@AbdulRehmanWarraich 不需要交互,只需可见即可。 - Umair Afzal
11个回答

50
如果你想在半个屏幕上显示一个视图控制器,我建议使用 UIPresentationController 类。它可以让你在视图控制器呈现时设置其框架。需要注意的是,这种方法会停止 presentingViewController 的用户交互,直到你关闭 presentedViewController。因此,如果你想在保留 presentingViewController 的用户交互的同时在半个屏幕上显示视图控制器,你应该使用容器视图,就像其他答案所建议的那样。下面是一个 UIPresentationController 类的示例代码,可以实现你的需求。
import UIKit
class ForgotPasswordPresentationController: UIPresentationController{
    let blurEffectView: UIVisualEffectView!
    var tapGestureRecognizer: UITapGestureRecognizer = UITapGestureRecognizer()
    func dismiss(){
        self.presentedViewController.dismiss(animated: true, completion: nil)
    }
    override init(presentedViewController: UIViewController, presenting presentingViewController: UIViewController?) {
        let blurEffect = UIBlurEffect(style: UIBlurEffectStyle.dark)
        blurEffectView = UIVisualEffectView(effect: blurEffect)
        super.init(presentedViewController: presentedViewController, presenting: presentingViewController)
        tapGestureRecognizer = UITapGestureRecognizer(target: self, action: #selector(self.dismiss))
        blurEffectView.autoresizingMask = [.flexibleWidth, .flexibleHeight]
        self.blurEffectView.isUserInteractionEnabled = true
        self.blurEffectView.addGestureRecognizer(tapGestureRecognizer)
    }
    override var frameOfPresentedViewInContainerView: CGRect{
        return CGRect(origin: CGPoint(x: 0, y: self.containerView!.frame.height/2), size: CGSize(width: self.containerView!.frame.width, height: self.containerView!.frame.height/2))
    }
    override func dismissalTransitionWillBegin() {
        self.presentedViewController.transitionCoordinator?.animate(alongsideTransition: { (UIViewControllerTransitionCoordinatorContext) in
            self.blurEffectView.alpha = 0
        }, completion: { (UIViewControllerTransitionCoordinatorContext) in
            self.blurEffectView.removeFromSuperview()
        })
    }
    override func presentationTransitionWillBegin() {
        self.blurEffectView.alpha = 0
        self.containerView?.addSubview(blurEffectView)
        self.presentedViewController.transitionCoordinator?.animate(alongsideTransition: { (UIViewControllerTransitionCoordinatorContext) in
            self.blurEffectView.alpha = 1
        }, completion: { (UIViewControllerTransitionCoordinatorContext) in

        })
    }
    override func containerViewWillLayoutSubviews() {
        super.containerViewWillLayoutSubviews()
        presentedView!.layer.masksToBounds = true
        presentedView!.layer.cornerRadius = 10
    }
    override func containerViewDidLayoutSubviews() {
        super.containerViewDidLayoutSubviews()
        self.presentedView?.frame = frameOfPresentedViewInContainerView
        blurEffectView.frame = containerView!.bounds
    }
}

这还添加了一个模糊视图和一个点击以在 presentedViewController 框架外部触发消失的功能。您需要设置 presentedViewControllertransitioningDelegate 并在其中实现

presentationController(forPresented presented: UIViewController, presenting: UIViewController?, source: UIViewController) -> UIPresentationController?

方法。别忘了还需要设置 modalPresentationStyle = .custom 为 presentedViewController。

我认为使用 UIPresentationController 是一种更加清晰的方法。祝好运。


这是一个很好的答案。当呈现的视图控制器已经有一个UIPopoverPresentationController时,我该如何适应它,但在iPhone上,我希望呈现的视图控制器只显示在屏幕的一半。 - Jan
16
我现在如何展示它?你代码下面的指示非常不清楚 - 请考虑到你正在回答从未使用过UIPresentationController的人的问题。 - linus_hologram
3
UIPresentationController并不是被呈现的内容 - 它处理呈现。以下步骤可能会遗漏:1 - 实现UIViewControllerTransitioningDelegate协议,并在presentationController(forPresented:presenting:source:)方法中返回UIPresentationController(例如,在此情况下为ForgotPasswordPresentationController)2 - 以通常的方式呈现您的视图控制器,但进行一些自定义,例如 myPresentedVC.modalPresentationStyle = .custom myPresetedVC.transitioningDelegate = <来自第1步的类> myPresentedVC.modalPresentationStyle = .custom - DCDC

41

iOS 15:有一个新类,UISheetPresentationController,其中包含一个名为detents的属性。这使您可以指定要使用哪种类型的调整大小行为。

class ViewController: UIViewController {
    @IBAction func nextButtonPressed(_ sender: Any) {
        let storyboard = UIStoryboard(name: "Main", bundle: nil)
        let viewController = storyboard.instantiateViewController(withIdentifier: "NextViewController")
        
        if let presentationController = viewController.presentationController as? UISheetPresentationController {
            presentationController.detents = [.medium()] /// change to [.medium(), .large()] for a half *and* full screen sheet
        }
        
        self.present(viewController, animated: true)
    }
}
半屏表格 半屏和全屏表格
半屏表格 表格可在半屏和全屏之间拖动

你好,看起来不错,但是我遇到了错误,请问你能提供两个控制器的完整演示代码吗?谢谢。错误:无法在范围内找到类型“UISheetPresentationController”附上代码:let vc = storyboard?.instantiateViewController(identifier: "AddressListVC") as! AddressListVC if let presentationController = vc.presentationController as? UISheetPresentationController { presentationController.detents = [.medium()] /// change to [.medium(), .large()] for a half and full screen sheet } self.present(vc, animated: true) - Faraz Ahmed
1
我为了达到这个目标付出了巨大的努力。 - p0lAris

38

iOS 15 *

使用UISheetPresentationController

使用方法

let yourVC = YourViewController()

if let sheet = yourVC.sheetPresentationController {
    sheet.detents = [.medium()]
}
self.present(yourVC, animated: true, completion: nil)

阅读更多 这里

iOS 15以下

使用 UIPresentationController,它在iOS 15上也可以工作。但如果您的应用程序仅支持iOS 15,请使用上面的代码。

import UIKit

class PresentationController: UIPresentationController {

  let blurEffectView: UIVisualEffectView!
  var tapGestureRecognizer: UITapGestureRecognizer = UITapGestureRecognizer()
  
  override init(presentedViewController: UIViewController, presenting presentingViewController: UIViewController?) {
      let blurEffect = UIBlurEffect(style: .dark)
      blurEffectView = UIVisualEffectView(effect: blurEffect)
      super.init(presentedViewController: presentedViewController, presenting: presentingViewController)
      tapGestureRecognizer = UITapGestureRecognizer(target: self, action: #selector(dismissController))
      blurEffectView.autoresizingMask = [.flexibleWidth, .flexibleHeight]
      self.blurEffectView.isUserInteractionEnabled = true
      self.blurEffectView.addGestureRecognizer(tapGestureRecognizer)
  }
  
  override var frameOfPresentedViewInContainerView: CGRect {
      CGRect(origin: CGPoint(x: 0, y: self.containerView!.frame.height * 0.4),
             size: CGSize(width: self.containerView!.frame.width, height: self.containerView!.frame.height *
              0.6))
  }

  override func presentationTransitionWillBegin() {
      self.blurEffectView.alpha = 0
      self.containerView?.addSubview(blurEffectView)
      self.presentedViewController.transitionCoordinator?.animate(alongsideTransition: { (UIViewControllerTransitionCoordinatorContext) in
          self.blurEffectView.alpha = 0.7
      }, completion: { (UIViewControllerTransitionCoordinatorContext) in })
  }
  
  override func dismissalTransitionWillBegin() {
      self.presentedViewController.transitionCoordinator?.animate(alongsideTransition: { (UIViewControllerTransitionCoordinatorContext) in
          self.blurEffectView.alpha = 0
      }, completion: { (UIViewControllerTransitionCoordinatorContext) in
          self.blurEffectView.removeFromSuperview()
      })
  }
  
  override func containerViewWillLayoutSubviews() {
      super.containerViewWillLayoutSubviews()
    presentedView!.roundCorners([.topLeft, .topRight], radius: 22)
  }

  override func containerViewDidLayoutSubviews() {
      super.containerViewDidLayoutSubviews()
      presentedView?.frame = frameOfPresentedViewInContainerView
      blurEffectView.frame = containerView!.bounds
  }

  @objc func dismissController(){
      self.presentedViewController.dismiss(animated: true, completion: nil)
  }
}

extension UIView {
  func roundCorners(_ corners: UIRectCorner, radius: CGFloat) {
      let path = UIBezierPath(roundedRect: bounds, byRoundingCorners: corners,
                              cornerRadii: CGSize(width: radius, height: radius))
      let mask = CAShapeLayer()
      mask.path = path.cgPath
      layer.mask = mask
  }
}

如何使用

UIViewControllerTransitioningDelegate添加到您的呈现视图控制器中

// MARK: - UIViewControllerTransitioningDelegate
extension PresentingViewController: UIViewControllerTransitioningDelegate {
    
    func presentationController(forPresented presented: UIViewController, presenting: UIViewController?, source: UIViewController) -> UIPresentationController? {
        PresentationController(presentedViewController: presented, presenting: presenting)
    }
}

在PresentingViewController中呈现你的VC

let yourVC = YourViewController()
yourVC.modalPresentationStyle = .custom
yourVC.transitioningDelegate = self
self.present(yourVC, animated: true, completion: nil)

代码参考资料


1
这是一个非常好的答案,值得更多的赞美,至少应该被接受。 - shinyuX
这确实是一个非常好的答案,特别适用于那些需要支持iOS 14及之前版本的人。 - szady

9
我建议使用容器视图来实现此功能。请参考这里
这意味着您可以在另一个视图控制器中嵌入一个 UIView,并显示一个 UIViewController(及其子类)。然后您可以对其进行淡入或者其他您想要的动画效果。

Umair,你必须在这里使用容器视图的概念。 - Mukesh Lokare

7
感谢@aheze和@Sreekuttan提供的iOS15解决方案。
我提供iOS13-15的解决方案。
iOS15:
使用UISheetPresentationController。
    let vc = HalfScreenVC()
    if #available(iOS 15.0, *) {
        if let sheet = vc.sheetPresentationController {
            sheet.detents = [.medium()]
            sheet.preferredCornerRadius = 20
        }
    }
    present(vc, animated: true, completion: nil)

iOS13-iOS14

 class HalfScreenVC: UIViewController {
        
        override func viewDidLoad() {
            super.viewDidLoad()
            view.backgroundColor = .red
        }
        
        override func viewDidLayoutSubviews() {
            super.viewDidLayoutSubviews()
            
            if #available(iOS 15.0, *) {
                
            } else {
                // Below iOS 15, change frame here
                self.view.frame = CGRect(x: 0, y: UIScreen.main.bounds.height / 5 * 2, width: self.view.bounds.width, height: UIScreen.main.bounds.height / 5 * 3)
                self.view.layer.cornerRadius = 20
                self.view.layer.masksToBounds = true
            }
        } 

    }

iPhone 13.0 - 15.4 在此输入图片描述 iPad 13.0 - 15.4 在此输入图片描述

如果我们使用文本字段,我们希望全屏输入。

    class HalfPresentVC: UIViewController {
        
        let textfield = UITextField(frame: CGRect(x: 20, y: 30, width: 200, height: 40))
        var initialBounds: CGRect?
        
        override func viewDidLoad() {
            super.viewDidLoad()
            view.backgroundColor = .red
            
            textfield.borderStyle = .roundedRect
            textfield.placeholder = "enter text"
            view.addSubview(textfield)
        }
        
        override func viewDidLayoutSubviews() {
            super.viewDidLayoutSubviews()
            if #available(iOS 15.0, *) {
               
            } else if initialBounds == nil {
                NotificationCenter.default.addObserver(self, selector: #selector(keyboardWillShow), name: UIResponder.keyboardWillShowNotification, object: nil)
                NotificationCenter.default.addObserver(self, selector: #selector(keyboardWillHide), name: UIResponder.keyboardWillHideNotification, object: nil)
                
                initialBounds = view.bounds
                view.layer.cornerRadius = 20
                view.layer.masksToBounds = true
                view.frame = CGRect(x: 0, y: view.bounds.height / 5 * 2, width: view.bounds.width, height: view.bounds.height / 5 * 3)
            }
        }
        
        @objc func keyboardWillShow() {
            guard let initialBounds = initialBounds else {
                return
            }
            view.frame = initialBounds
        }
        
        @objc func keyboardWillHide() {
            guard let initialBounds = initialBounds else {
                return
            }
            view.frame = CGRect(x: 0, y: initialBounds.height / 5 * 2, width: initialBounds.width, height: initialBounds.height / 5 * 3)
        }
        
        deinit {
            NotificationCenter.default.removeObserver(self)
        }

    }

type full screen


6

以下是实现此功能的更新代码。在需要显示ViewController的操作上:

@IBAction func btnShow(_ sender: Any) {
    let storyboard = UIStoryboard(name: "Main", bundle: nil)
    let pvc = storyboard.instantiateViewController(withIdentifier: "SubViewController") as! SubViewController
    pvc.modalPresentationStyle = UIModalPresentationStyle.overCurrentContext
    self.present(pvc, animated: true, completion: nil)
}

前往StoryBoard选择subViewController并在其中添加一个UIView

要实现模糊效果,请设置其约束条件为

(top:0,Bottom:0,Leading:0,Trailing:0)

为了让所有边框变成您想要的透明度,您需要将其颜色更改为黑色。接下来,添加另一个UIView用于选项,并将其约束设置为:

(top:-,Bottom:0,Leading:0,Trailing:0)

将其 height 约束设置为 equal height with superview(self.View),并将其 multipler 更改为 0.33 或 0.34。


5
你可以使用UIPresentationController来实现这一点。在呈现视图控制器上实现UIViewControllerTransitioningDelegate方法,从委托方法中返回你的PresentationController即可。
func presentationController(forPresented presented: UIViewController, 
                          presenting: UIViewController?, 
                              source: UIViewController) -> UIPresentationController? 

您可以参考这个类似要求的答案。或者,您也可以使用其他答案中建议的UIView动画或嵌入式视图控制器。编辑:Github中找到示例项目:https://github.com/martinnormark/HalfModalPresentationController

1

你可以简单地按照以下步骤进行操作:首先,你需要将屏幕设计为两个部分,就像我要隐藏topView并将其设置为整个屏幕的0.3一样。这段代码应该放在viewDidLoad函数中。然后,你需要呈现你的viewController,并将modalPresentationStyle设置为.formSheet。

    topView.backgroundColor = UIColor(white: 1, alpha: 0.000001)
    self.view.backgroundColor = UIColor(white: 1, alpha: 0.000001)

1

请在呈现的视图控制器上编写以下代码。

 override var popupPresentDuration: Double { return 0.30  }

override var popupDismissDuration: Double { return 0.30 }
override var popupHeight: CGFloat { return CGFloat(UIScreen.main.bounds.height - 100) }

它将适用于所有iOS版本。


你忘了提到它是一个pod 'BottomPopup'。 - arunit21
我正在尝试展示一个UIColorPickerViewController。你的意思是说我真的必须要子类化它才能使它正确地展示吗?太糟糕了。 - clearlight

1
如果您想使用@DatForis答案中的功能,但不想烦恼地覆盖表示控制器,您可以创建一种明显的黑客方式,使用全屏模态框,如下所示:

modal_example

你可以像平常一样呈现一个全屏模态,但是在设计模态时创建两个顶部视图,一个用于模态,另一个视图放置在背景上。放置在背景上的视图应该是透明的,这样你就可以从呈现视图控制器中看到它。然后要关闭它,你需要做如下操作:
@IBOutlet weak var transparentView: UIView!

override func viewWillAppear(_ animated: Bool) {
    super.viewWillAppear(false)

    let tapGesture = UITapGestureRecognizer(target: self, action: #selector(backgroundTapped(gesture:)))
    transparentView.addGestureRecognizer(tapGesture)
}

@objc func backgroundTapped(gesture: UIGestureRecognizer) {
    self.dismiss(animated: true, completion: nil)
}

希望这有意义/能帮到某个人!

它帮助我创建了一个自定义的模态“警报”,使用全屏视图控制器,而无需实现演示控制器,免去了麻烦。 - Carl Smith

网页内容由stack overflow 提供, 点击上面的
可以查看英文原文,
原文链接