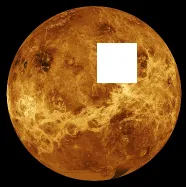
我尝试在UIImage中剪切一个透明的正方形,但我真的不知道从哪里或如何开始。
任何帮助都将不胜感激。
谢谢!
如何在UIImage中“切”出一个透明的孔?
14
- Phillip
5
1你想在 image 中剪切孔洞还是在显示它的UIImageView中剪切孔洞? - matt
1看看我在这段代码中如何在UIImageView(及其图像)中打一个圆形孔:https://dev59.com/BF7Va4cB1Zd3GeqPLqRt#8632731。你可以完全按照相同的方式操作,只不过你需要画一个正方形而不是圆形。 - matt
@matt:在实际的UIImageView中切一个洞会非常完美!但是,我不知道如何使用你提供的代码:p CLayer和CGContextRef是什么?谢谢!! - Phillip
我很高兴你想要真正了解这里发生的事情,而不是盲目地复制一堆代码。这是我的完整解释,关于如何在iOS中绘图,包括那段代码中涉及的所有内容,除了实际的“遮罩层”部分:http://www.apeth.com/iOSBook/ch15.html 这是我关于图层的讨论(你需要知道这个,因为打洞涉及到遮罩视图的图层):http://www.apeth.com/iOSBook/ch16.html (尤其是http://www.apeth.com/iOSBook/ch16.html#_shadows_borders_and_more) - matt
@matt:我会仔细阅读这个,非常感谢!有很多有用的信息。 - Phillip
5个回答
21
假设您的图像正在一个视图中显示,可能是UIImageView。然后我们可以通过遮罩视图的层在该视图中打一个矩形洞。每个视图都有一个层。我们将为此视图的层应用一个蒙版,它本身是包含图像的图层,我们将在代码中生成此图像。该图像将除了中间某个位置的清晰矩形外都是黑色的。该清晰矩形将导致图像视图中的空洞。
因此,让self.iv成为这个UIImageView。尝试运行此代码:
CGRect r = self.iv.bounds;
CGRect r2 = CGRectMake(20,20,40,40); // adjust this as desired!
UIGraphicsBeginImageContextWithOptions(r.size, NO, 0);
CGContextRef c = UIGraphicsGetCurrentContext();
CGContextAddRect(c, r2);
CGContextAddRect(c, r);
CGContextEOClip(c);
CGContextSetFillColorWithColor(c, [UIColor blackColor].CGColor);
CGContextFillRect(c, r);
UIImage* maskim = UIGraphicsGetImageFromCurrentImageContext();
UIGraphicsEndImageContext();
CALayer* mask = [CALayer layer];
mask.frame = r;
mask.contents = (id)maskim.CGImage;
self.iv.layer.mask = mask;

编辑: 我觉得有必要说明一下,因为我在评论中提到过,如何使用CAShapeLayer完成同样的效果。结果完全相同:
CGRect r = self.iv.bounds;
CGRect r2 = CGRectMake(20,20,40,40); // adjust this as desired!
CAShapeLayer* lay = [CAShapeLayer layer];
CGMutablePathRef path = CGPathCreateMutable();
CGPathAddRect(path, nil, r2);
CGPathAddRect(path, nil, r);
lay.path = path;
CGPathRelease(path);
lay.fillRule = kCAFillRuleEvenOdd;
self.iv.layer.mask = lay;
- matt
5
这个完美地运行了,非常感谢Matt!我还在阅读你提供的资料,但是很棒能够知道我有可参考的工作代码:D再次感谢你,你真的很棒! :) - Phillip
1真正酷的部分(其中之一)是它适用于 任何 UIView。您可以在 任何东西 上打一个洞。此外,您不仅可以打一个纯洞,还可以打一个半透明的洞。此外,我们在这里所做的并不是唯一的方法;我们可以使用 CAShapeLayer 作为我们的蒙版,而不是制作图像。 - matt
那真的很酷!!如果我将来需要再做这样的事情,我一定会记住这个的 :D - Phillip
1编辑了我的答案,展示了如何使用形状图层完成。当你刚开始时,你可能会发现这更容易。此外(听好了),形状图层可以让你动画显示的形状,所以我认为你可以通过动画方式移动或改变孔的形状。 - matt
太酷了!是啊,这有点更有意义了,不过在我完全弄明白之前,我还有很多学习要做: P再次感谢你!:D - Phillip
14
这是一个简单的Swift函数cut#hole#inView,可以在2017年复制并粘贴使用。
func cut(hole: CGRect, inView view: UIView) {
    let path: CGMutablePath = CGMutablePath()
    path.addRect(view.bounds)
    path.addRect(hole)

    let shapeLayer = CAShapeLayer()
    shapeLayer.path = path
    shapeLayer.fillRule = .evenOdd

    view.layer.mask = shapeLayer
}
- Fattie
4
我只需要@Fattie的版本号,再次感谢!这是更新后的Swift 5.1代码:
private func cut(holeRect: CGRect, inView view: UIView) {
    let combinedPath = CGMutablePath()
    combinedPath.addRect(view.bounds)
    combinedPath.addRect(holeRect)

    let maskShape = CAShapeLayer()
    maskShape.path = combinedPath
    maskShape.fillRule = .evenOdd

    view.layer.mask = maskShape
}
如果您希望切口有圆角,您可以将combinedPath.addRect(holeRect)替换为rectanglePath.addRoundedRect(in: holeRect, cornerWidth: 8, cornerHeight: 8)。
- palme
0
以下是使用Swift在UIImage上切割一个孔的更新代码(而非UIView):
func cut(hole: CGRect, inView image: UIImage) -> UIImage? {
        UIGraphicsBeginImageContext(image.size)
        image.draw(at: CGPoint.zero)
        let context = UIGraphicsGetCurrentContext()!
        let bez = UIBezierPath(rect: hole)
        context.addPath(bez.cgPath)
        context.clip()
        context.clear(CGRect(x:0,y:0,width: image.size.width,height: image.size.height))
        let newImage = UIGraphicsGetImageFromCurrentImageContext()
        UIGraphicsEndImageContext()

        return newImage
    }
- AnupamChugh
0
如果你正在使用图形上下文,答案就很简单:
使用专门用于此目的的“clear”命令。
那就是全部。.clear
使用专门用于此目的的“clear”命令。
context.clear(someRect)
那就是全部。.clear
let frame = CGRect(origin: .zero, size: sz)
let fmt = UIGraphicsImageRendererFormat()
fmt.scale = 1
let image = UIGraphicsImageRenderer(size: sz, format: fmt).image { rc in

    .red.setFill()
    rc.fill(frame)

    rc.cgContext.clear(CGRect(x: 10, y: 10, width: 10, height: 10))

    let att = [NSAttributedString.Key.font: UIFont.systemFont(ofSize: 10.0)]
    "test".draw(in: frame, withAttributes: att)
}

try! image.pngData()!.write(to: "red.png")
- Fattie
网页内容由stack overflow 提供, 点击上面的可以查看英文原文,
原文链接
原文链接