在Jetpack Compose的"row"或"column"中如何将ClipToBounds设置为"false"

3
    Row(modifier = Modifier.height(58.dp).fillMaxWidth().notClip()) {
                Icon(
                    painter = painterResource(id = R.drawable.ic_launcher_foreground),
                    contentDescription = null,
                    modifier = Modifier
                        .height(100.dp)
                        .width(100.dp)
                        .clip(shape = CircleShape)
                    .clickable(
                        onClick = {
                        Toast
                            .makeText(
                                this@MainActivity,
                                "YOU clicked android button",
                                Toast.LENGTH_SHORT
                            )
                            .show();
                    },
                    ))
            }


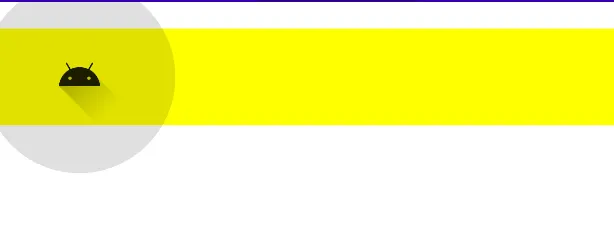
在我的上述代码中,我试图在行约束条件之外展示按钮的涟漪效果(就像GitHub移动应用程序的底部导航栏一样,在单击底部导航栏的按钮时,它会在BottomNavigation栏之外显示涟漪效果),即height(60.dp),但是它没有起作用。我进行了一些研究并创建了自己的扩展函数,如下:
fun Modifier.notClip()= graphicsLayer(clip = false) ;

在行的修饰符上使用它以禁用裁剪,但行仍会裁剪要显示在行约束范围之外的涟漪效果。有人能帮忙吗! `
1个回答

4

clickable 修饰符中,您可以指定 Indication 参数。您可以使用默认的涟漪效果,其由 rememberRipple 自定义,通过更改 bounded 参数。

    Row(
        modifier = Modifier.height(58.dp).fillMaxWidth().background(Color.Yellow)
    ) {
        Icon(
            painter = painterResource(id = R.drawable.ic_launcher_foreground),
            contentDescription = null,
            modifier = Modifier
                .clickable(
                    interactionSource = interactionSource,
                    indication = rememberRipple(
                        //radius= 300.dp,
                        bounded = false),
                    onClick = { /* .. */ })
                .height(100.dp)
                .width(100.dp)
                .clip(shape = CircleShape)

        )
    }

enter image description here


网页内容由stack overflow 提供, 点击上面的
可以查看英文原文,
原文链接