UIButton:如何使用imageEdgeInsets和titleEdgeInsets将图像和文本居中?

161
如果我只在一个按钮中放置一张图片,并将imageEdgeInsets设置得更靠近顶部,那么图片会保持居中并且一切都按预期工作:
[button setImage:image forState:UIControlStateNormal];
[button setImageEdgeInsets:UIEdgeInsetsMake(-15.0, 0.0, 0.0, 0.0)];

如果我在按钮中只放置文本,并将titleEdgeInsets设置更靠近底部,那么文本会保持居中,一切都按预期工作:

[button setTitle:title forState:UIControlStateNormal];
[button setTitleEdgeInsets:UIEdgeInsetsMake(0.0, 0.0, -30, 0.0)];

然而,如果我把这4行代码放在一起,文本会干扰图像,两者都失去了中心对齐。

我的所有图片都有30像素的宽度,如果我在setTitleEdgeInsets的左参数中输入30,那么文本就会再次居中。问题是图像永远无法居中,因为它似乎依赖于button.titleLabel的大小。我已经尝试了许多关于button大小、图像大小、titleLabel大小的计算,但从未完美地将两者居中对齐。

是否有人遇到过相同的问题?

26个回答

421

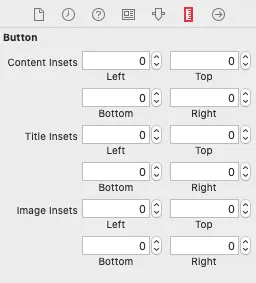
以下提供了一般性方案,可使图像在文本上方水平居中显示,而不需要使用任何神奇数字。 不过请注意,下面的代码已经过时了,你应该使用下面更新版本之一:

// the space between the image and text
CGFloat spacing = 6.0;

// lower the text and push it left so it appears centered 
//  below the image
CGSize imageSize = button.imageView.frame.size;
button.titleEdgeInsets = UIEdgeInsetsMake(
  0.0, - imageSize.width, - (imageSize.height + spacing), 0.0);

// raise the image and push it right so it appears centered
//  above the text
CGSize titleSize = button.titleLabel.frame.size;
button.imageEdgeInsets = UIEdgeInsetsMake(
  - (titleSize.height + spacing), 0.0, 0.0, - titleSize.width);

以下版本包含为支持iOS 7+所做的更改,这些更改在下面的评论中被推荐。我自己没有测试过此代码,因此不确定它的工作效果如何,或者是否会在早期版本的iOS下使用时出现问题。

// the space between the image and text
CGFloat spacing = 6.0;

// lower the text and push it left so it appears centered 
//  below the image
CGSize imageSize = button.imageView.image.size;
button.titleEdgeInsets = UIEdgeInsetsMake(
  0.0, - imageSize.width, - (imageSize.height + spacing), 0.0);

// raise the image and push it right so it appears centered
//  above the text
CGSize titleSize = [button.titleLabel.text sizeWithAttributes:@{NSFontAttributeName: button.titleLabel.font}];
button.imageEdgeInsets = UIEdgeInsetsMake(
  - (titleSize.height + spacing), 0.0, 0.0, - titleSize.width);

// increase the content height to avoid clipping
CGFloat edgeOffset = fabsf(titleSize.height - imageSize.height) / 2.0;
button.contentEdgeInsets = UIEdgeInsetsMake(edgeOffset, 0.0, edgeOffset, 0.0);

Swift 5.0 版本

extension UIButton {
  func alignVertical(spacing: CGFloat = 6.0) {
    guard let imageSize = imageView?.image?.size,
      let text = titleLabel?.text,
      let font = titleLabel?.font
    else { return }

    titleEdgeInsets = UIEdgeInsets(
      top: 0.0,
      left: -imageSize.width,
      bottom: -(imageSize.height + spacing),
      right: 0.0
    )

    let titleSize = text.size(withAttributes: [.font: font])
    imageEdgeInsets = UIEdgeInsets(
      top: -(titleSize.height + spacing),
      left: 0.0,
      bottom: 0.0,
      right: -titleSize.width
    )

    let edgeOffset = abs(titleSize.height - imageSize.height) / 2.0
    contentEdgeInsets = UIEdgeInsets(
      top: edgeOffset,
      left: 0.0,
      bottom: edgeOffset,
      right: 0.0
    )
  }
}

5
太好了-谢谢!我认为许多其他答案都走了“艰难的道路”- 这个看起来好得多。 - Joe D'Andrea
3
我发现上述方法可行,但是我完全不知道它的工作原理。有没有人能提供一个图解来说明各个EdgeInsets参数影响哪些内容?还有为什么文本宽度会改变? - Robert Atkins
3
当图像被缩小以适应按钮大小时,此方法无效。似乎 UIButton(至少在 iOS 7 中)使用的是 image.size 而非 imageView.frame.size 来进行居中计算。 - Dan Jackson
5
@Hemang和Dan Jackson,我会采纳你们的建议,但没有亲自测试过。我觉得有点荒谬,因为我最初是为iOS 4编写的,经过这么多版本之后,我们仍然不得不基本上反向工程Apple的布局算法才能得到如此明显的功能。或者至少我认为目前还没有更好的解决方案,因为以下回答中一直有人赞同并给出了同样笨拙的答案(无意冒犯)。 - Jesse Crossen
5
在iOS8中,我发现使用button.currentTitlebutton.titleLabel.text更好,特别是当按钮文本将来可能会更改时。 currentTitle会立即填充,而titleLabel.text变化缓慢,这可能导致不对齐的插图。 - mjangda
显示剩余13条评论

59

已找到解决方案。

首先,配置titleLabel的文本(考虑样式,例如粗体、斜体等)。然后,使用setTitleEdgeInsets来考虑您的图像宽度:

[button setTitleColor:[UIColor blackColor] forState:UIControlStateNormal];
[button setTitle:title forState:UIControlStateNormal];
[button.titleLabel setFont:[UIFont boldSystemFontOfSize:10.0]];

// Left inset is the negative of image width.
[button setTitleEdgeInsets:UIEdgeInsetsMake(0.0, -image.size.width, -25.0, 0.0)]; 

之后,考虑文本范围的宽度,使用 setTitleEdgeInsets

[button setImage:image forState:UIControlStateNormal];

// Right inset is the negative of text bounds width.
[button setImageEdgeInsets:UIEdgeInsetsMake(-15.0, 0.0, 0.0, -button.titleLabel.bounds.size.width)];

现在图像和文本将居中显示(在此示例中,图像位于文本上方)。

干杯。


3
7年了,伙计。真的记不清了。当我问自己时,我回答了自己(那时我的答案是唯一的)。后来在当前被选择为最佳答案的作者专注于消除那些神奇数字时,我改变了所选答案。因此,在被选中的答案中,你可以弄清它们的含义。 - reinaldoluckman

20

你可以使用这个Swift扩展来实现,其中一部分基于Jesse Crossen的回答:

extension UIButton {
  func centerLabelVerticallyWithPadding(spacing:CGFloat) {
    // update positioning of image and title
    let imageSize = self.imageView.frame.size
    self.titleEdgeInsets = UIEdgeInsets(top:0,
                                        left:-imageSize.width,
                                        bottom:-(imageSize.height + spacing),
                                        right:0)
    let titleSize = self.titleLabel.frame.size
    self.imageEdgeInsets = UIEdgeInsets(top:-(titleSize.height + spacing),
                                        left:0,
                                        bottom: 0,
                                        right:-titleSize.width)

    // reset contentInset, so intrinsicContentSize() is still accurate
    let trueContentSize = CGRectUnion(self.titleLabel.frame, self.imageView.frame).size
    let oldContentSize = self.intrinsicContentSize()
    let heightDelta = trueContentSize.height - oldContentSize.height
    let widthDelta = trueContentSize.width - oldContentSize.width
    self.contentEdgeInsets = UIEdgeInsets(top:heightDelta/2.0,
                                          left:widthDelta/2.0,
                                          bottom:heightDelta/2.0,
                                          right:widthDelta/2.0)
  }
}

这定义了一个函数centerLabelVerticallyWithPadding,该函数会适当地设置标题和图像插图。

它还设置了contentEdgeInsets,我认为这是必要的,以确保intrinsicContentSize仍然能正确工作,并且需要使用自动布局。

我认为所有子类化UIButton的解决方案在技术上都不合法,因为您不应该子类化UIKit控件。也就是说,在理论上,它们可能会在未来的版本中出现问题。


在iOS9上进行测试。图像居中显示,但文本向左显示:( - endavid

13

编辑:已更新为Swift 3

如果你正在寻找Jesse Crossen的答案的Swift解决方案,你可以将以下内容添加到UIButton的子类中:

override func layoutSubviews() {

    let spacing: CGFloat = 6.0

    // lower the text and push it left so it appears centered
    //  below the image
    var titleEdgeInsets = UIEdgeInsets.zero
    if let image = self.imageView?.image {
        titleEdgeInsets.left = -image.size.width
        titleEdgeInsets.bottom = -(image.size.height + spacing)
    }
    self.titleEdgeInsets = titleEdgeInsets

    // raise the image and push it right so it appears centered
    //  above the text
    var imageEdgeInsets = UIEdgeInsets.zero
    if let text = self.titleLabel?.text, let font = self.titleLabel?.font {
        let attributes = [NSFontAttributeName: font]
        let titleSize = text.size(attributes: attributes)
        imageEdgeInsets.top = -(titleSize.height + spacing)
        imageEdgeInsets.right = -titleSize.width
    }
    self.imageEdgeInsets = imageEdgeInsets

    super.layoutSubviews()
}

9

这里有一些伟大的例子,但当涉及到处理多行文本(文本换行)时,我无法让它在所有情况下都起作用。最终,为了使其工作,我结合了几种技术:

  1. I used Jesse Crossen example above. However, I fixed a text height issue and I added the ability to specify a horizontal text margin. The margin is useful when allowing text to wrap so it doesn't hit the edge of the button:

    // the space between the image and text
    CGFloat spacing = 10.0;
    float   textMargin = 6;
    
    // get the size of the elements here for readability
    CGSize  imageSize   = picImage.size;
    CGSize  titleSize   = button.titleLabel.frame.size;
    CGFloat totalHeight = (imageSize.height + titleSize.height + spacing);      // get the height they will take up as a unit
    
    // lower the text and push it left to center it
    button.titleEdgeInsets = UIEdgeInsetsMake( 0.0, -imageSize.width +textMargin, - (totalHeight - titleSize.height), +textMargin );   // top, left, bottom, right
    
    // the text width might have changed (in case it was shortened before due to 
    // lack of space and isn't anymore now), so we get the frame size again
    titleSize = button.titleLabel.bounds.size;
    
    button.imageEdgeInsets = UIEdgeInsetsMake(-(titleSize.height + spacing), 0.0, 0.0, -titleSize.width );     // top, left, bottom, right        
    
  2. Make sure you setup the text label to wrap

    button.titleLabel.numberOfLines = 2; 
    button.titleLabel.lineBreakMode = UILineBreakModeWordWrap;
    button.titleLabel.textAlignment = UITextAlignmentCenter;
    
  3. This will mostly work now. However, I had some buttons that wouldn't render their image correctly. The image was either shifted to far to the right or left (it wasn't centered). So I used an UIButton layout override technique to force the imageView to be centered.

    @interface CategoryButton : UIButton
    @end
    
    @implementation CategoryButton
    
    - (void)layoutSubviews
    {
        // Allow default layout, then center imageView
        [super layoutSubviews];
    
        UIImageView *imageView = [self imageView];
        CGRect imageFrame = imageView.frame;
        imageFrame.origin.x = (int)((self.frame.size.width - imageFrame.size.width)/ 2);
        imageView.frame = imageFrame;
    }
    @end
    

这似乎是一个不错的解决方案,但是button.titleLabel.numberOfLines不应该为0吗?这样它就可以有任意多行了。 - Ben Lachman
在我的情况下,我只需要最多两行。否则,图像将会对按钮的整体大小产生问题。 - Tod Cunningham

9
我为@TodCunningham的回答编写了一个方法。
 -(void) AlignTextAndImageOfButton:(UIButton *)button
 {
   CGFloat spacing = 2; // the amount of spacing to appear between image and title
   button.imageView.backgroundColor=[UIColor clearColor];
   button.titleLabel.lineBreakMode = UILineBreakModeWordWrap;
   button.titleLabel.textAlignment = UITextAlignmentCenter;
   // get the size of the elements here for readability
   CGSize imageSize = button.imageView.frame.size;
   CGSize titleSize = button.titleLabel.frame.size;

  // lower the text and push it left to center it
  button.titleEdgeInsets = UIEdgeInsetsMake(0.0, - imageSize.width, - (imageSize.height   + spacing), 0.0);

  // the text width might have changed (in case it was shortened before due to 
  // lack of space and isn't anymore now), so we get the frame size again
   titleSize = button.titleLabel.frame.size;

  // raise the image and push it right to center it
  button.imageEdgeInsets = UIEdgeInsetsMake(- (titleSize.height + spacing), 0.0, 0.0, -     titleSize.width);
 }

8

以下是 Jesse CrossenSwift 4中的更新答案:

extension UIButton {
    func alignVertical(spacing: CGFloat = 6.0) {
        guard let imageSize = self.imageView?.image?.size,
            let text = self.titleLabel?.text,
            let font = self.titleLabel?.font
            else { return }
        self.titleEdgeInsets = UIEdgeInsets(top: 0.0, left: -imageSize.width, bottom: -(imageSize.height + spacing), right: 0.0)
        let labelString = NSString(string: text)
        let titleSize = labelString.size(withAttributes: [kCTFontAttributeName as NSAttributedStringKey: font])
        self.imageEdgeInsets = UIEdgeInsets(top: -(titleSize.height + spacing), left: 0.0, bottom: 0.0, right: -titleSize.width)
        let edgeOffset = abs(titleSize.height - imageSize.height) / 2.0;
        self.contentEdgeInsets = UIEdgeInsets(top: edgeOffset, left: 0.0, bottom: edgeOffset, right: 0.0)
    }
}

使用方法如下:

override func viewDidLayoutSubviews() {
    button.alignVertical()
}

经过许多,许多小时。这是唯一有效的方法 :) - Harry Blue
嗨,哈利,很高兴听到这个消息。如果有任何与iOS相关的问题,请随时问我。分享就是关爱! - Egzon P.

8

更新至 Xcode 11+

在最近版本的 Xcode 中,我原来回答中提到的插图已经被移动到 Size Inspector 中。我不是100%确定何时发生了这个变化,但读者应该在属性检查器中找不到插图信息时查看 Size Inspector。下面是新插图界面的示例(截止至11.5版本,在Size Attributes Inspector顶部)。

insets_moved_to_size_inspector

原始回答

其他回答没有问题,但我想指出,在 Xcode 中可以使用零行代码可视化地实现相同的行为。如果您不需要计算出值或正在使用故事板/xib构建(否则请使用其他解决方案),则此解决方案很有用。

注意-我知道 OP 的问题需要代码。我只是为了完整性和作为那些使用 storyboards/xibs 的逻辑替代方案而提供此答案。

要使用边缘插图修改按钮/控件的图像、标题和内容视图间距,可以选择按钮/控件并打开属性检查器。向下滚动到检查器中间,并找到边缘插图部分。

edge-insets

还可以访问和修改标题、图像或内容视图的特定边缘插图。

menu-options


1
我不明白的是,为什么在Storyboard中有些值似乎无法输入负数。 - Daniel T.
这适用于更新的Swift版本吗?我无法在任何地方找到Edge属性。 - brockhampton
@brockhampton - 请查看更新后的答案以获取新位置。 - Tommie C.

6

继承UIButton类

- (void)layoutSubviews {
    [super layoutSubviews];
    CGFloat spacing = 6.0;
    CGSize imageSize = self.imageView.image.size;
    CGSize titleSize = [self.titleLabel sizeThatFits:CGSizeMake(self.frame.size.width, self.frame.size.height - (imageSize.height + spacing))];
    self.imageView.frame = CGRectMake((self.frame.size.width - imageSize.width)/2, (self.frame.size.height - (imageSize.height+spacing+titleSize.height))/2, imageSize.width, imageSize.height);
    self.titleLabel.frame = CGRectMake((self.frame.size.width - titleSize.width)/2, CGRectGetMaxY(self.imageView.frame)+spacing, titleSize.width, titleSize.height);
}

6
不要与系统对抗。如果使用接口生成器和简单的配置代码无法管理布局复杂的情况,可以使用layoutSubviews手动以更简单的方式进行布局 - 这就是它的作用!其他所有方法都将成为hack。
创建一个UIButton子类并覆盖其layoutSubviews方法,以编程方式对齐文本和图像。或者使用类似于https://github.com/nickpaulson/BlockKit/blob/master/Source/UIView-BKAdditions.h这样的东西,以便您可以使用块实现layoutSubviews。

网页内容由stack overflow 提供, 点击上面的
可以查看英文原文,
原文链接