我正在使用MapKit,如何在MKAnnotation视图中显示多行?
每个注释都有标题和副标题。如何借助自动布局显示带有多行的副标题?
我找到了答案,请尝试我的答案。我们只需要在代码中进行以下操作:
- (MKAnnotationView *)mapView:(MKMapView *)mapView viewForAnnotation:(id <MKAnnotation>)annotation
{

}
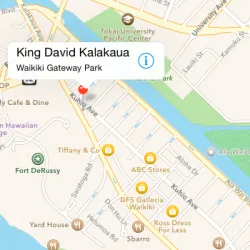
在这里,我展示了如何使用自动布局和MKAnnotation。
我正在使用MapKit,如何在MKAnnotation视图中显示多行?
每个注释都有标题和副标题。如何借助自动布局显示带有多行的副标题?
我找到了答案,请尝试我的答案。我们只需要在代码中进行以下操作:
- (MKAnnotationView *)mapView:(MKMapView *)mapView viewForAnnotation:(id <MKAnnotation>)annotation
{
}
在这里,我展示了如何使用自动布局和MKAnnotation。
我们可以使用自动布局的帮助,在MKAnnotation视图中显示多行。
这非常简单。
在objective c中。
- (MKAnnotationView *) mapView:(MKMapView *)mapView viewForAnnotation:(id<MKAnnotation>)annotation {
if ([annotation isKindOfClass:[MKUserLocation class]])
return nil;
if ([annotation isKindOfClass:[CustomAnnotation class]]) {
CustomAnnotation *customAnnotation = (CustomAnnotation *) annotation;
MKAnnotationView *annotationView = [mapView dequeueReusableAnnotationViewWithIdentifier:@"CustomAnnotation"];
if (annotationView == nil)
annotationView = customAnnotation.annotationView;
else
annotationView.annotation = annotation;
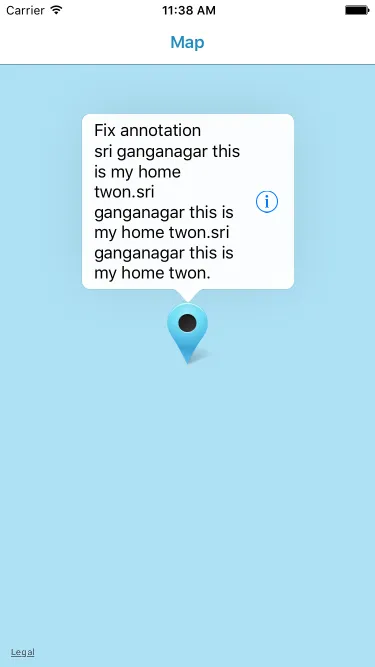
//Adding multiline subtitle code
UILabel *subTitlelbl = [[UILabel alloc]init];
subTitlelbl.text = @"sri ganganagar this is my home twon.sri ganganagar this is my home twon.sri ganganagar this is my home twon. ";
annotationView.detailCalloutAccessoryView = subTitlelbl;
NSLayoutConstraint *width = [NSLayoutConstraint constraintWithItem:subTitlelbl attribute:NSLayoutAttributeWidth relatedBy:NSLayoutRelationLessThanOrEqual toItem:nil attribute:NSLayoutAttributeNotAnAttribute multiplier:1 constant:150];
NSLayoutConstraint *height = [NSLayoutConstraint constraintWithItem:subTitlelbl attribute:NSLayoutAttributeHeight relatedBy:NSLayoutRelationGreaterThanOrEqual toItem:nil attribute:NSLayoutAttributeNotAnAttribute multiplier:1 constant:0];
[subTitlelbl setNumberOfLines:0];
[subTitlelbl addConstraint:width];
[subTitlelbl addConstraint:height];
return annotationView;
} else
return nil;
}
输出
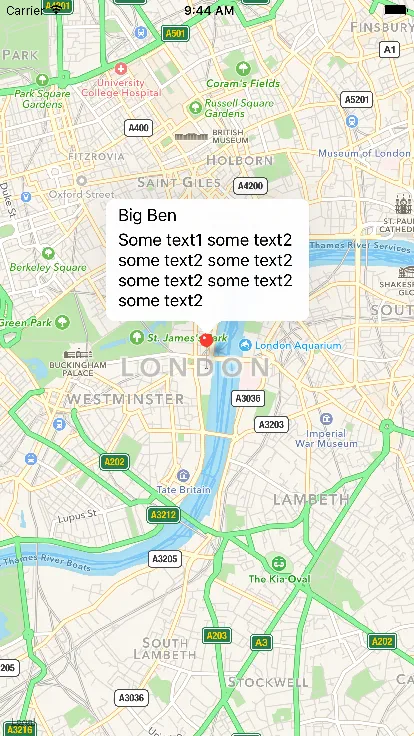
适用于Swift
func mapView(mapView: MKMapView, viewForAnnotation annotation: MKAnnotation) -> MKAnnotationView? {

        let identifier = "MyPin"

        if annotation.isKindOfClass(MKUserLocation) {
            return nil
        }

        var annotationView: MKPinAnnotationView? = mapView.dequeueReusableAnnotationViewWithIdentifier(identifier) as? MKPinAnnotationView

        if annotationView == nil {

            annotationView = MKPinAnnotationView(annotation: annotation, reuseIdentifier: identifier)
            annotationView?.canShowCallout = true

              let label1 = UILabel(frame: CGRectMake(0, 0, 200, 21))
            label1.text = "Some text1 some text2 some text2 some text2 some text2 some text2 some text2"
             label1.numberOfLines = 0
              annotationView!.detailCalloutAccessoryView = label1;

            let width = NSLayoutConstraint(item: label1, attribute: NSLayoutAttribute.Width, relatedBy: NSLayoutRelation.LessThanOrEqual, toItem: nil, attribute: NSLayoutAttribute.NotAnAttribute, multiplier: 1, constant: 200)
            label1.addConstraint(width)


            let height = NSLayoutConstraint(item: label1, attribute: NSLayoutAttribute.Height, relatedBy: NSLayoutRelation.Equal, toItem: nil, attribute: NSLayoutAttribute.NotAnAttribute, multiplier: 1, constant: 90)
            label1.addConstraint(height)


        } else {
            annotationView!.annotation = annotation
        }
        return annotationView
    }


}
我在代码中使用了 NSLayoutConstraint。
我通过编程创建一个标签,添加了约束,然后将该标签添加到MKAnnotationView的detailCalloutAccessoryView中。
添加多行的扩展:
import MapKit // must import MapKit for MKAnnotationView to get recognized

extension MKAnnotationView {

    func loadCustomLines(customLines: [String]) {
        let stackView = self.stackView()
        for line in customLines {
            let label = UILabel()
            label.text = line
            stackView.addArrangedSubview(label)
        }
        self.detailCalloutAccessoryView = stackView
    }


    private func stackView() -> UIStackView {
        let stackView = UIStackView()
        stackView.axis = .vertical
        stackView.distribution = .fillEqually
        stackView.alignment = .fill
        return stackView
    }
}
使用:
view = MKPinAnnotationView(annotation: annotation, reuseIdentifier: identifier)
view.canShowCallout = true
view.loadCustomLines(customLines: ["qqqq", "wwww", "eee"])
let subtitleLabel = UILabel()
subtitleLabel.text = "Location updated\n" + dateFormatter.string(from: date)
subtitleLabel.numberOfLines = 0
subtitleLabel.font = UIFont.systemFont(ofSize: 14)
subtitleLabel.textColor = .lightGray
subtitleLabel.setContentCompressionResistancePriority(.required, for: .vertical)

annotationView?.detailCalloutAccessoryView = subtitleLabel
setContentCompressionResistancePriority() 似乎是最简单的方法。此外,可能还可以使用动态类型支持,例如 subtitleLabel.font = UIFont.preferredFont(forTextStyle: .body); subtitleLabel.adjustsFontForContentSizeCategory = true。 - Gary5个步骤
我创建了一个标签,并将其添加到annotationView?.detailCalloutAccessoryView属性中(第5步)。 我还将标签的文本设置为annotation.subtitle文本(第2步和第4步),并且.numberOfLines = 0
步骤在代码上方的注释中
func mapView(mapView: MKMapView, viewForAnnotation annotation: MKAnnotation) -> MKAnnotationView? {

    if annotation.isKindOfClass(MKUserLocation) {
        return nil
    }

    let reuseIdentifier = "reuseIdentifier"

    var annotationView = mapView.mapView.dequeueReusableAnnotationView(withIdentifier: reuseIdentifier) as? MKPinAnnotationView

    if annotationView == nil {

        annotationView = MKPinAnnotationView(annotation: annotation, reuseIdentifier: reuseIdentifier)

        // 1. set the annotationView's canShowCallout property to true
        annotationView?.canShowCallout = true

        // 2. get the subtitle text from the annontation's subtitle property
        let subtitleText = annotation.subtitle ?? "you have no subtitle"

        // 3. create a label for the subtitle text
        let subtitleLabel = UILabel()
        subtitleLabel.translatesAutoresizingMaskIntoConstraints = false

        // 4. set the subtitle's text to the label's text property and number of lines to 0
        subtitleLabel.text = subtitleText
        subtitleLabel.numberOfLines = 0

        // 5. set the annotation's detailCalloutAccessoryView property to the subtitleLabel
        annotationView?.detailCalloutAccessoryView = subtitleLabel

    } else {
        annotationView!.annotation = annotation
    }

    return annotationView
}
如果您想让多标签被点击后跳转到某处,您需要: 1- 在AnnotationView上编写程序创建UITapGestureRecognizer。 2- 创建函数并将其传递给手势选择器。该函数带有类型为UIGestureRecognizer的sender参数。使用if语句确保canshowcallout为true,这样只有在它显示时才能单击,以避免单击实际的图钉本身。
所以在我的情况下,我有这种场景。这可能对某些人有帮助: - tableView 具有填充不同位置单元格的单元格 - 屏幕的上半部分是地图,显示每个位置的标记 - 当您单击表视图或地图中的标记时,地图会居中并显示标记 callout 视图,它是一个具有图片和位置名称的小视图,在名称过长时使用多行换行符来避免截断尾巴。 - 因为索引在我们的代码中传递并被用于确定单击的位置是哪个位置,所以我还必须使用它来显示被单击位置的 callout 中正确的名称。 我遇到的问题是单击标签,因为我使用了 annotationView.detailCalloutAccessoryView = myLabel。似乎当你使用 detail 而不是 right 或 left 时,即使从 controlTapped 地图委托函数中也无法获得单击。因此,我不得不在之前谈到的手势选择器函数内执行以下操作: 确保您正在进行某种保护或 if let,并在这些检查上一起使用逗号。 - 通过 let tag = sender.view.tag 检查视图标签 - 将视图作为 MKPinAnnotationView 获取:let view = sender.view as? MKPointAnnotationView - 通过进行以下操作检查 callout 是否首先显示:view.canShowCallout - 然后在 if 或 guard 的花括号内,您可以让 index = tag,并将其传递到我的函数中,该函数会对视图执行操作,以使其跳转到点击 annotationView 后的本机苹果地图。let label1 = UILabel(frame: CGRect(x: 0, y: 0, width: 200, height: 21))
label1.text = "Some text1 some text2 some text2 some text2 some text2 some text2 some text2"
label1.numberOfLines = 0
annotationView!.detailCalloutAccessoryView = label1;
let width = NSLayoutConstraint(item: label1, attribute: NSLayoutConstraint.Attribute.width, relatedBy: NSLayoutConstraint.Relation.lessThanOrEqual, toItem: nil, attribute: NSLayoutConstraint.Attribute.notAnAttribute, multiplier: 1, constant: 200)
label1.addConstraint(width)
let height = NSLayoutConstraint(item: label1, attribute: NSLayoutConstraint.Attribute.height, relatedBy: NSLayoutConstraint.Relation.equal, toItem: nil, attribute: NSLayoutConstraint.Attribute.notAnAttribute, multiplier: 1, constant: 90)
label1.addConstraint(height)