模糊图像的阈值 - 第2部分

10
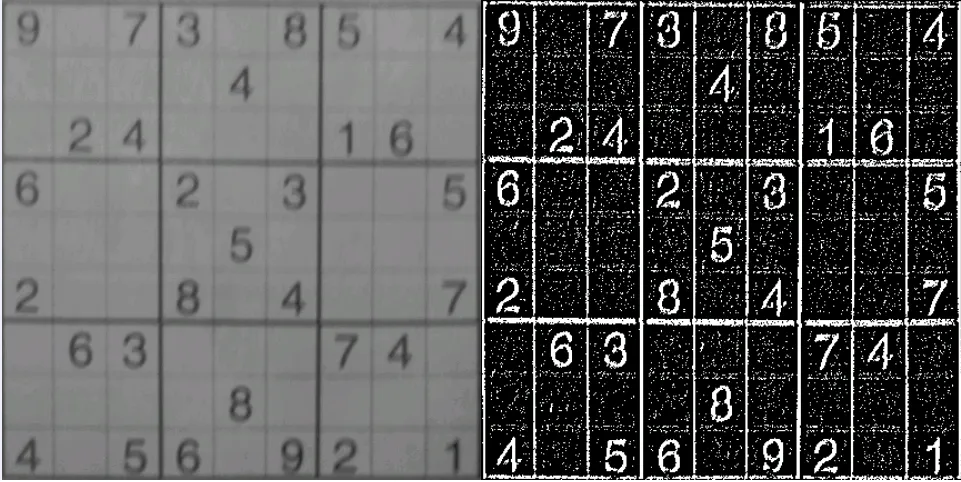
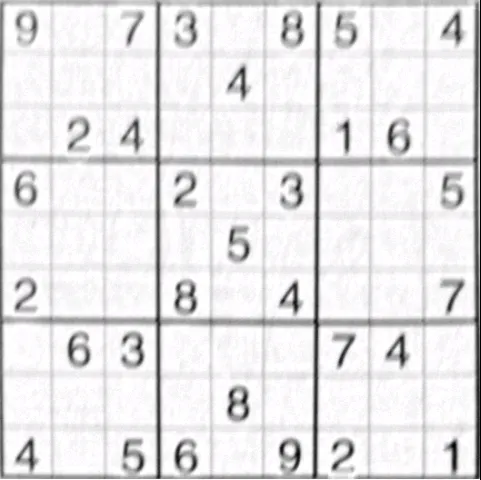
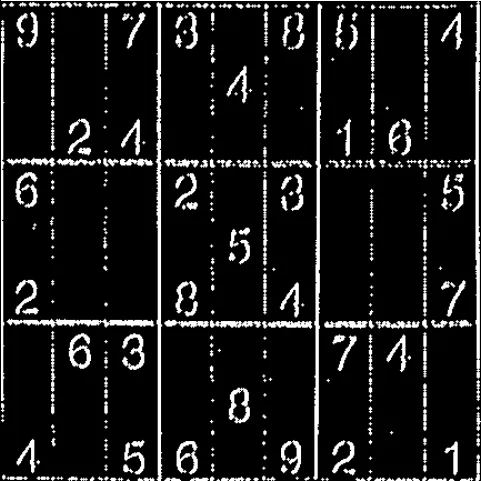
我应该如何处理这张模糊的图片,以使数字更加清晰?在之前的一篇文章中,我尝试了自适应阈值处理模糊图像(左图),结果导致数字变形且不连续(右图):

enter image description here

从那时起,我尝试使用形态学闭运算来使图像的亮度均匀,如this post所述:

enter image description here

如果我自适应阈值这个图像,结果并没有显著提高。然而,由于亮度大致均匀,现在我可以使用普通的阈值:

enter image description here

这比之前好多了,但我有两个问题:
  1. 我必须手动选择阈值。虽然闭合操作可以使亮度均匀,但其他图像的亮度水平可能会不同。
  2. 图像的不同部分在阈值水平上略有变化会更好。例如,左上角的9和7出现了部分褪色,应该有一个较低的阈值,而一些6已经融合成8,应该有一个较高的阈值。
我认为回到自适应阈值,但使用非常大的块大小(图像的1/9)将解决这两个问题。但实际上,我得到了奇怪的“光晕效果”,其中图像中心明亮得多,但边缘与通常阈值处理后的图像相同。

enter image description here

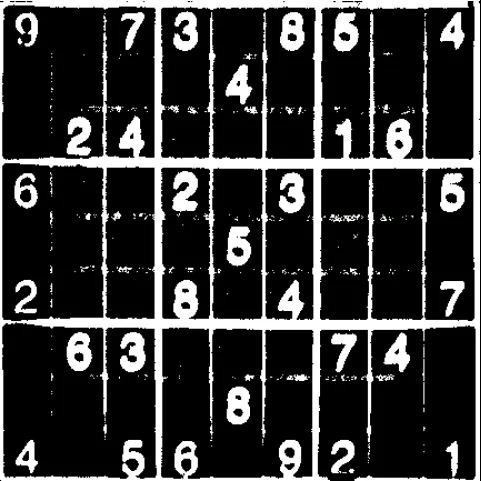
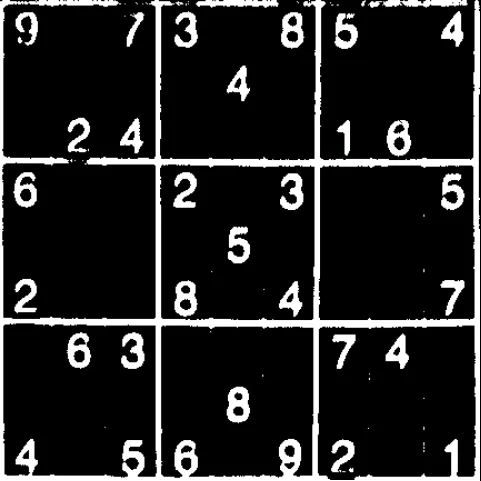
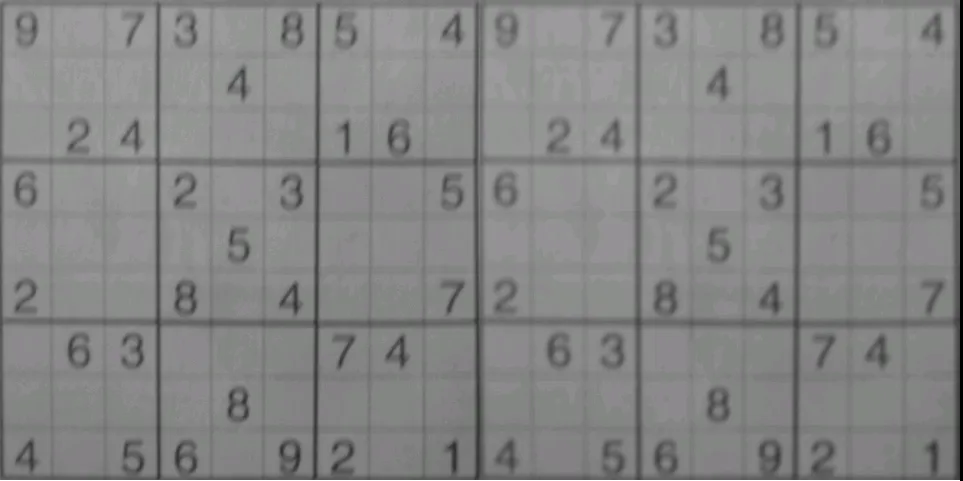
编辑:尝试使用椭圆核来开启此帖子右上角的阈值图像,remi建议使用suggested。但是效果并不太好。使用椭圆核时,只有3x3足够小,可以避免完全抹掉图像,即使如此,数字仍然会出现显著的断裂:

enter image description here

编辑2: mmgp 建议使用维纳滤波器去除模糊。 我将这段用于在OpenCV中进行维纳滤波的代码改编为OpenCV4Android,但它使图像变得更加模糊! 这是过滤之前(左)和使用我的代码和5x5内核进行过滤后的图像:

enter image description here

这是我改编后的代码,可以原地过滤:

private void wiener(Mat input, int nRows, int nCols) { // I tried nRows=5 and nCols=5

    Mat localMean = new Mat(input.rows(), input.cols(), input.type());
    Mat temp = new Mat(input.rows(), input.cols(), input.type());
    Mat temp2 = new Mat(input.rows(), input.cols(), input.type());

    // Create the kernel for convolution: a constant matrix with nRows rows 
    // and nCols cols, normalized so that the sum of the pixels is 1.
    Mat kernel = new Mat(nRows, nCols, CvType.CV_32F, new Scalar(1.0 / (double) (nRows * nCols)));

    // Get the local mean of the input.  localMean = convolution(input, kernel)
    Imgproc.filter2D(input, localMean, -1, kernel, new Point(nCols/2, nRows/2), 0); 

    // Get the local variance of the input.  localVariance = convolution(input^2, kernel) - localMean^2 
    Core.multiply(input, input, temp);  // temp = input^2
    Imgproc.filter2D(temp, temp, -1, kernel, new Point(nCols/2, nRows/2), 0); // temp = convolution(input^2, kernel)
    Core.multiply(localMean, localMean, temp2); //temp2 = localMean^2
    Core.subtract(temp, temp2, temp); // temp = localVariance = convolution(input^2, kernel) - localMean^2  

    // Estimate the noise as mean(localVariance)
    Scalar noise = Core.mean(temp);

    // Compute the result.  result = localMean + max(0, localVariance - noise) / max(localVariance, noise) * (input - localMean)

    Core.max(temp, noise, temp2); // temp2 = max(localVariance, noise)

    Core.subtract(temp, noise, temp); // temp = localVariance - noise
    Core.max(temp, new Scalar(0), temp); // temp = max(0, localVariance - noise)

    Core.divide(temp, temp2, temp);  // temp = max(0, localVar-noise) / max(localVariance, noise)

    Core.subtract(input, localMean, input);  // input = input - localMean
    Core.multiply(temp, input, input); // input = max(0, localVariance - noise) / max(localVariance, noise) * (input - localMean)
    Core.add(input, localMean, input); // input = localMean + max(0, localVariance - noise) / max(localVariance, noise) * (input - localMean)
}

2
以下是对您的问题的不同看法(如果不奇怪的话):如果您控制所使用的字体,请将其更改为更好的字体。 “更好”意味着使6或9更难变成8。也许还要加粗。我猜您最终会尝试识别这些数字,这就是您提出问题的原因。 - mmgp
不幸的是,我将从Android用户的相机中“野外”识别这些图像,因此无法控制字体。虽然否则那将是一个有用的解决方案。 - 1''
您可能需要局部阈值化。有一些通用的方法可以实现这个目的。请查看Niblack算法。另请参见https://dev59.com/PWHVa4cB1Zd3GeqPr_ZU。 https://dev59.com/PWHVa4cB1Zd3GeqPr_ZU#9891678 我们成功地将其用于文档分割。 - Rob Audenaerde
假设您已经了解数独单元格是一个强制先决条件!您应该在问题中说明。Sauvola在实践中非常快,无论使用哪种语言,都可以基于积分图像的实现来计算任何块的平均值/标准差,并在恒定时间内完成。使用OpenCV,可以编写几行代码。但是,在图像的局部区域中使用OTSU可能会更好,因为它可以自行计算阈值。 - remi
Otsu是一种统计方法,它计算统计数据允许的最佳阈值,即不会自动更好地在实际任务中解决问题。这里的问题是另一个不正确通过二值化解决的问题,你最多只能期望使用这种方法得到合理的结果。现在,我的答案涉及简化(可以删除)了解数独单元格的过程,并且这并不改变二值化仍然不是正确的做法的事实。对于所描述的问题,去卷积或者在某些文本中称为去模糊是逻辑上的下一步。 - mmgp
显示剩余6条评论
4个回答

6
我尝试将每个3x3的方框分别进行阈值处理,使用Otsu算法(CV_OTSU-感谢remi!)来确定每个方框的最佳阈值。这比对整个图像进行阈值处理效果要好一些,而且可能更加稳健。
更好的解决方案是受欢迎的。

一种适用于此类文档的高效二值化技术是Sauvola技术(谷歌Sauvola + 二值化)。它没有在OpenCV中实现,但很容易这样做,并且您可以使用积分图像来极快地计算图像块的平均值和标准差 - remi
我在你的图像上尝试了Sauvola算法,成功地得到了相当不错的结果,但正如mmgp所说,需要对参数进行微调。而且,可能这组参数只适用于这张图片,对于具有不同条件的图片来说并不是最优的。 - remi

6
如果您愿意花费一些时间,有去模糊的技术可以用来在处理之前增强图像。目前OpenCV中没有相关内容,但如果这是一个必须要做的事情,您可以添加它。
这个主题有很多文献: http://www.cse.cuhk.edu.hk/~leojia/projects/motion_deblurring/index.html http://www.google.com/search?q=motion+deblurring
OpenCV邮件列表上也有一些讨论: http://tech.groups.yahoo.com/group/OpenCV/message/20938 你看到的奇怪的“光晕效果”可能是由于OpenCV假定颜色为黑色,当自适应阈值接近或在图像边缘时,使用的窗口“悬挂”在非图像区域。有方法可以纠正这个问题,最可能的方法是创建一个临时图像,比摄像机图像至少高和宽两个完整块大小。然后将摄像机图像复制到中间。然后将临时图像周围的“空白”部分设置为摄像机图像的平均颜色。现在当执行自适应阈值时,边缘处的数据将更加准确。虽然不是真实的图片,但比OpenCV假设存在的黑色产生更好的结果。

6

以下是一些你可以尝试的提示:

  • 在原始二值化图像中应用形态学开运算(即第一张图片右侧嘈杂的那个)。这样可以消除大部分背景噪声,重新连接数字。

  • 使用与形态学闭运算不同的原始图像预处理方法,例如中值滤波(倾向于模糊边缘)或bilateral filtering,后者会更好地保留边缘但计算速度较慢。

  • 就阈值而言,您可以在cv::threshold中使用CV_OTSU标志来确定全局阈值的最佳值。局部阈值可能仍然更好,但应该与双边或中值滤波器配合使用效果更好。


CV_OTSU标志是个好主意,它的效果很棒!但是,形态学开运算在我的阈值图像上效果不佳(请参见我编辑过的帖子)。此外,Astor在阈值化之前尝试了中值/双边滤波器,并且效果不如闭合+普通阈值。 - 1''
可能在开头和结尾都加上标记会比只在开头加标记更有利于结果的改善。 - remi

5

我的建议是假设您可以识别数独单元格,我认为这不是要求太多。尝试应用形态学运算符(尽管我非常喜欢它们)和/或二值化方法作为第一步是错误的,我当然是这样认为的。由于某些原因(包括原始摄像机角度和/或移动等),您的图像至少部分模糊。因此,您需要通过执行去卷积来恢复图像。当然,要求完美的去卷积是太过苛刻的,但我们可以尝试一些东西。

其中之一是 Wiener filter,在Matlab中,例如,该函数名为deconvwnr。我注意到模糊方向是垂直方向,因此我们可以使用长度为10的垂直核进行去卷积,并且还假定输入不是无噪声的(5%的假设)--我只是试图给一个非常肤浅的观点,在Matlab中,通过执行以下操作,您的问题至少部分得以解决:

f = imread('some_sudoku_cell.png');
g = deconvwnr(f, fspecial('motion', 10, 90), 0.05));
h = im2bw(g, graythresh(g)); % graythresh is the Otsu method

以下是您一些细胞的结果(原始图像,Otsu二值化图像,区域增长的Otsu二值化图像,形态学增强图像,形态学增强图像中使用区域增长的Otsu二值化图像,去卷积的Otsu二值化图像):

enter image description here enter image description here enter image description hereenter image description here enter image description here enter image description here
enter image description here enter image description here enter image description here enter image description here enter image description here enter image description here

通过使用半径为3的平坦圆盘执行原始+顶帽(原始)-底帽(原始),生成了增强图像。我手动选择了区域生长的种子点并手动选择了最佳阈值。

对于空单元格,您会得到奇怪的结果(去卷积的原始和otsu):

enter image description here enter image description here

但我认为你不会有麻烦来检测一个单元格是否为空(全局阈值已经解决了这个问题)。

编辑:

添加了我用一种不同的方法得到的最佳结果:区域增长。我也尝试了其他一些方法,但这是第二好的。


我在谷歌上搜索了OpenCV中的反卷积,并找到了一些可能对您有帮助的内容:https://github.com/Itseez/opencv/blob/master/samples/python2/deconvolution.py和https://www.ibm.com/developerworks/mydeveloperworks/blogs/theTechTrek/entry/experiments_with_deblurring_using_opencv1?lang=en(没有阅读,但听起来很有用)。 - mmgp
我将在我的答案中扩展代码第二行的意义。首先,我没有使用5x5内核。相反,我使用了高度为10,宽度为1的垂直线(值90表示此)。这个内核实际上非常简单:[0.05 0.1 0.1 0.1 0.1 0.1 0.1 0.1 0.1 0.05]‘。我也没有将它应用于整个图像。 - mmgp
啊,wiener2是一个低通滤波器,所以这是你得到的结果更加重要的原因。 - mmgp
哦,好的,既然你提到了,那看起来确实像是一个低通滤波器 :) - 1''
据看,Matlab有一个名叫deconvblind的函数可以执行盲解卷积。你听说过这个函数吗? - 1''
显示剩余12条评论

网页内容由stack overflow 提供, 点击上面的
可以查看英文原文,
原文链接