这个问题源于
? android:attr/editTextBackground的默认值。
<inset xmlns:android="http://schemas.android.com/apk/res/android"
    android:insetBottom="@dimen/abc_edit_text_inset_bottom_material"
    android:insetLeft="@dimen/abc_edit_text_inset_horizontal_material"
    android:insetRight="@dimen/abc_edit_text_inset_horizontal_material"
    android:insetTop="@dimen/abc_edit_text_inset_top_material">

    <selector>
        <item android:state_enabled="false">
            <nine-patch
                android:alpha="?android:attr/disabledAlpha"
                android:src="@drawable/abc_textfield_default_mtrl_alpha"
                android:tint="?attr/colorControlNormal" />
        </item>
        <item
            android:state_focused="false"
            android:state_pressed="false">
            <nine-patch
                android:src="@drawable/abc_textfield_default_mtrl_alpha"
                android:tint="?attr/colorControlNormal" />
        </item>
        <item>
            <nine-patch
                android:src="@drawable/abc_textfield_activated_mtrl_alpha"
                android:tint="?attr/colorControlActivated" />
        </item>
    </selector>

</inset>
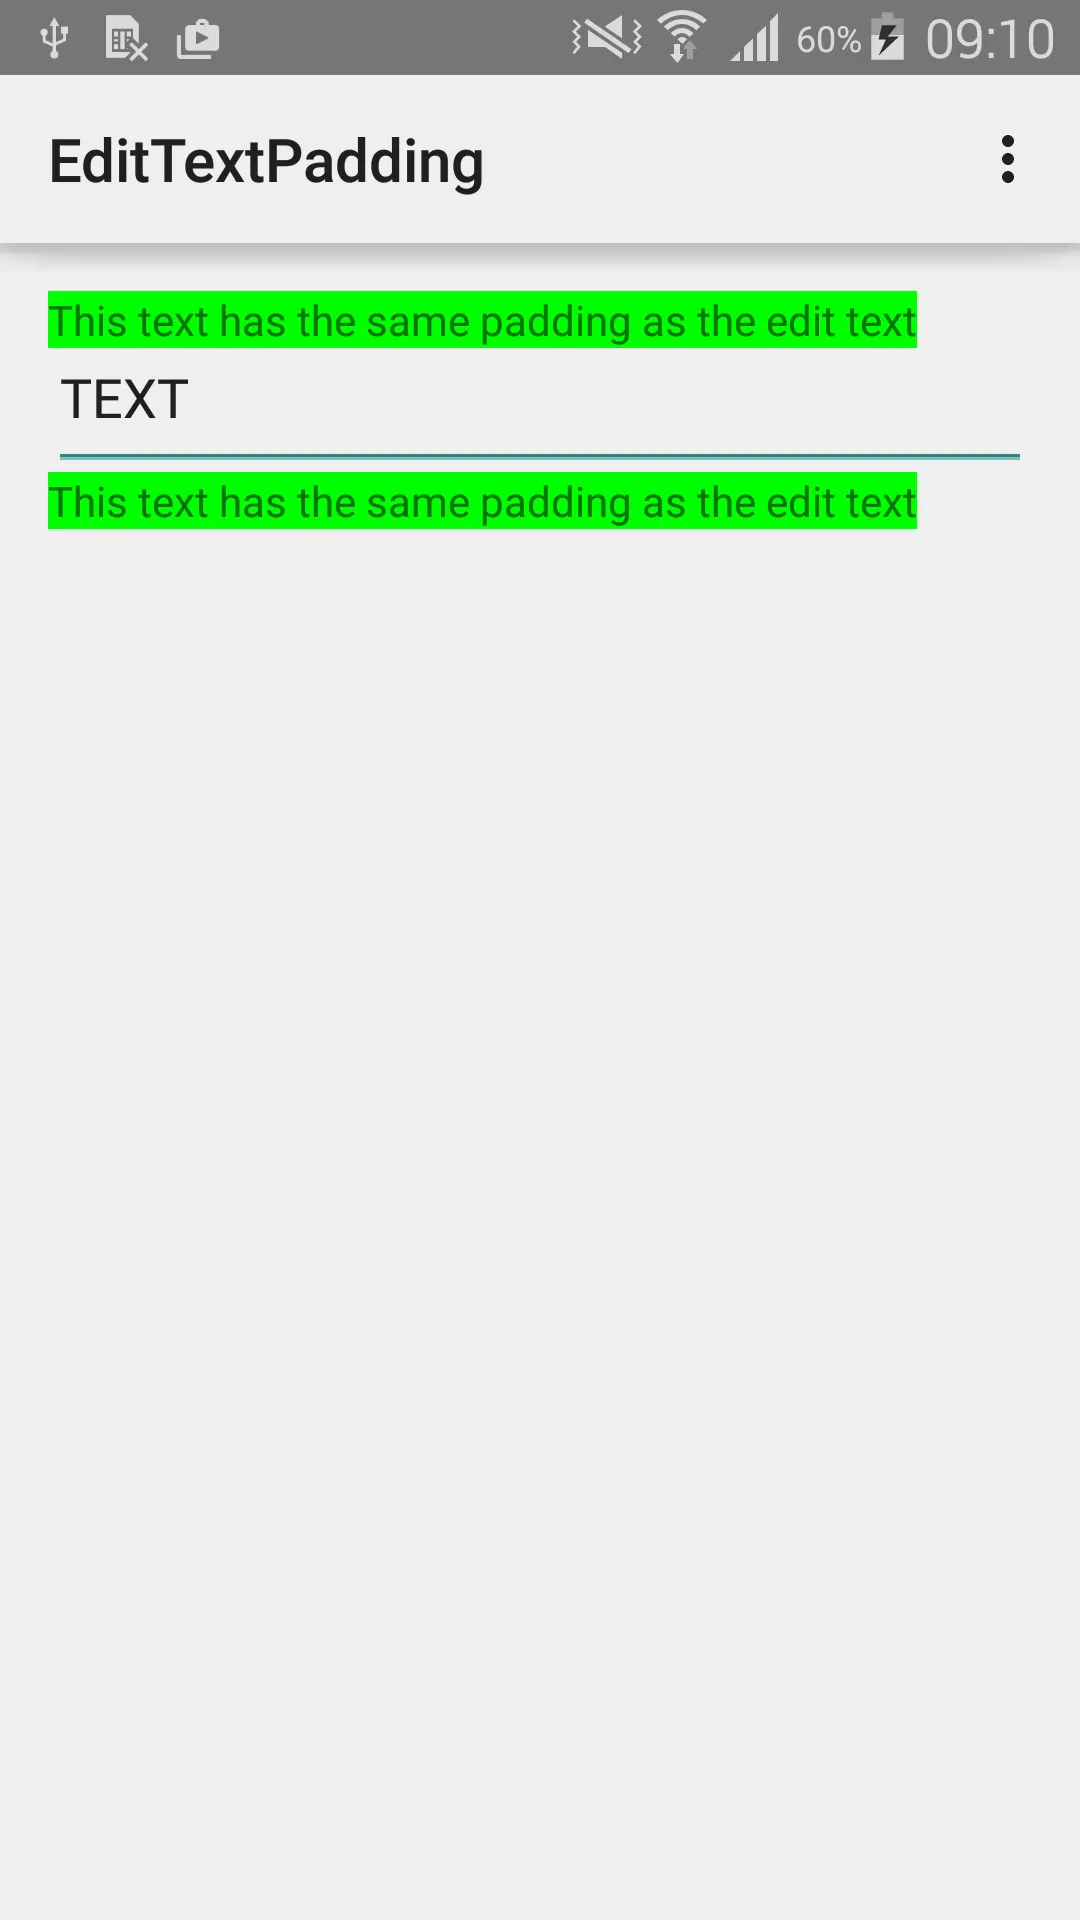
如您所见,EditText 的所有边缘的插入值为 abc_edit_text_inset_top_material = 4dp。 这使得 EditText 在其内容周围具有小的内边距。
要删除该内边距,您应创建一个新的 EditText 样式,并修改 editTextBackground 属性。例如:
<style name="Widget.App.TextField" parent="@style/Widget.AppCompat.EditText">
        <item name="colorControlActivated">#303E44</item>
        <item name="colorControlHighlight">#E5E9EC</item>
        <item name="colorControlNormal">#E5E9EC</item>
        <item name="editTextBackground">@drawable/background_new_edit_text</item>
<item name="android:editTextBackground">@drawable/background_new_edit_text</item>
    </style>
新的
background_edit_text.xml文件(记得把这个文件放到正确的drawable目录中,以免被覆盖,比如drawable-v21...)。
<?xml version="1.0" encoding="utf-8"?>
<inset xmlns:android="http://schemas.android.com/apk/res/android"
    android:inset="@dimen/spacing_0dp">
    <selector>
        <item android:state_enabled="false">
            <nine-patch
                android:alpha="?android:attr/disabledAlpha"
                android:src="@drawable/abc_textfield_default_mtrl_alpha"
                android:tint="?attr/colorControlNormal" />
        </item>
        <item
            android:state_focused="false"
            android:state_pressed="false">
            <nine-patch
                android:src="@drawable/abc_textfield_default_mtrl_alpha"
                android:tint="?attr/colorControlNormal" />
        </item>
        <item>
            <nine-patch
                android:src="@drawable/abc_textfield_activated_mtrl_alpha"
                android:tint="?attr/colorControlActivated" />
        </item>
    </selector>

</inset>
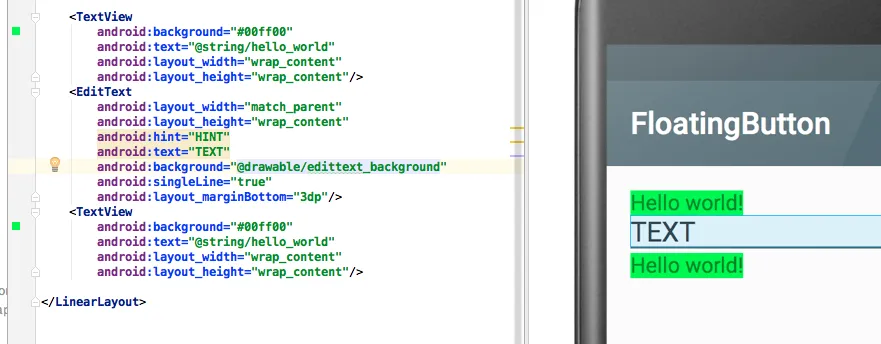
为你的EditText应用新样式:
<EditText
        android:id="@+id/edt_phone"
        android:layout_width="match_parent"
        android:layout_height="wrap_content"
        android:theme="@style/Widget.App.TextField"
        />