如何在最新的python绑定(cv2)中为彩色图像应用掩码?在以前的python绑定中,最简单的方法是使用
cv.Copy,例如:
cv.Copy(dst, src, mask)
但是这个函数在cv2绑定中不可用。有没有不使用样板代码的解决方法?
cv.Copy,例如:
cv.Copy(dst, src, mask)
但是这个函数在cv2绑定中不可用。有没有不使用样板代码的解决方法?
如果您已经有掩模图像,可以使用 cv2.bitwise_and 函数。
要检查下面的代码:
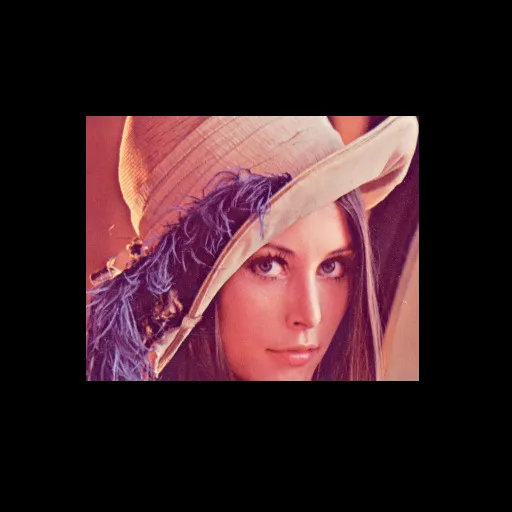
img = cv2.imread('lena.jpg')
mask = cv2.imread('mask.png',0)
res = cv2.bitwise_and(img,img,mask = mask)
对于 lena 图像和矩形掩模,输出结果如下所示。
如果您想要背景颜色不是纯黑色,那么这里有一个解决方案。我们只需要反转遮罩并将其应用于与之大小相同的一张背景图片上,然后将背景和前景组合在一起即可。这种解决方案的优点是背景可以是任何东西(甚至是其他图像)。
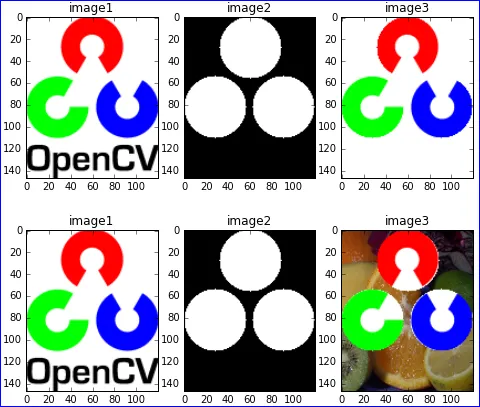
此示例修改自霍夫圆变换。第一张图片是OpenCV标志,第二张是原始遮罩,第三张是背景+前景组合。
# http://opencv-python-tutroals.readthedocs.io/en/latest/py_tutorials/py_imgproc/py_houghcircles/py_houghcircles.html
import cv2
import numpy as np

# load the image
img = cv2.imread('E:\\FOTOS\\opencv\\opencv_logo.png')
img = cv2.cvtColor(img, cv2.COLOR_BGR2RGB)

# detect circles
gray = cv2.medianBlur(cv2.cvtColor(img, cv2.COLOR_RGB2GRAY), 5)
circles = cv2.HoughCircles(gray, cv2.HOUGH_GRADIENT, 1, 20, param1=50, param2=50, minRadius=0, maxRadius=0)
circles = np.uint16(np.around(circles))

# draw mask
mask = np.full((img.shape[0], img.shape[1]), 0, dtype=np.uint8)  # mask is only
for i in circles[0, :]:
    cv2.circle(mask, (i[0], i[1]), i[2], (255, 255, 255), -1)

# get first masked value (foreground)
fg = cv2.bitwise_or(img, img, mask=mask)

# get second masked value (background) mask must be inverted
mask = cv2.bitwise_not(mask)
background = np.full(img.shape, 255, dtype=np.uint8)
bk = cv2.bitwise_or(background, background, mask=mask)

# combine foreground+background
final = cv2.bitwise_or(fg, bk)
注意:最好使用OpenCV的方法,因为它们是经过优化的。
import cv2 as cv
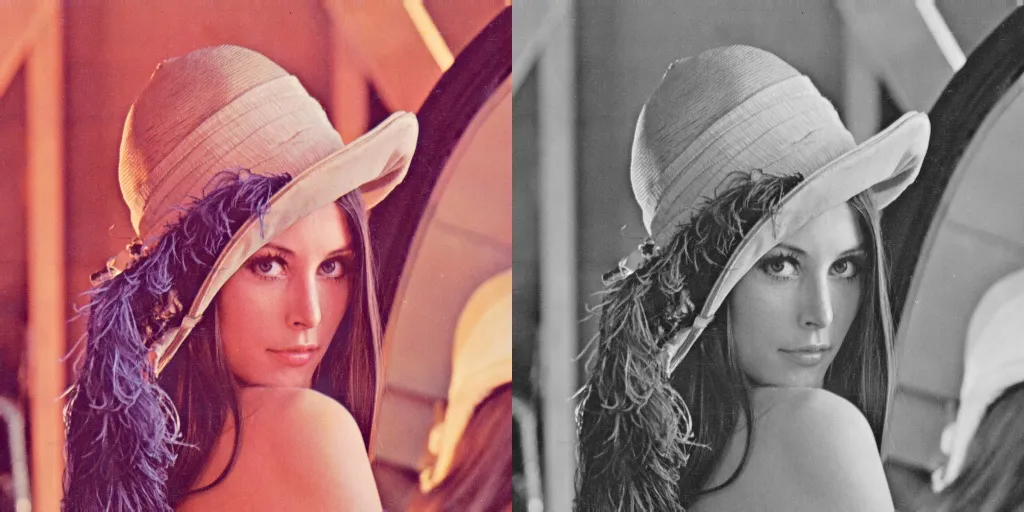
im_color = cv.imread("lena.png", cv.IMREAD_COLOR)
im_gray = cv.cvtColor(im_color, cv.COLOR_BGR2GRAY)
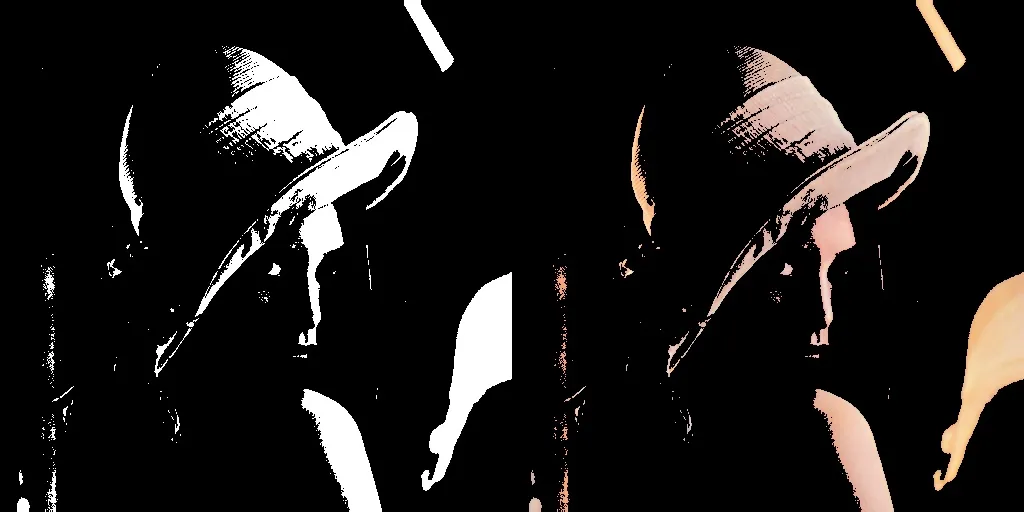
让我们进行二进制阈值操作。它创建一个黑白掩膜图像。黑色区域的值为0,白色区域的值为255
_, mask = cv.threshold(im_gray, thresh=180, maxval=255, type=cv.THRESH_BINARY)
im_thresh_gray = cv.bitwise_and(im_gray, mask)
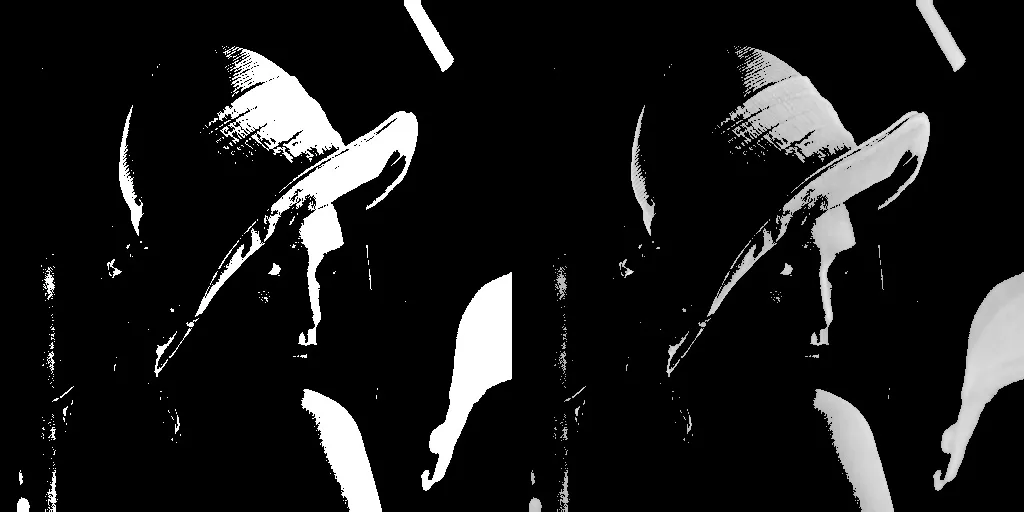
mask3 = cv.cvtColor(mask, cv.COLOR_GRAY2BGR) # 3 channel mask
然后,我们可以使用相同的bitwise_and函数将这个三通道掩码应用到我们的彩色图像上。
im_thresh_color = cv.bitwise_and(im_color, mask3)
mask3 是代码中左侧的图像,im_thresh_color 是其右侧的图像。
您可以绘制结果并自行查看。
cv.imshow("original image", im_color)
cv.imshow("binary mask", mask)
cv.imshow("3 channel mask", mask3)
cv.imshow("im_thresh_gray", im_thresh_gray)
cv.imshow("im_thresh_color", im_thresh_color)
cv.waitKey(0)
我在这里找到的原始图像是lenacolor.png。
Abid Rahman K提供的答案并不完全正确。我也尝试过,发现很有帮助,但仍然遇到了一些困难。
以下是如何使用给定遮罩复制图像的方法。
x, y = np.where(mask!=0)
pts = zip(x, y)
# Assuming dst and src are of same sizes
for pt in pts:
   dst[pt] = src[pt]
idx = (mask!=0)
dst[idx] = src[idx]
其他方法都假设二进制掩码。如果你想使用真实值的单通道灰度图像作为掩码(例如来自 alpha 通道),你可以将其扩展到三个通道,然后用于插值:
assert len(mask.shape) == 2 and issubclass(mask.dtype.type, np.floating)
assert len(foreground_rgb.shape) == 3
assert len(background_rgb.shape) == 3

alpha3 = np.stack([mask]*3, axis=2)
blended = alpha3 * foreground_rgb + (1. - alpha3) * background_rgb
mask 在范围 0..1 内。同时,假定 1.0 表示仅保留前景,而 0.0 表示仅保留背景。(h, w, 1),那么这会有所帮助:alpha3 = np.squeeze(np.stack([np.atleast_3d(mask)]*3, axis=2))
在这里,np.atleast_3d(mask)将掩膜变成(h, w, 1)格式,如果它原先是(h, w)格式。而np.squeeze(...)则将结果从(h, w, 3, 1)改变为(h, w, 3)格式。