如何创建圆形列表,以便在Android Wear 2.0中使用?
类似于这样:
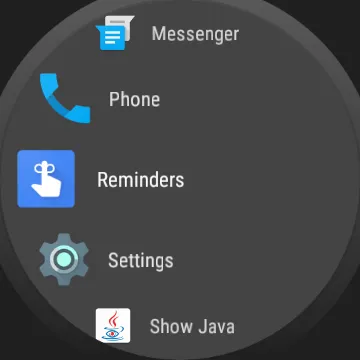
如何创建圆形列表,以便在Android Wear 2.0中使用?
类似于这样:
首先,您需要将ListView替换为WearableRecyclerView。它可以像普通的ListView一样使用。但是要确保从android.support.wear.widget中导入正确的一个。不要使用android.support.wearable.view中的一个。这个应该被划掉了,所以检查是否使用了正确的不会花费太长时间。如果只有一个WearableRecyclerView可供选择,请确保在build.gradle(wear)文件的依赖项中添加compile 'com.android.support:wear:27.0.0'。同时,在您的activity.xml中使用<android.support.wear.widget.WearableRecyclerView/>。如果您只想要一个没有任何自定义项目缩放的圆形ListView,请在onLayoutInflated()方法中调用此方法:
your_recyclerview.setEdgeItemsCenteringEnabled(true);
your_recyclerview.setLayoutManager(new WearableLinearLayoutManager(your_activity_context));
private class CustomScrollingLayoutCallback extends WearableLinearLayoutManager.LayoutCallback {

        private static final float MAX_ICON_PROGRESS = 2F;

        @Override
        public void onLayoutFinished(View child, RecyclerView parent) {

            float centerOffset = ((float) child.getHeight() / 2.0f) / (float) parent.getHeight();
            float yRelativeToCenterOffset = (child.getY() / parent.getHeight()) + centerOffset;

            float progresstoCenter = (float) Math.sin(yRelativeToCenterOffset * Math.PI);

            float mProgressToCenter = Math.abs(0.5f - yRelativeToCenterOffset);

            mProgressToCenter = Math.min(mProgressToCenter, MAX_ICON_PROGRESS);

            child.setScaleX(1 - mProgressToCenter);
            child.setScaleY(1 - mProgressToCenter);
            child.setX(+(1 - progresstoCenter) * 100);
        }

    }
然后回到您的onLayoutInflated()方法,并输入以下内容:
    CustomScrollingLayoutCallback customScrollingLayoutCallback = new CustomScrollingLayoutCallback();
    your_recycler_view.setLayoutManager(new WearableLinearLayoutManager(your_context, customScrollingLayoutCallback));
    your_recycler_view.setCircularScrollingGestureEnabled(true);
WearableRecyclerView 实现。您可能想阅读更多关于 Android Wear 2.0 预览版3 的信息。Wear 2.0引入了
WearableRecyclerView类,用于显示和操作垂直列表项,针对圆形显示器进行了优化。WearableRecyclerView扩展了现有的RecyclerView类,提供了弧形布局和可穿戴应用中的循环滚动手势。