RGB图像的像素强度及如何用整数乘以它来显示灰度阴影

4
我有一张RGB图像,其包含4种不同的颜色,黑色(0,0,0)作为背景,绿色(106,136,93),蓝色(64,224,208)和棕色(168,124,85)。当我将图像读取为灰度图像并使用np.unique()时,它会返回一个巨大的像素强度列表。但实际上,只有4种强度,即[0,1,2,3]分别对应于黑色、绿色、蓝色和棕色。
import cv2
import numpy as np

test = cv2.imread("test-BlackBG.png",0) #test image 

results = np.unique(test)     #returns [0,1,2,3,4,5,6,7,8...........132]
print(test.shape)             #returns (480, 640)
print(results)
cv2.imshow("image",test)
cv2.waitKey()
cv2.destroyAllWindows()

期望结果:当我将图像乘以85时,应该在不同的灰度阴影中显示所有3种强度。

1
你最终想要实现灰度图像吗?如果是的话,请尝试使用 gray_image = cv2.cvtColor(image, cv2.COLOR_BGR2GRAY) - Charles Parr
如果您在问题中包含的图像是起始图像,那么您应该知道它有790种独特的颜色... - Mark Setchell
也许你可以另外提一个问题,关于你是如何创建这张图片的……它在生命周期中是否曾经被保存为JPEG格式?为什么它有一个未使用的Alpha通道? - Mark Setchell
这似乎非常不可能。你用 np.unique() 计算了灰度值的数量吗? - Mark Setchell
3个回答

1

你的问题和假设存在一些问题。


使用np.unique(image)无法计算颜色数量

使用np.unique(im)无法计算图像中的颜色数量。让我们通过创建仅包含4个强度值(0、1、2和3)的随机图像来了解原因。

import numpy as np
import cv2

# Ensure repeatable, deterministic randomness!
np.random.seed(42)

# Make a random image
im = np.random.randint(0,4,(480,640,3), dtype=np.uint8)

这看起来像是每行都是一个像素的RGB三元组:

array([[[2, 2, 3],
    [3, 2, 1],
    [2, 2, 0],
    ...,
    [3, 3, 2],
    [0, 0, 1],
    [1, 1, 1]],
    ...,
    [3, 3, 1],
    [2, 3, 0],
    [0, 1, 3]]], dtype=uint8)

现在,如果您尝试像这样获取唯一的颜色,它将不起作用,因为每种颜色都是三种强度的组合
np.unique(im)    # prints: array([0, 1, 2, 3], dtype=uint8)

如果你想要得到独特颜色的数量,你需要查找三个RGB/BGR值的独特组合数量:

np.unique(im.reshape(-1, im.shape[2]), axis=0)

该函数会返回图像中所有唯一RGB/BGR三元组的向量 - 每行代表一种唯一的颜色组合:

array([[0, 0, 0],
       [0, 0, 1],
       [0, 0, 2],
       [0, 0, 3],
       [0, 1, 0],
       [0, 1, 1],
       [0, 1, 2],
       [0, 1, 3],
       [0, 2, 0],
       [0, 2, 1],
       [0, 2, 2],
       [0, 2, 3],
       [0, 3, 0],
       [0, 3, 1],
       [0, 3, 2],
       [0, 3, 3],
       [1, 0, 0],
       [1, 0, 1],
       [1, 0, 2],
       [1, 0, 3],
       [1, 1, 0],
       [1, 1, 1],
       [1, 1, 2],
       [1, 1, 3],
       [1, 2, 0],
       [1, 2, 1],
       [1, 2, 2],
       [1, 2, 3],
       [1, 3, 0],
       [1, 3, 1],
       [1, 3, 2],
       [1, 3, 3],
       [2, 0, 0],
       [2, 0, 1],
       [2, 0, 2],
       [2, 0, 3],
       [2, 1, 0],
       [2, 1, 1],
       [2, 1, 2],
       [2, 1, 3],
       [2, 2, 0],
       [2, 2, 1],
       [2, 2, 2],
       [2, 2, 3],
       [2, 3, 0],
       [2, 3, 1],
       [2, 3, 2],
       [2, 3, 3],
       [3, 0, 0],
       [3, 0, 1],
       [3, 0, 2],
       [3, 0, 3],
       [3, 1, 0],
       [3, 1, 1],
       [3, 1, 2],
       [3, 1, 3],
       [3, 2, 0],
       [3, 2, 1],
       [3, 2, 2],
       [3, 2, 3],
       [3, 3, 0],
       [3, 3, 1],
       [3, 3, 2],
       [3, 3, 3]], dtype=uint8)

或者,作为独特颜色的简单数量:

len(np.unique(im.reshape(-1, im.shape[2]), axis=0))    # prints 64

所以,针对您的图片:

# Open image
im = cv2.imread('image.png',cv2.IMREAD_UNCHANGED)

# Count unique colours
len(np.unique(im.reshape(-1, im.shape[2]), axis=0)    # prints 790

颜色比你想象的多

为什么我的颜色比想象中多?最常见的两个原因是:

  • 图像被保存为JPEG格式
  • 存在文本或绘制的形状进行了反锯齿处理

让我们看看如何将保存为JPEG格式会导致问题!

# Load image and count colours
im = cv2.imread('image.png',cv2.IMREAD_UNCHANGED)
len(np.unique(im.reshape(-1, im.shape[2]), axis=0))    # prints 790

# Save as JPEG
cv2.imwrite('temp.jpg',im)

# Reload and recount just the same
im = cv2.imread('temp.jpg',cv2.IMREAD_UNCHANGED)
len(np.unique(im.reshape(-1, im.shape[2]), axis=0))    # prints 4666 !!!

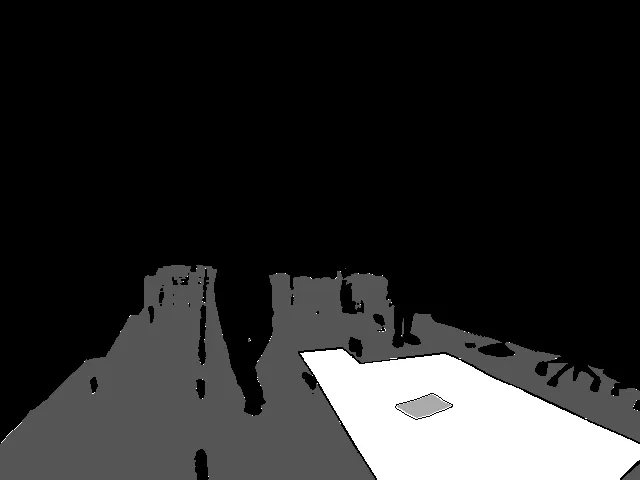
如何将图像进行调色板处理 - (减少颜色到固定的调色板)?

如果您想将图像调色板化为自己特定的调色板,首先需要按BGR顺序指定您的调色板(),以匹配OpenCV的排序:

palette = np.array([
   [0,0,0],                # Black
   [93,136,106],           # Green
   [208,224,64],           # Blue
   [85,124,168]],          # Brown
   dtype=np.uint8)

然后读取您的图像,丢弃完全没有意义的alpha通道:

test = cv2.imread("image.png",cv2.IMREAD_COLOR)

然后计算每个像素到每个调色板条目的距离:

distance = np.linalg.norm(test[:,:,None] - palette[None,None,:], axis=3)

然后选择调色板中最接近每个像素的颜色:

palettised = np.argmin(distance, axis=2).astype(np.uint8)

你的图像现在存储在数组palettised中,每个像素位置存储的是调色板中最接近颜色的索引。因此,如果你的调色板有4个条目(0..3),那么你的图像所有元素都是0、1、2或3。
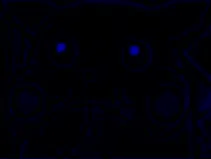
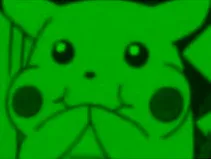
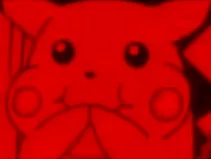
所以,现在你可以使用以下方法乘以85:
result = palettised * 85

enter image description here


你给我了结果,但我对此有不同的方法。我使用了cv2.inrange()函数将绿色替换为rgb(1,1,1),棕色替换为rgb(2,2,2),蓝色替换为rgb(3,3,3)。这给了我一张黑色的图像,当我将其乘以85时,得到了与你输出类似的图像。我喜欢你的解决方案,也会尝试它。 - BOT-Singh

0

我不是完全确定你在这里想要什么,但是要确定图像的 RGB 像素强度,可以将每个 RGB 通道隔离,同时将其他通道设置为 0。

原始图像

enter image description here

import cv2

image = cv2.imread('pikachu_smile.png')

blue = image.copy()
# Set green and red channels to 0
blue[:, :, 1] = 0
blue[:, :, 2] = 0

green = image.copy() 
# Set blue and red channels to 0
green[:, :, 0] = 0
green[:, :, 2] = 0

red = image.copy()
# Set blue and green channels to 0
red[:, :, 0] = 0
red[:, :, 1] = 0

cv2.imshow('blue', blue)
cv2.imshow('green', green)
cv2.imshow('red', red)

cv2.waitKey(0)

分离的蓝色(左)、绿色(中)和红色(右)通道

enter image description here enter image description here enter image description here

要增加特定通道的强度,您可以向整个通道添加固定值。例如,使用绿色通道

green[:, :, 1] += 40

enter image description here


0

我认为边缘部分可能会影响它的效果。尝试编写一个函数,将构成形状边缘的像素设置为该形状的确切颜色。


网页内容由stack overflow 提供, 点击上面的
可以查看英文原文,
原文链接