GLSL 顶点着色器 双线性采样 高度图

7
我正在创建一个地形,使用geomip映射技术。目前已经基本实现了。在相机附近的地形细分程度很高,远离相机时逐渐减少。地形的几何图形基本上遵循相机并根据顶点位置采样高度图纹理。由于地形几何图形的细分程度非常高,当采样时有时会看到纹理中的每个像素。这会产生明显的像素颗粒。我想通过平滑高度图采样来解决这个问题。但是,我似乎遇到了一些与双线性采样代码相关的奇怪问题。我通过将每个顶点位移根据高度图纹理进行渲染。要获得给定UV坐标处顶点的高度,可以使用以下公式:
vec2 worldToMapSpace( vec2 worldPosition ) {
   return ( worldPosition / worldScale + 0.5 );
}

float getHeight( vec3 worldPosition )
{
        #ifdef USE_HEIGHTFIELD
        vec2 heightUv = worldToMapSpace(worldPosition.xz);
        vec2 tHeightSize = vec2( HEIGHTFIELD_SIZE_WIDTH, HEIGHTFIELD_SIZE_HEIGHT ); //both 512
        vec2 texel = vec2( 1.0 / tHeightSize );
        //float coarseHeight = texture2DBilinear( heightfield, heightUv,  texel, tHeightSize ).r;
        float coarseHeight = texture2D( heightfield, vUv ).r;
        return altitude * coarseHeight + heightOffset;
    #else
        return 0.0;
    #endif
}

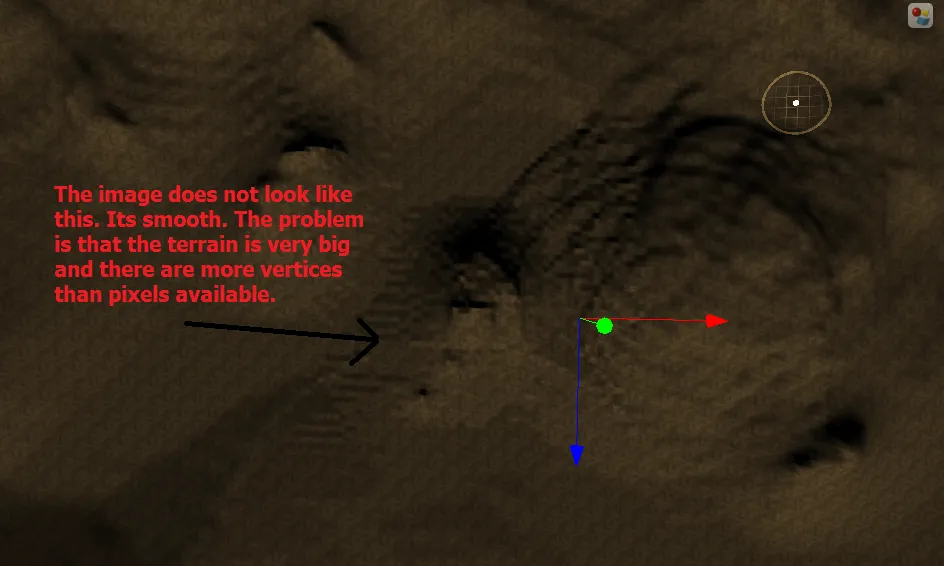
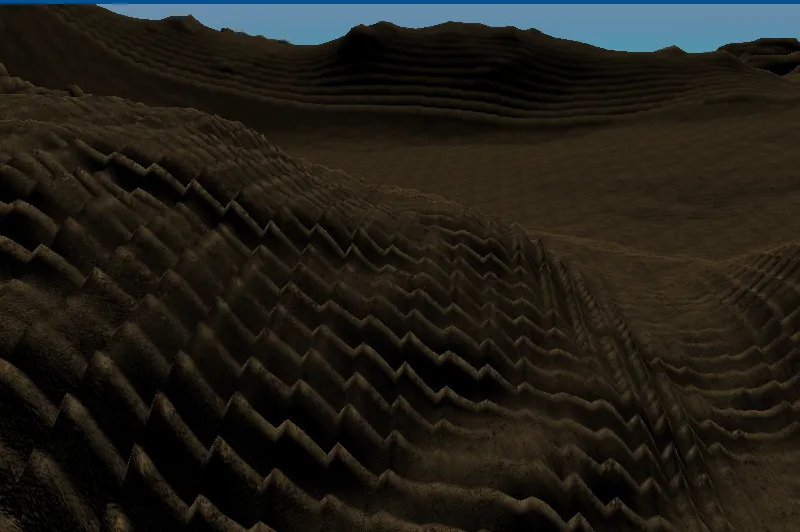
这将产生以下结果(请注意您可以看到每个像素):

enter image description here

这是一个线框图:

enter image description here

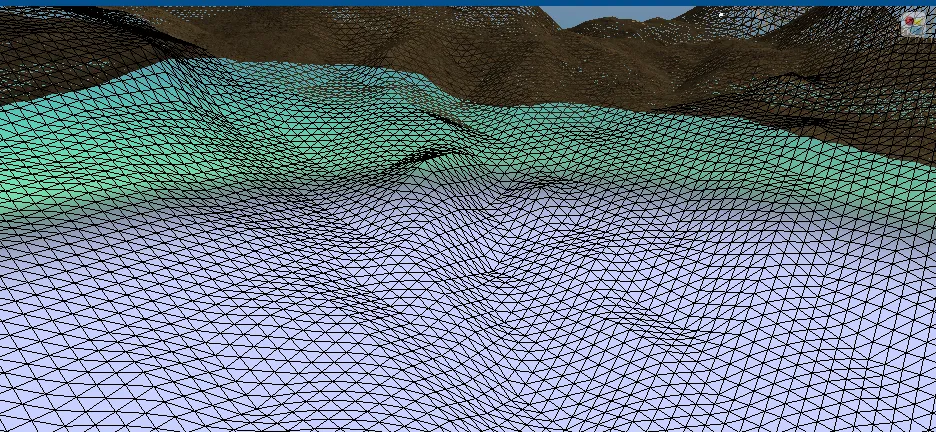
我希望使地形采样更加平滑。因此,我想使用一些双线性采样代替标准的texture2D函数。因此,这是我的双线性采样函数:

vec4 texture2DBilinear( sampler2D textureSampler, vec2 uv, vec2 texelSize, vec2 textureSize )
{
    vec4 tl = texture2D(textureSampler, uv);
    vec4 tr = texture2D(textureSampler, uv + vec2( texelSize.x, 0.0 ));
    vec4 bl = texture2D(textureSampler, uv + vec2( 0.0, texelSize.y ));
    vec4 br = texture2D(textureSampler, uv + vec2( texelSize.x, texelSize.y ));
    vec2 f = fract( uv.xy * textureSize ); // get the decimal part
    vec4 tA = mix( tl, tr, f.x );
    vec4 tB = mix( bl, br, f.x );
    return mix( tA, tB, f.y ); 
}

texelSize是根据高度图大小计算的,公式为1 / 高度图大小:

vec2 texel = vec2( 1.0 / tHeightSize );

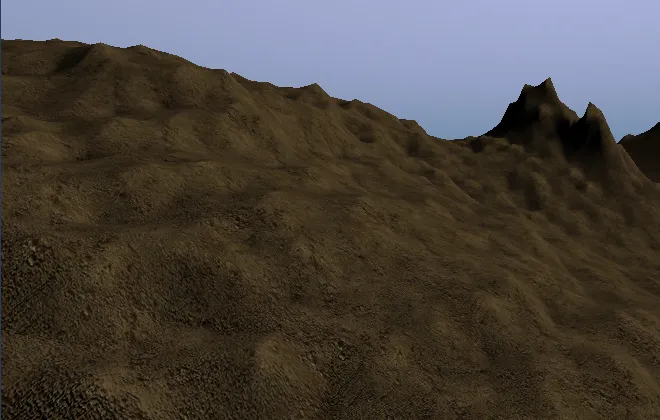
textureSize是高度图的宽度和高度。然而,当我使用这个函数时,我得到了这个结果:

float coarseHeight = texture2DBilinear( heightfield, heightUv,  texel, tHeightSize ).r;

在此输入图片描述

现在看起来更糟糕了 :( 有什么想法我可能做错了吗?或者如何获得更平滑的地形采样?

编辑

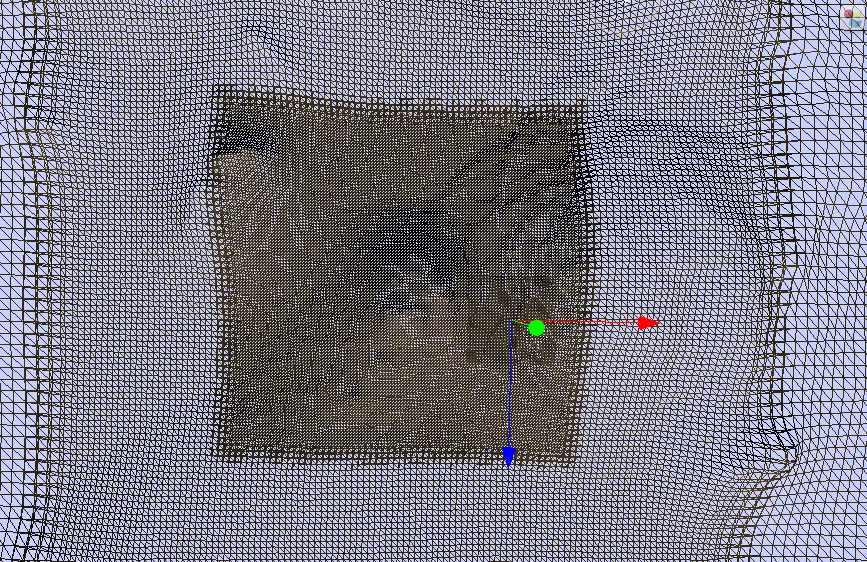
这是一个垂直的截图,从上往下看地形。您可以看到层的效果很好。请注意,外层的三角剖分较少,看起来更加平滑,而具有更高细分的层则显示每个像素。我正在尝试找到一种方法来平滑纹理采样。

在此输入图片描述 在此输入图片描述


你为什么要首先使用自定义双线性插值?如果每个顶点在高度图中只有一个像素,那么你应该在纹理上使用高斯模糊来使其“平滑”。如果你的顶点比像素多,内置的纹理插值就可以完成工作。 - dari
你为什么不使用内置的插值呢?https://www.opengl.org/wiki/Sampler_Object#Sampling_parameters - dari
是的,它们已经设置为线性了。我读到你必须在顶点着色器上创建自己的双线性采样:http://www.gamerendering.com/2008/10/05/bilinear-interpolation/ “请注意,在顶点着色器中,您必须在纹理采样之间进行手动双线性插值。” - Mat
首先,你提供的链接说明该代码与内置的插值是完全相同的。因此,我仍然看不出使用它的意义。在线框图中,可以看出插值效果良好。问题在于你将多个线性批次放在一起。尽管边界处的高度值相同,但导数/梯度不同。要获得“平滑”的外表,您需要使用双三次插值或贝塞尔曲面。 - dari
本文描述了同样的问题。http://www.catalinzima.com/xna/tutorials/4-uses-of-vtf/terrain-rendering-using-heightmaps/“如果我们有双线性过滤,GPU将自动计算周围4个像素的平均值,结果将是平滑的,而不是像现在这样步进式的。但由于顶点纹理不支持双线性过滤,我们必须在顶点着色器中手动完成它。” - Mat
显示剩余3条评论
1个回答

5

我找到并实现了一种使用catmulrom插值的技术。代码如下。

// catmull works by specifying 4 control points p0, p1, p2, p3 and a weight. The function is used to calculate a point n between p1 and p2 based
// on the weight. The weight is normalized, so if it's a value of 0 then the return value will be p1 and if its 1 it will return p2. 
float catmullRom( float p0, float p1, float p2, float p3, float weight ) {
    float weight2 = weight * weight;
    return 0.5 * (
        p0 * weight * ( ( 2.0 - weight ) * weight - 1.0 ) +
        p1 * ( weight2 * ( 3.0 * weight - 5.0 ) + 2.0 ) +
        p2 * weight * ( ( 4.0 - 3.0 * weight ) * weight + 1.0 ) +
        p3 * ( weight - 1.0 ) * weight2 );
}

// Performs a horizontal catmulrom operation at a given V value.
float textureCubicU( sampler2D samp, vec2 uv00, float texel, float offsetV, float frac ) {
    return catmullRom(
        texture2DLod( samp, uv00 + vec2( -texel, offsetV ), 0.0 ).r,
        texture2DLod( samp, uv00 + vec2( 0.0, offsetV ), 0.0 ).r,
        texture2DLod( samp, uv00 + vec2( texel, offsetV ), 0.0 ).r,
        texture2DLod( samp, uv00 + vec2( texel * 2.0, offsetV ), 0.0 ).r,
    frac );
}

// Samples a texture using a bicubic sampling algorithm. This essentially queries neighbouring
// pixels to get an average value.
float textureBicubic( sampler2D samp, vec2 uv00, vec2 texel, vec2 frac ) {
    return catmullRom(
        textureCubicU( samp, uv00, texel.x, -texel.y, frac.x ),
        textureCubicU( samp, uv00, texel.x, 0.0, frac.x ),
        textureCubicU( samp, uv00, texel.x, texel.y, frac.x ),
        textureCubicU( samp, uv00, texel.x, texel.y * 2.0, frac.x ),
    frac.y );
}

    // Gets the  UV coordinates based on the world X Z position
    vec2 worldToMapSpace( vec2 worldPosition ) {
        return ( worldPosition / worldScale + 0.5 );
    }


// Gets the height at a location p (world space)
float getHeight( vec3 worldPosition )
{
    #ifdef USE_HEIGHTFIELD

        vec2 heightUv = worldToMapSpace(worldPosition.xz);
        vec2 tHeightSize = vec2( HEIGHTFIELD_WIDTH, HEIGHTFIELD_HEIGHT );

        // If we increase the smoothness factor, the terrain becomes a lot smoother.
        // This is because it has the effect of shrinking the texture size and increaing
        // the texel size. Which means when we do sampling the samples are from farther away - making
        // it smoother. However this means the terrain looks less like the original heightmap and so
        // terrain picking goes a bit off. 
        float smoothness = 1.1;
        tHeightSize /= smoothness;

        // The size of each texel
        vec2 texel = vec2( 1.0 / tHeightSize );

        // Find the top-left texel we need to sample.
        vec2 heightUv00 = ( floor( heightUv * tHeightSize ) ) / tHeightSize;

        // Determine the fraction across the 4-texel quad we need to compute.
        vec2 frac = vec2( heightUv - heightUv00 ) * tHeightSize;

        float coarseHeight = textureBicubic( heightfield, heightUv00, texel, frac );
        return altitude * coarseHeight + heightOffset;
    #else
        return 0.0;
    #endif
}

很有用!谢谢。你能分享一下结果(图片)吗? - Nolesh

网页内容由stack overflow 提供, 点击上面的
可以查看英文原文,
原文链接