我想编写一些着色器(表面/片段/...),以将我的漫反射纹理重新着色为一些新颜色。目前,我有这个版本的着色器(我正在尝试实时重新着色纹理):
//sm_surf

uniform vec4 colorTarget; (used in full version)
uniform vec4 colorTint; (used in full version)

vec4 colorTexture = texture2D(u_diffuseTexture, _surface.diffuseTexcoord);
//vec4 colorTexture = _sample.diffuse;//the same result

vec4 tinted = colorTexture;
tinted.r = max(0.0, colorTexture.r - 0.2);
_surface.diffuse = tinted;
这是OpenCV中的代码(我先对纹理进行了重新上色,然后将其用作新的漫反射纹理):
image = cv::imread([path UTF8String], cv::IMREAD_UNCHANGED);
for (int i = 0; i < image.rows; i++) {
    for (int j = 0; j < image.cols; j++) {
        cv::Vec4b pixel = image.at<cv::Vec4b>(i,j);
        pixel[2] = fmin(255, fmax(0, pixel[2] - 50));
        image.at<cv::Vec4b>(i,j) = pixel;
    }
}

cv::imwrite([newPath UTF8String], image);
这个测试只是想减少颜色的R分量。
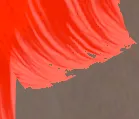
OpenCV(正确)
SceneKit(不正确)
扩散纹理包含 alpha 通道。
(由 mnuages 解决) 同时,似乎在重新着色后 alpha 通道被破坏了。使用此着色器:
tinted.r = 1;
tinted.g = 0;
tinted.b = 0;
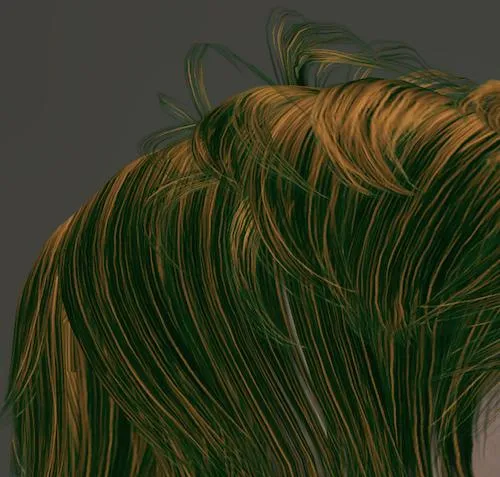
我的结果是:
 而不是:
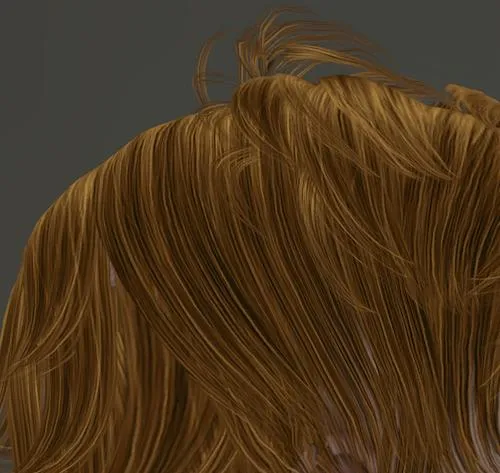
而不是: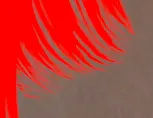 原始纹理:
原始纹理: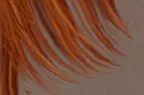 我该如何像在OpenCV中一样重新着色漫反射纹理?
更新: 这是使用SceneKit着色器和OpenCV处理后的结果(我已经从图像中删除了所有透明像素):
OpenCV:
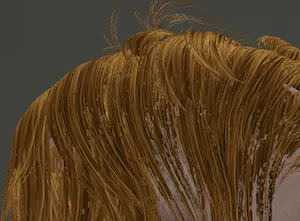
SceneKit:
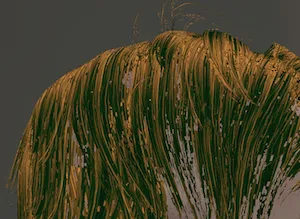
着色器:
vec4 colorTexture = _surface.diffuse;
vec3 tinted = colorTexture.a > 0.0 ? colorTexture.rgb / colorTexture.a : colorTexture.rgb;
if (colorTexture.a == 1) {
    tinted.r = max(0.0, colorTexture.r - 0.2);
} else {
    colorTexture.a = 0;
}
_surface.diffuse = vec4(tinted, 1.0) * colorTexture.a;
和OpenCV代码:
pixel[2] = fmax(0, pixel[2] - 50);//2 because it's bgr in OpenCV
if (pixel[3] != 255) {
    pixel[3] = 0;
}
一些更奇怪的事情: 我已经将我的OpenCV代码更改为以下内容以生成新的纹理
pixel[0] = 255 - (j % 4) * 30;//b
pixel[1] = 0;//g
pixel[2] = 0;//r
pixel[3] = 255;
如果我像这样改变纹理:
if (pixel[0] == 255) {
    pixel[0] = 255;pixel[1] = 255;pixel[2] = 255;
} else {
    pixel[0] = 0;pixel[1] = 0;pixel[2] = 0;
}
我收到类似这样的内容:
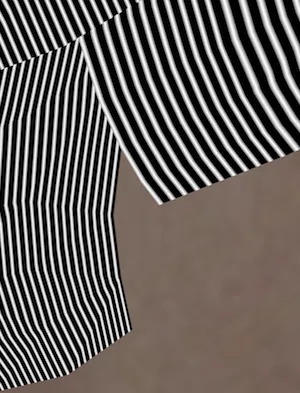
vec4 colorTexture = _surface.diffuse;
vec3 tinted = colorTexture.rgb; // colorTexture.a == 1
if (tinted.b > 0.99) {
    tinted = vec3(0,0,0);
} else {
    tinted = vec3(1,1,1);
}
_surface.diffuse = vec4(tinted, 1.0) * colorTexture.a;
但是我收到了这个:
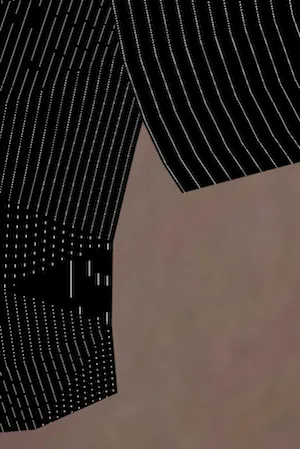
有一些白色条纹,但太细了。
我可以通过将条件更改为tinted.b > 0.85来增加它们,但这已经是一个错误,因为_surface.diffuse中的颜色与纹理中的颜色不同。似乎SceneKit在插值纹理或类似于此的东西。
更新2:
我已经添加了源代码(1.5Mb),其中包含此问题。有3个球体:
1 顶部) 带有原始纹理
2 左侧) 使用着色器重新着色的纹理(newR = r - 0.2)(float)
3 右侧) 使用OpenCV重新着色的纹理(newR = r - 51)(uint8)
它们是不同的!场景中没有任何光线/环境等,只有3个球体。
max(0.0, tinted.r - 0.2);而不是max(0.0, colorTexture.r - 0.2);。 - mnuages