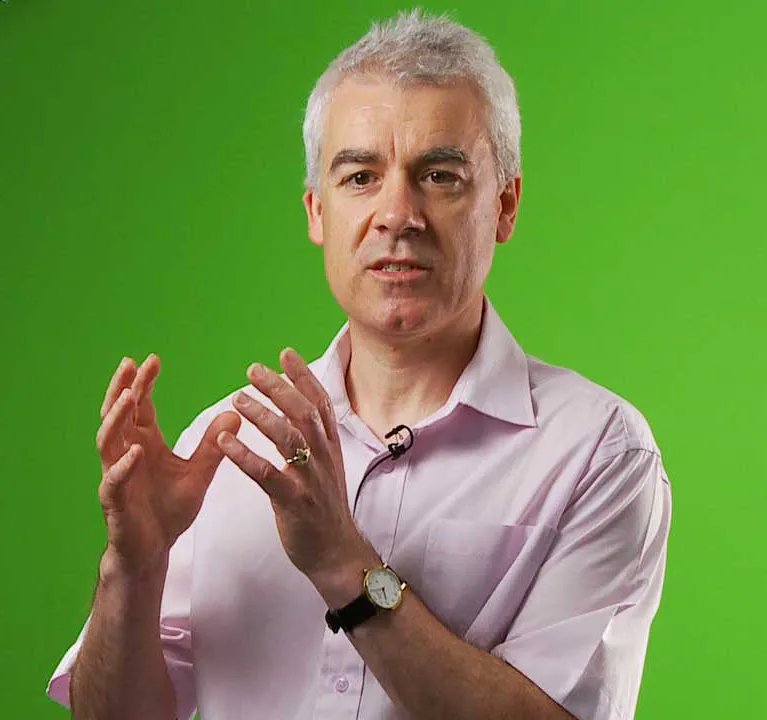
由于您没有提供任何图像,因此我从网络上选择了一张带有不同绿色阴影和显着的噪声(因为JPEG压缩)的图像进行抠图。
由于没有技术规格说明,所以我使用了Java和Marvin Framework。
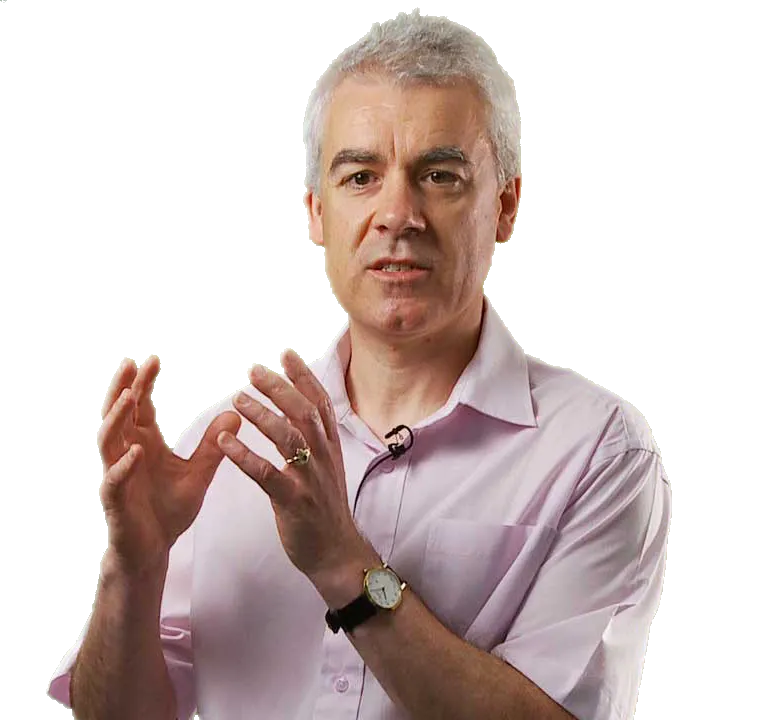
输入图像:
步骤1简单地将绿色像素转换为透明。基本上它使用了HSV颜色空间中的一个过滤规则。
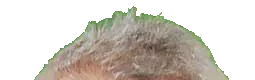
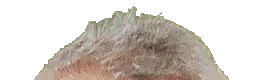
正如您提到的,头发和一些边界像素呈现混合绿色的颜色。为了减少这个问题,第二步中过滤这些像素并平衡以减少其绿色比例。
之前:
之后:
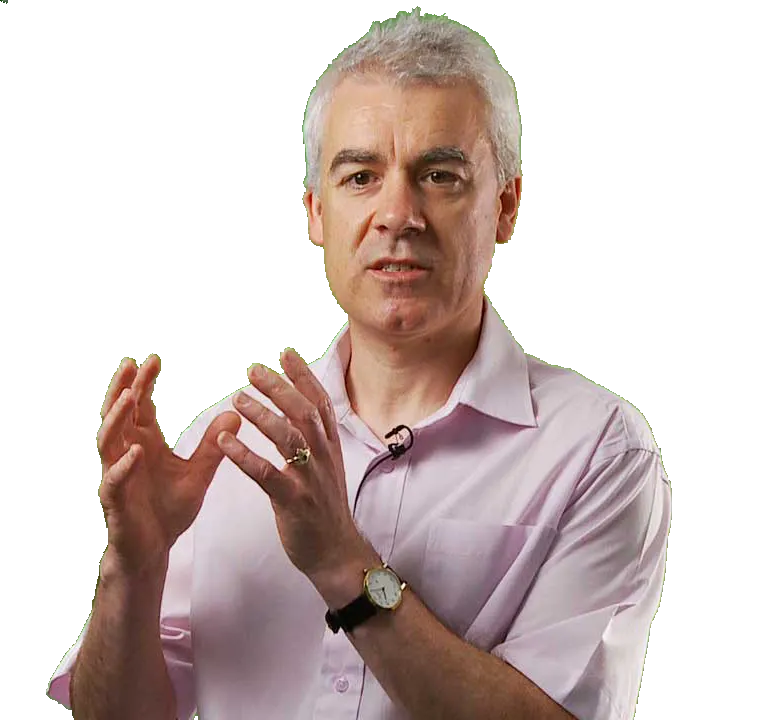
最后,在第三步中,对所有边界像素应用渐变透明度。高质量图像将得到更好的结果。
最终输出:
源代码:
import static marvin.MarvinPluginCollection.*;
public class ChromaToTransparency {
public ChromaToTransparency(){
MarvinImage image = MarvinImageIO.loadImage("./res/person_chroma.jpg");
MarvinImage imageOut = new MarvinImage(image.getWidth(), image.getHeight());
greenToTransparency(image, imageOut);
MarvinImageIO.saveImage(imageOut, "./res/person_chroma_out1.png");
reduceGreen(imageOut);
MarvinImageIO.saveImage(imageOut, "./res/person_chroma_out2.png");
alphaBoundary(imageOut, 6);
MarvinImageIO.saveImage(imageOut, "./res/person_chroma_out3.png");
}
private void greenToTransparency(MarvinImage imageIn, MarvinImage imageOut){
for(int y=0; y<imageIn.getHeight(); y++){
for(int x=0; x<imageIn.getWidth(); x++){
int color = imageIn.getIntColor(x, y);
int r = imageIn.getIntComponent0(x, y);
int g = imageIn.getIntComponent1(x, y);
int b = imageIn.getIntComponent2(x, y);
double[] hsv = MarvinColorModelConverter.rgbToHsv(new int[]{color});
if(hsv[0] >= 60 && hsv[0] <= 130 && hsv[1] >= 0.4 && hsv[2] >= 0.3){
imageOut.setIntColor(x, y, 0, 127, 127, 127);
}
else{
imageOut.setIntColor(x, y, color);
}
}
}
}
private void reduceGreen(MarvinImage image){
for(int y=0; y<image.getHeight(); y++){
for(int x=0; x<image.getWidth(); x++){
int r = image.getIntComponent0(x, y);
int g = image.getIntComponent1(x, y);
int b = image.getIntComponent2(x, y);
int color = image.getIntColor(x, y);
double[] hsv = MarvinColorModelConverter.rgbToHsv(new int[]{color});
if(hsv[0] >= 60 && hsv[0] <= 130 && hsv[1] >= 0.15 && hsv[2] > 0.15){
if((r*b) !=0 && (g*g) / (r*b) >= 1.5){
image.setIntColor(x, y, 255, (int)(r*1.4), (int)g, (int)(b*1.4));
} else{
image.setIntColor(x, y, 255, (int)(r*1.2), g, (int)(b*1.2));
}
}
}
}
}
public static void main(String[] args) {
new ChromaToTransparency();
}
}