虽然这个问题很老了,但正确答案却很难找到,所以我决定发布这个答案。你需要的是“叠加”合成,可以在维基百科上找到该算法:https://en.wikipedia.org/wiki/Alpha_compositing
虽然我不是OpenCV的专家,但经过一些实验,我发现以下方法最有效:
import cv2

background = cv2.imread("background.png", cv2.IMREAD_UNCHANGED)
foreground = cv2.imread("overlay.png", cv2.IMREAD_UNCHANGED)

# normalize alpha channels from 0-255 to 0-1
alpha_background = background[:,:,3] / 255.0
alpha_foreground = foreground[:,:,3] / 255.0

# set adjusted colors
for color in range(0, 3):
    background[:,:,color] = alpha_foreground * foreground[:,:,color] + \
        alpha_background * background[:,:,color] * (1 - alpha_foreground)

# set adjusted alpha and denormalize back to 0-255
background[:,:,3] = (1 - (1 - alpha_foreground) * (1 - alpha_background)) * 255

# display the image
cv2.imshow("Composited image", background)
cv2.waitKey(0)
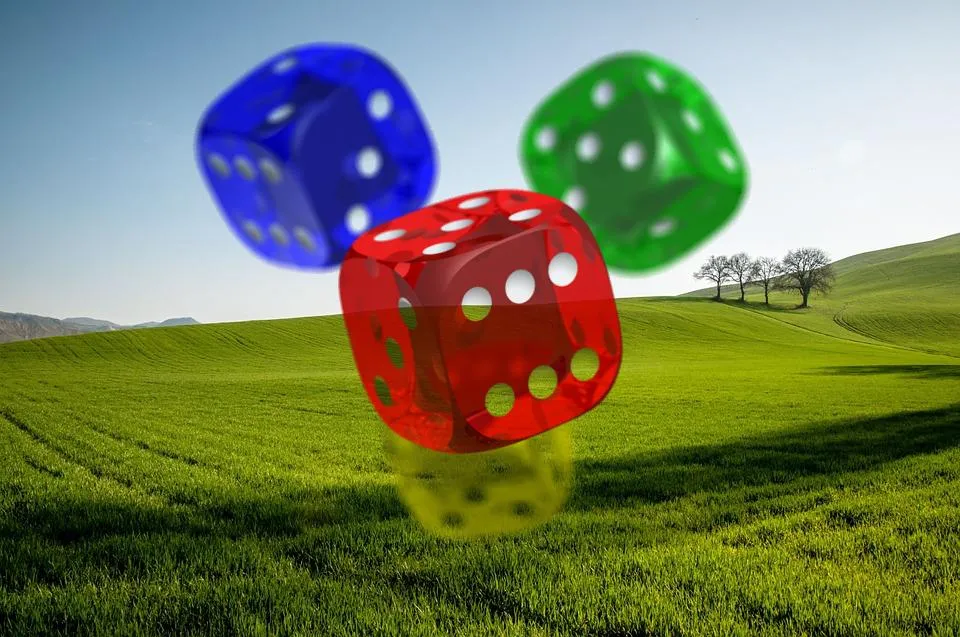
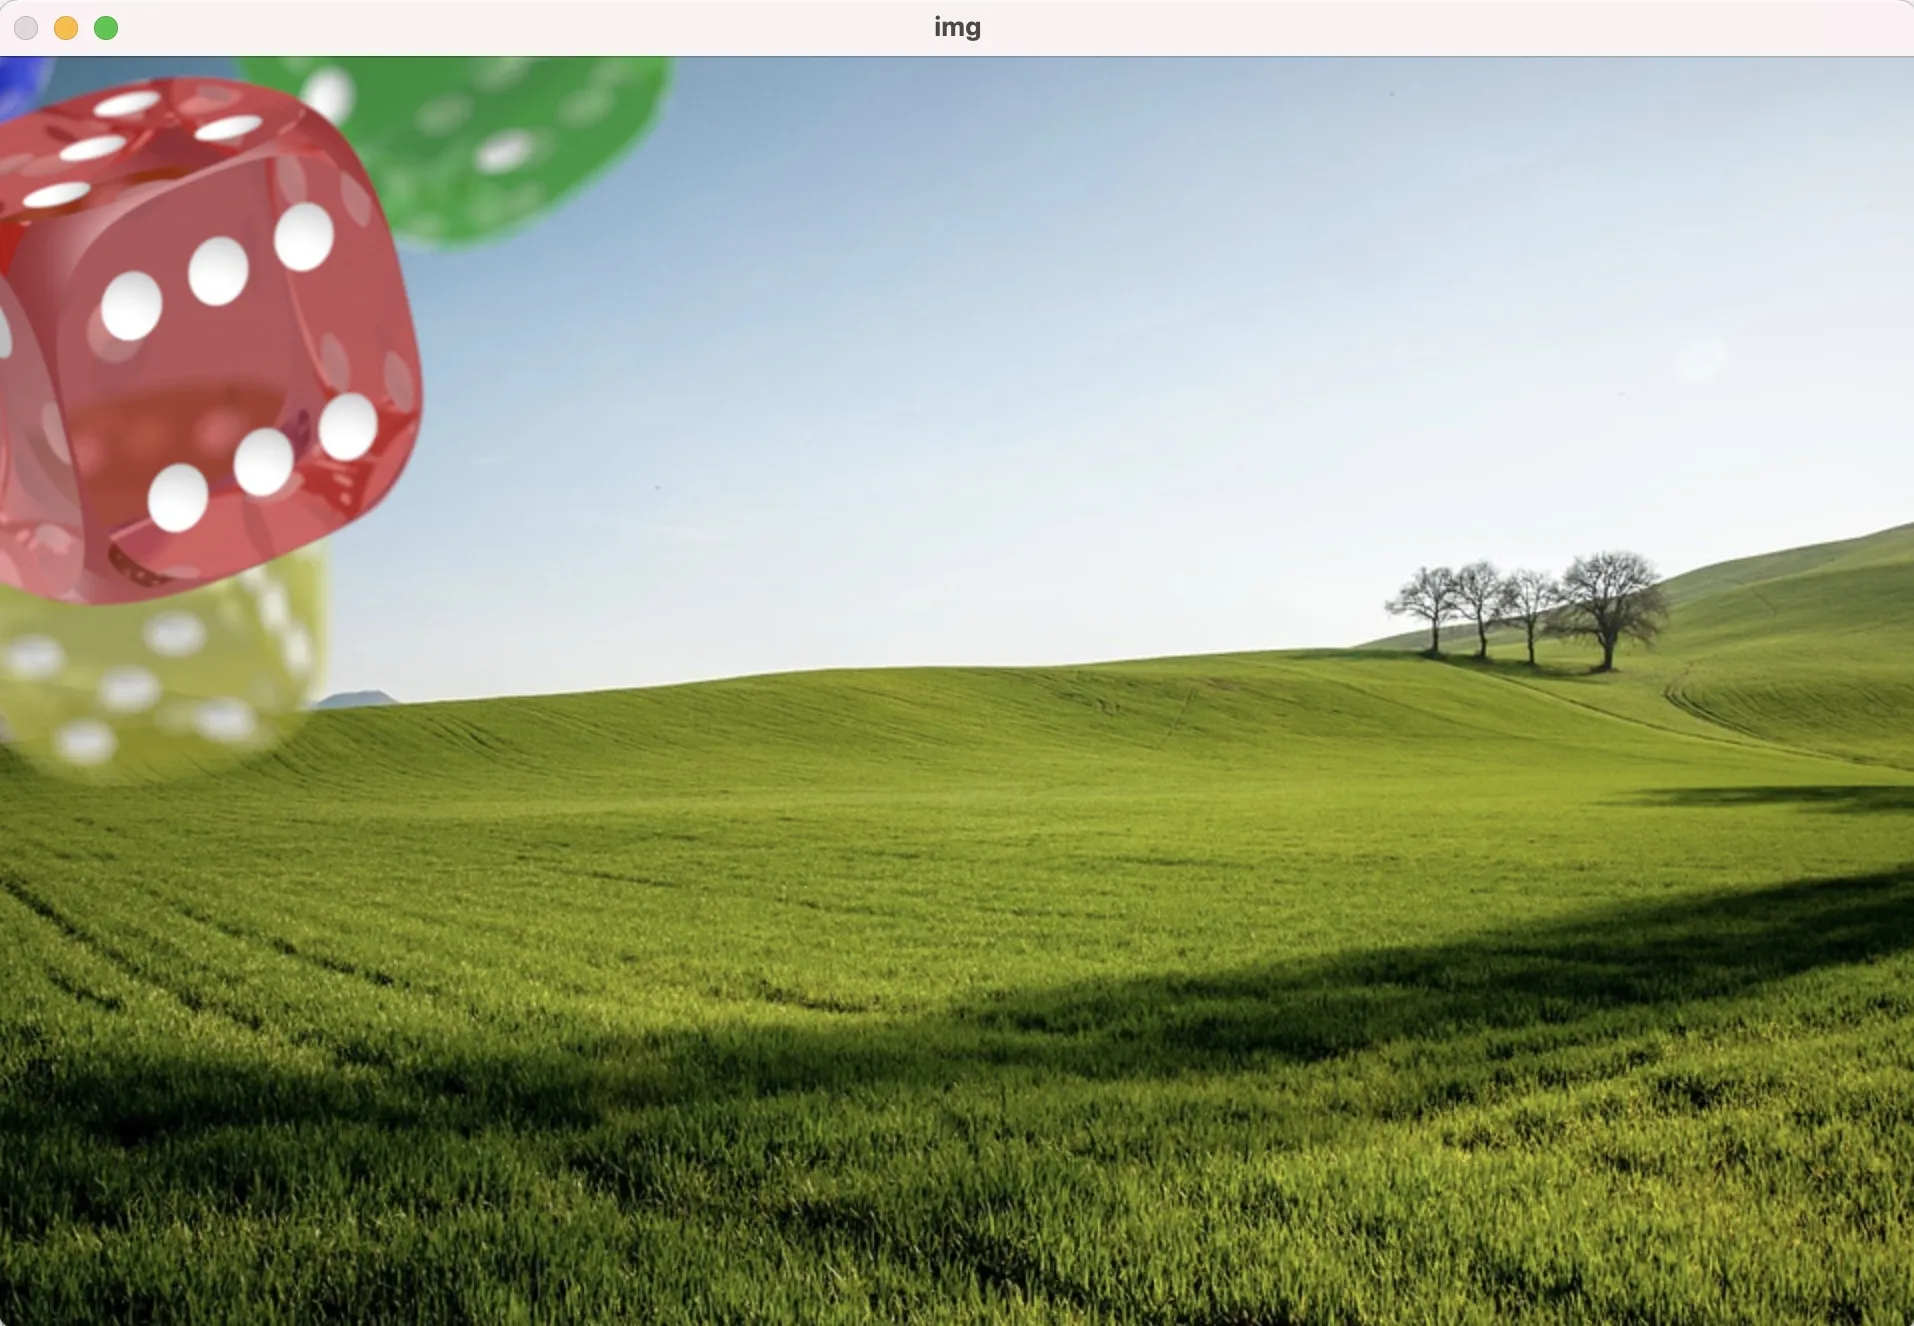
3
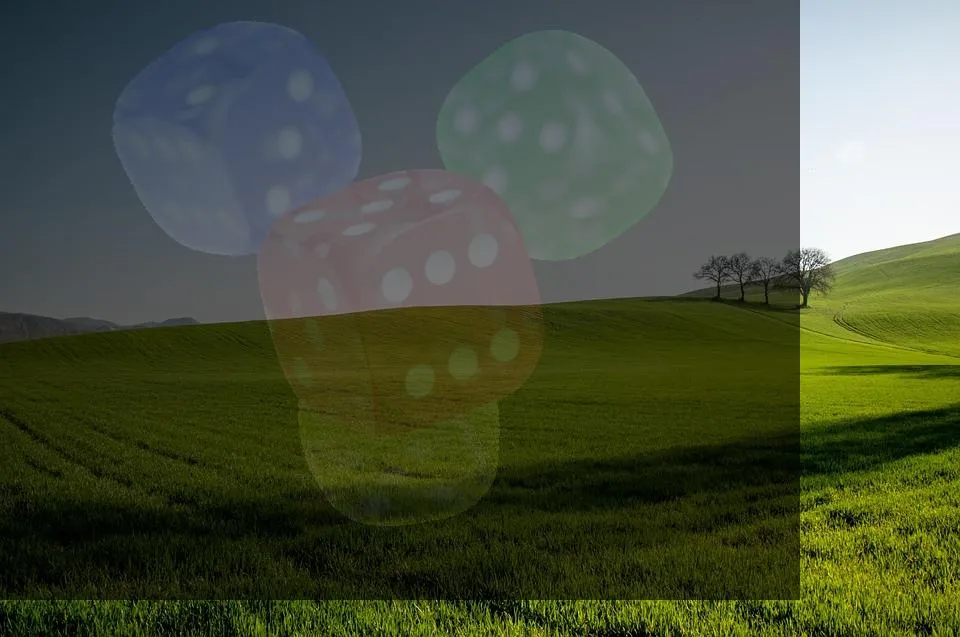
background,它的类型是float64...但值在0..255范围内,因此输出将被吹出。要么.astype(np.uint8)或除以255。 - Christoph RackwitzaddWeighted()比上面的代码快得多,但它实际上并没有做出问题所要求的操作。 - Malaimport cv2
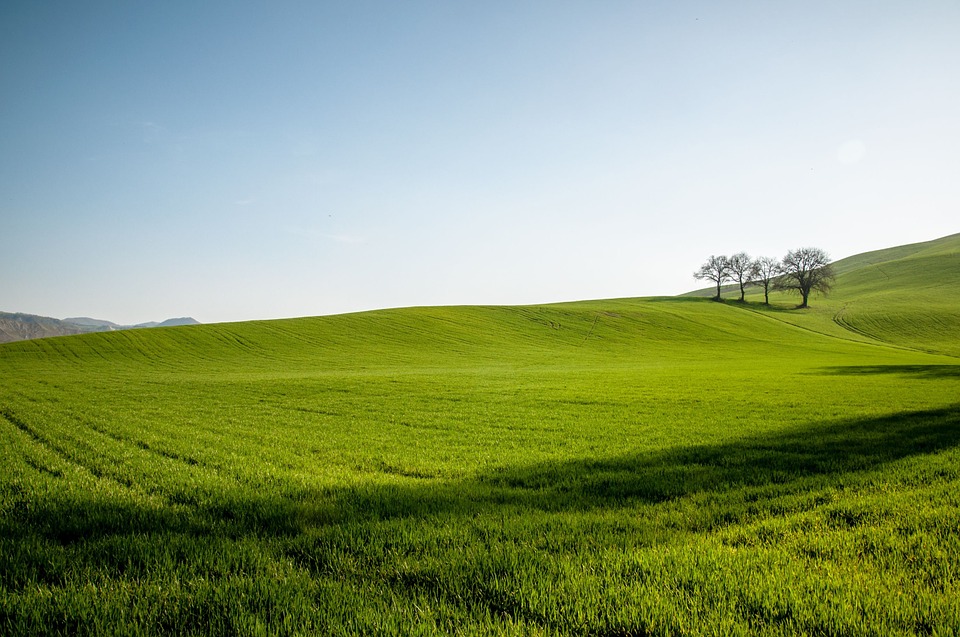
background = cv2.imread('field.jpg')
overlay = cv2.imread('dice.png')
added_image = cv2.addWeighted(background,0.4,overlay,0.1,0)
cv2.imwrite('combined.png', added_image)
4
x 和 y 来设置覆盖图像的左上角。import cv2
import numpy as np
def overlay_transparent(background, overlay, x, y):
background_width = background.shape[1]
background_height = background.shape[0]
if x >= background_width or y >= background_height:
return background
h, w = overlay.shape[0], overlay.shape[1]
if x + w > background_width:
w = background_width - x
overlay = overlay[:, :w]
if y + h > background_height:
h = background_height - y
overlay = overlay[:h]
if overlay.shape[2] < 4:
overlay = np.concatenate(
[
overlay,
np.ones((overlay.shape[0], overlay.shape[1], 1), dtype = overlay.dtype) * 255
],
axis = 2,
)
overlay_image = overlay[..., :3]
mask = overlay[..., 3:] / 255.0
background[y:y+h, x:x+w] = (1.0 - mask) * background[y:y+h, x:x+w] + mask * overlay_image
return background
如果你想保留原始的背景图片,那么这段代码会改变背景,所以请先创建一份副本。
7
ValueError: operands could not be broadcast together with shapes (790,600,1) (790,600)。 - Will Nathanoverlay_image = overlay[..., :overlay.shape[2]] 代替 overlay_image = overlay[..., :3] 以正确处理带有 Alpha 通道的图像。 - roipoussiere.astype(np.uint8)修复imshow显示的过曝图像或将其除以255(值范围为0.0到1.0)。 - Christoph Rackwitz如果性能不是问题,那么可以迭代每个叠加层的像素并将其应用于背景。这并不是很高效,但它有助于理解如何处理PNG的alpha层。
慢速版本
import cv2

background = cv2.imread('field.jpg')
overlay = cv2.imread('dice.png', cv2.IMREAD_UNCHANGED)  # IMREAD_UNCHANGED => open image with the alpha channel

height, width = overlay.shape[:2]
for y in range(height):
    for x in range(width):
        overlay_color = overlay[y, x, :3]  # first three elements are color (RGB)
        overlay_alpha = overlay[y, x, 3] / 255  # 4th element is the alpha channel, convert from 0-255 to 0.0-1.0

        # get the color from the background image
        background_color = background[y, x]

        # combine the background color and the overlay color weighted by alpha
        composite_color = background_color * (1 - overlay_alpha) + overlay_color * overlay_alpha

        # update the background image in place
        background[y, x] = composite_color

cv2.imwrite('combined.png', background)
结果:
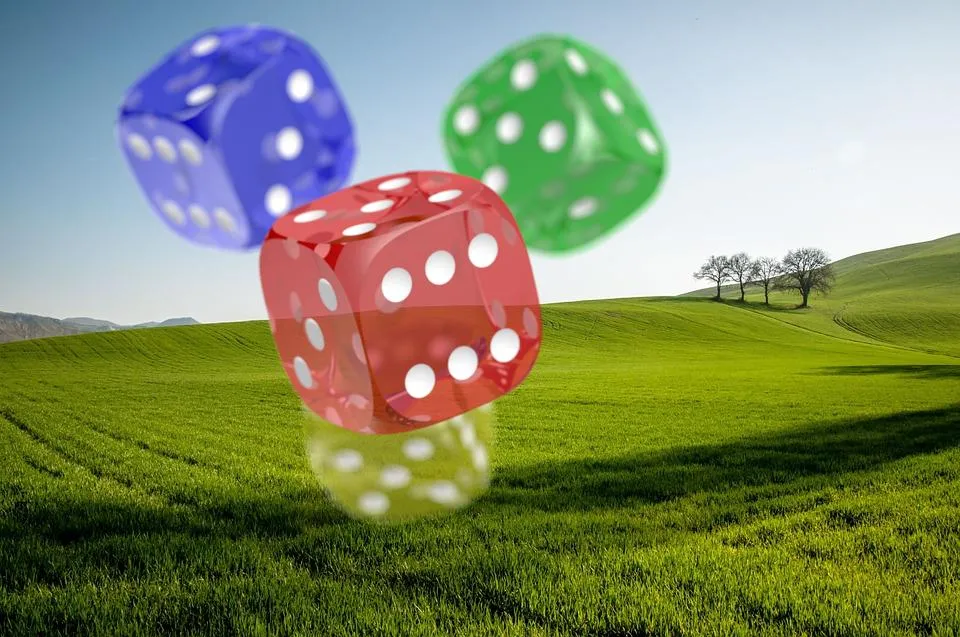
快速版本
我在尝试为实时视频流添加一个png叠加层时偶然发现了这个问题。上面的解决方案对于此目的来说太慢了。我们可以通过使用numpy的向量函数使算法显着加快。
注:这是我第一次真正涉足numpy,因此可能有比我想出的更好/更快的方法。
import cv2
import numpy as np

background = cv2.imread('field.jpg')
overlay = cv2.imread('dice.png', cv2.IMREAD_UNCHANGED)  # IMREAD_UNCHANGED => open image with the alpha channel

# separate the alpha channel from the color channels
alpha_channel = overlay[:, :, 3] / 255 # convert from 0-255 to 0.0-1.0
overlay_colors = overlay[:, :, :3]

# To take advantage of the speed of numpy and apply transformations to the entire image with a single operation
# the arrays need to be the same shape. However, the shapes currently looks like this:
#    - overlay_colors shape:(width, height, 3)  3 color values for each pixel, (red, green, blue)
#    - alpha_channel  shape:(width, height, 1)  1 single alpha value for each pixel
# We will construct an alpha_mask that has the same shape as the overlay_colors by duplicate the alpha channel
# for each color so there is a 1:1 alpha channel for each color channel
alpha_mask = np.dstack((alpha_channel, alpha_channel, alpha_channel))

# The background image is larger than the overlay so we'll take a subsection of the background that matches the
# dimensions of the overlay.
# NOTE: For simplicity, the overlay is applied to the top-left corner of the background(0,0). An x and y offset
# could be used to place the overlay at any position on the background.
h, w = overlay.shape[:2]
background_subsection = background[0:h, 0:w]

# combine the background with the overlay image weighted by alpha
composite = background_subsection * (1 - alpha_mask) + overlay_colors * alpha_mask

# overwrite the section of the background image that has been updated
background[0:h, 0:w] = composite

cv2.imwrite('combined.png', background)
有多快?在我的机器上,慢方法需要大约3秒钟,而优化方法只需要大约30毫秒。所以快了约100倍!
封装成一个函数
此函数处理不同大小的前景和背景图像,并支持负和正偏移来将覆盖层向任意方向移动到背景图像的边界。
import cv2
import numpy as np

def add_transparent_image(background, foreground, x_offset=None, y_offset=None):
    bg_h, bg_w, bg_channels = background.shape
    fg_h, fg_w, fg_channels = foreground.shape

    assert bg_channels == 3, f'background image should have exactly 3 channels (RGB). found:{bg_channels}'
    assert fg_channels == 4, f'foreground image should have exactly 4 channels (RGBA). found:{fg_channels}'

    # center by default
    if x_offset is None: x_offset = (bg_w - fg_w) // 2
    if y_offset is None: y_offset = (bg_h - fg_h) // 2

    w = min(fg_w, bg_w, fg_w + x_offset, bg_w - x_offset)
    h = min(fg_h, bg_h, fg_h + y_offset, bg_h - y_offset)

    if w < 1 or h < 1: return

    # clip foreground and background images to the overlapping regions
    bg_x = max(0, x_offset)
    bg_y = max(0, y_offset)
    fg_x = max(0, x_offset * -1)
    fg_y = max(0, y_offset * -1)
    foreground = foreground[fg_y:fg_y + h, fg_x:fg_x + w]
    background_subsection = background[bg_y:bg_y + h, bg_x:bg_x + w]

    # separate alpha and color channels from the foreground image
    foreground_colors = foreground[:, :, :3]
    alpha_channel = foreground[:, :, 3] / 255  # 0-255 => 0.0-1.0

    # construct an alpha_mask that matches the image shape
    alpha_mask = np.dstack((alpha_channel, alpha_channel, alpha_channel))

    # combine the background with the overlay image weighted by alpha
    composite = background_subsection * (1 - alpha_mask) + foreground_colors * alpha_mask

    # overwrite the section of the background image that has been updated
    background[bg_y:bg_y + h, bg_x:bg_x + w] = composite
用例示例:
background = cv2.imread('field.jpg')
overlay = cv2.imread('dice.png', cv2.IMREAD_UNCHANGED)  # IMREAD_UNCHANGED => open image with the alpha channel

x_offset = 0
y_offset = 0
print("arrow keys to move the dice. ESC to quit")
while True:
    img = background.copy()
    add_transparent_image(img, overlay, x_offset, y_offset)

    cv2.imshow("", img)
    key = cv2.waitKey()
    if key == 0: y_offset -= 10  # up
    if key == 1: y_offset += 10  # down
    if key == 2: x_offset -= 10  # left
    if key == 3: x_offset += 10  # right
    if key == 27: break  # escape
2
alpha_mask = alpha_channel[:,:,np.newaxis] - Stefan Meili虽然这个问题已经出现了一段时间,但我相信这是正确的简单答案,仍然可以帮助某些人。
background = cv2.imread('road.jpg')
overlay = cv2.imread('traffic sign.png')

rows,cols,channels = overlay.shape

overlay=cv2.addWeighted(background[250:250+rows, 0:0+cols],0.5,overlay,0.5,0)

background[250:250+rows, 0:0+cols ] = overlay
这将覆盖在背景图像上,如下所示:
忽略ROI矩形
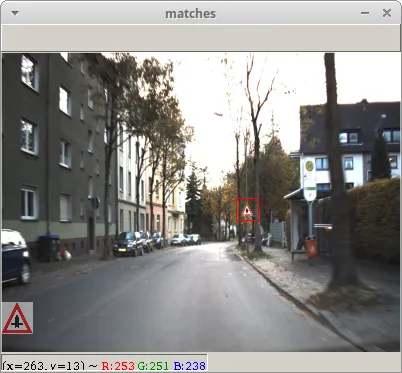
请注意,我使用了大小为400x300的背景图像和大小为32x32的覆盖图像,根据我设置的坐标,在背景图像的x [0-32]和y [250-282]部分显示,首先计算混合,然后将计算出的混合放置在我想要的图像部分。
(覆盖是从磁盘加载的,而不是从背景图像本身加载的,不幸的是,覆盖图像有自己的白色背景,因此您也可以在结果中看到它)
1
您需要使用标志IMREAD_UNCHANGED打开透明的PNG图像。
Mat overlay = cv::imread("dice.png", IMREAD_UNCHANGED);
然后将通道拆分,将RGB分组,并使用透明通道作为掩码,操作如下:
/**
 * @brief Draws a transparent image over a frame Mat.
 *
 * @param frame the frame where the transparent image will be drawn
 * @param transp the Mat image with transparency, read from a PNG image, with the IMREAD_UNCHANGED flag
 * @param xPos x position of the frame image where the image will start.
 * @param yPos y position of the frame image where the image will start.
 */
void drawTransparency(Mat frame, Mat transp, int xPos, int yPos) {
    Mat mask;
    vector<Mat> layers;

    split(transp, layers); // seperate channels
    Mat rgb[3] = { layers[0],layers[1],layers[2] };
    mask = layers[3]; // png's alpha channel used as mask
    merge(rgb, 3, transp);  // put together the RGB channels, now transp insn't transparent
    transp.copyTo(frame.rowRange(yPos, yPos + transp.rows).colRange(xPos, xPos + transp.cols), mask);
}
可以这样调用:
drawTransparency(background, overlay, 10, 10);
4
import cv2
import numpy as np
def logoOverlay(image,logo,alpha=1.0,x=0, y=0, scale=1.0):
(h, w) = image.shape[:2]
image = np.dstack([image, np.ones((h, w), dtype="uint8") * 255])
overlay = cv2.resize(logo, None,fx=scale,fy=scale)
(wH, wW) = overlay.shape[:2]
output = image.copy()
# blend the two images together using transparent overlays
try:
if x<0 : x = w+x
if y<0 : y = h+y
if x+wW > w: wW = w-x
if y+wH > h: wH = h-y
print(x,y,wW,wH)
overlay=cv2.addWeighted(output[y:y+wH, x:x+wW],alpha,overlay[:wH,:wW],1.0,0)
output[y:y+wH, x:x+wW ] = overlay
except Exception as e:
print("Error: Logo position is overshooting image!")
print(e)
output= output[:,:,:3]
return output
使用方法:
background = cv2.imread('image.jpeg')
overlay = cv2.imread('logo.png', cv2.IMREAD_UNCHANGED)
print(overlay.shape) # must be (x,y,4)
print(background.shape) # must be (x,y,3)
# downscale logo by half and position on bottom right reference
out = logoOverlay(background,overlay,scale=0.5,y=-100,x=-100)
cv2.imshow("test",out)
cv2.waitKey(0)
1
import cv2
import numpy as np

background = cv2.imread('background.jpg')
overlay = cv2.imread('cloudy.png')
overlay = cv2.resize(overlay, (200,200))
# overlay = for_transparent_removal(overlay)
h, w = overlay.shape[:2]
shapes = np.zeros_like(background, np.uint8)
shapes[0:h, 0:w] = overlay
alpha = 0.8
mask = shapes.astype(bool)

# option first
background[mask] = cv2.addWeighted(shapes, alpha, shapes, 1 - alpha, 0)[mask]
cv2.imwrite('combined.png', background)
# option second
background[mask] = cv2.addWeighted(background, alpha, overlay, 1 - alpha, 0)[mask]
# NOTE : above both option will give you image overlays but effect would be changed
cv2.imwrite('combined.1.png', background)
5
background[mask] = cv2.addWeighted(background, 1 - alpha, overlay, alpha, 0)[mask] ... 这样的行为方式符合大多数人的预期:Alpha 是您希望 OVERLAY 形状可见的程度。因此,0.8 表示 OVERLAY 可见度为 80%。等等。 :) 如果您愿意,可以将此编辑到您的答案中。 :) - Mitch McMabers这里是另一种非常简单的方法,我们可以在背景图像上方添加一个透明的覆盖图像:
import numpy as np
import cv2
fsize = 600
img = cv2.imread('football_stadium.png')
overlay_t = cv2.imread('football_3.png',-1) # -1 loads with transparency
overlay_t = cv2.resize(overlay_t, (fsize, fsize))

def overlay_transparent(background_img, img_to_overlay_t, x, y, overlay_size=None):
    """
    @brief      Overlays a transparant PNG onto another image using CV2

    @param      background_img    The background image
    @param      img_to_overlay_t  The transparent image to overlay (has alpha channel)
    @param      x                 x location to place the top-left corner of our overlay
    @param      y                 y location to place the top-left corner of our overlay
    @param      overlay_size      The size to scale our overlay to (tuple), no scaling if None

    @return     Background image with overlay on top
    """

    bg_img = background_img.copy()

    if overlay_size is not None:
        img_to_overlay_t = cv2.resize(img_to_overlay_t.copy(), overlay_size)

    # Extract the alpha mask of the RGBA image, convert to RGB
    b,g,r,a = cv2.split(img_to_overlay_t)
    overlay_color = cv2.merge((b,g,r))

    # Apply some simple filtering to remove edge noise
    mask = cv2.medianBlur(a,5)

    h, w, _ = overlay_color.shape
    roi = bg_img[y:y+h, x:x+w]

    # Black-out the area behind the logo in our original ROI
    img1_bg = cv2.bitwise_and(roi.copy(),roi.copy(),mask = cv2.bitwise_not(mask))

    # Mask out the logo from the logo image.
    img2_fg = cv2.bitwise_and(overlay_color,overlay_color,mask = mask)

    # Update the original image with our new ROI
    bg_img[y:y+h, x:x+w] = cv2.add(img1_bg, img2_fg)

    return bg_img

game_window = "game_window"
cv2.namedWindow(game_window, cv2.WINDOW_NORMAL)
cv2.resizeWindow(game_window, 800, 600)
start_x = 2700
start_y = 3600
cv2.imshow(game_window, overlay_transparent(img, overlay_t, start_x, start_y, (fsize,fsize)))
cv2.waitKey(0)
**使用此函数将覆盖层放置在任何背景图像上。
如果要调整覆盖层大小,请使用此overlay = cv2.resize(overlay, (200,200)),然后将调整大小的覆盖层传递到函数中。
**
import cv2
import numpy as np


def image_overlay_second_method(img1, img2, location, min_thresh=0, is_transparent=False):
    h, w = img1.shape[:2]
    h1, w1 = img2.shape[:2]
    x, y = location
    roi = img1[y:y + h1, x:x + w1]

    gray = cv2.cvtColor(img2, cv2.COLOR_BGR2GRAY)
    _, mask = cv2.threshold(gray, min_thresh, 255, cv2.THRESH_BINARY)
    mask_inv = cv2.bitwise_not(mask)

    img_bg = cv2.bitwise_and(roi, roi, mask=mask_inv)
    img_fg = cv2.bitwise_and(img2, img2, mask=mask)
    dst = cv2.add(img_bg, img_fg)
    if is_transparent:
        dst = cv2.addWeighted(img1[y:y + h1, x:x + w1], 0.1, dst, 0.9, None)
    img1[y:y + h1, x:x + w1] = dst
    return img1

if __name__ == '__main__':
    background = cv2.imread('background.jpg')
    overlay = cv2.imread('overlay.png')
    output = image_overlay_third_method(background, overlay, location=(800,50), min_thresh=0, is_transparent=True)
    cv2.imwrite('output.png', output)
background.jpg
output.png

3
原文链接
result = background + overlay。 - MK Yung